Hey there, fellow garden enthusiasts! It’s so good to be sharing my little slice of green heaven with you today. I’m excited to dive into propagating a plant that’s really captured my heart recently: Corchorus walcottii.
Why You’ll Love Propagating Corchorus Walcottii
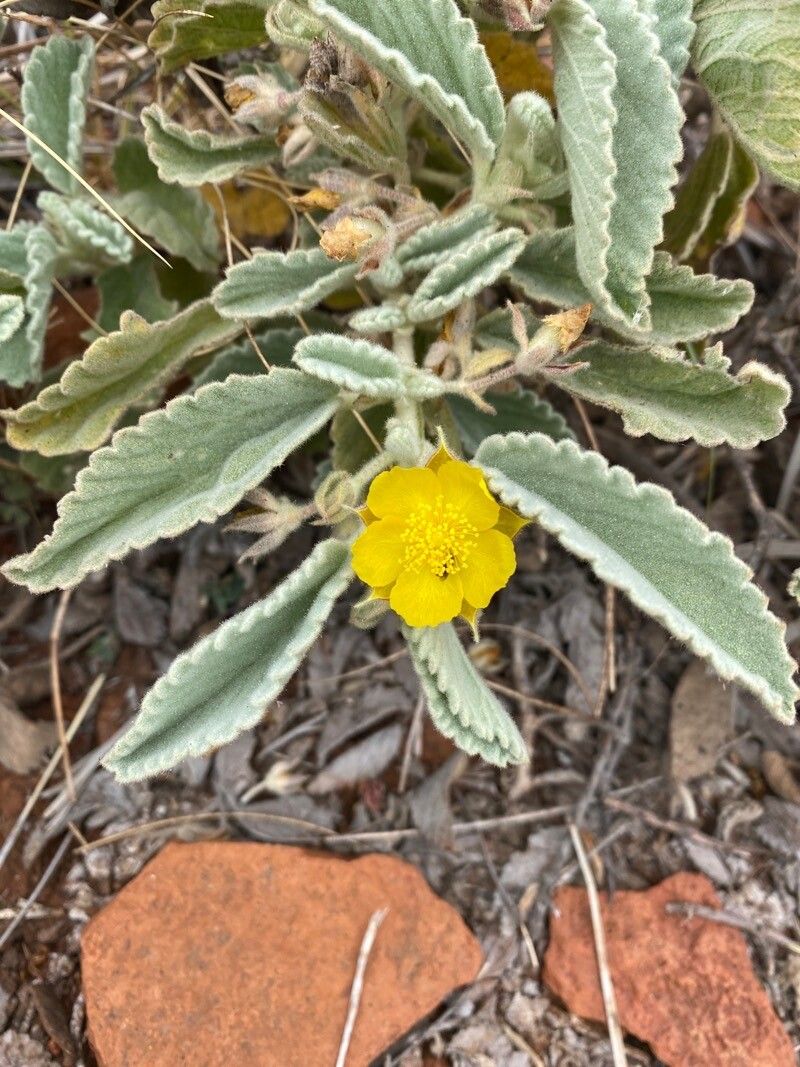
If you’re looking for a plant that brings a touch of the unexpected to your garden, Corchorus walcottii is it. Its delicate, almost fern-like foliage and charming little flowers are simply delightful. The real joy, though, comes from nurturing it from a tiny sliver into a thriving specimen. Propagating your own plants feels like wielding a bit of quiet magic, and believe me, it’s a wonderfully rewarding journey. For those wondering, Corchorus walcottii is fairly straightforward to propagate, making it a fantastic choice for beginners eager to expand their plant family.
When to Get Your Hands Dirty
The very best time to set your propagation efforts in motion is during the late spring to early summer. This is when the plant is in its most vigorous growth phase, meaning it has plenty of energy to put into developing new roots. Aim for when the plant is actively producing new stems and leaves – you’ll see that vibrant, fresh green popping out.
Your Propagation Toolkit
Gathering your supplies beforehand makes the whole process smoother. Here’s what you’ll want to have on hand:
- Sharp Pruning Shears or a Knife: Clean cuts are crucial for healthy rooting.
- Rooting Hormone Powder (Optional but Recommended): This little helper can significantly boost your success rate.
- Well-Draining Potting Mix: A good blend of peat moss, perlite, and coarse sand works wonders. You can also buy a ready-made propagation mix.
- Small Pots or Seed Trays: Clean ones, of course!
- Clear Plastic Bag or Dome: This creates a mini-greenhouse effect.
- Watering Can or Spray Bottle: For gentle watering.
- Labels: To keep track of your precious new arrivals!
Bringing New Life: Propagation Methods
I’ve found two methods work exceptionally well for Corchorus walcottii.
Method 1: Stem Cuttings (My Favorite!)
This is the most reliable way to get new plants.
- Select a Healthy Stem: Look for a semi-hardwood stem from your established plant. This means it’s not brand new and soft, nor is it old and woody. About 4-6 inches long is ideal.
- Make the Cut: Using your clean shears, take a cutting just below a leaf node. This is the spot where leaves emerge from the stem, and it’s rich in growth hormones.
- Prepare the Cutting: Gently remove the lower leaves, leaving just two or three at the top. This reduces water loss. If the remaining leaves are quite large, you can even cut them in half horizontally to minimize transpiration.
- Apply Rooting Hormone (If Using): Dip the cut end into your rooting hormone powder, tapping off any excess.
- Plant Your Cutting: Moisten your potting mix, then gently insert the cutting about 1-2 inches deep. You can make a small pilot hole with a pencil to avoid rubbing off the hormone.
- Create a Humid Environment: Water the mix gently and cover the pot with a clear plastic bag or a propagator lid. Make sure the leaves aren’t touching the plastic. You can prop up the bag with a few small sticks if needed.
- Find a Cozy Spot: Place the pot in a bright location but out of direct sunlight. Warmth is beneficial, so a spot near a radiator (not on it, though!) or on a heating mat can be excellent.
Method 2: Water Propagation (Simple and Visual)
While I lean towards soil, this is a fun way to watch the roots develop.
- Take Your Cutting: Follow steps 1-3 from the stem cutting method.
- Place in Water: Plunge the cut end of your cutting into a clean jar or glass of fresh water.
- The Crucial Detail: Ensure no leaves are submerged in the water. Any foliage below the water line will rot and contaminate the water, harming your cutting.
- Change the Water Regularly: Every few days, refresh the water to keep it clean and oxygenated.
- Location, Location, Location: Similar to soil cuttings, place your water propagation jar in bright, indirect light.
The “Secret Sauce”: My Insider Tips
After years of coaxing life from cuttings, I’ve picked up a few tricks.
- Stealthy Sterilization: Always, always sterilize your tools before making any cuts. A quick wipe with rubbing alcohol can prevent nasty diseases from spreading to your precious cuttings.
- The Power of the “Heel”: Sometimes, taking a cutting from a branch that has a tiny bit of older wood attached (a “heel”) can encourage faster rooting. It’s not strictly necessary for Corchorus walcottii, but it’s a good principle to remember for other plants.
- Bottom Heat is Your Friend: If you have the space and inclination, using a propagator with a heating element can dramatically speed up root development. It mimics spring soil temperatures and gives your cuttings that extra little nudge.
Aftercare and When Things Go Wrong
Once you see those beautiful white roots emerging (usually after a few weeks for stem cuttings, or a bit longer), it’s time to transition them.
- For Water Cuttings: When the roots are about an inch long, carefully transplant them into your well-draining potting mix. Treat them gently as if they were brand new seedlings.
- For Soil Cuttings: Once you feel a slight resistance when gently tugging on the cutting, that’s a good sign they’ve rooted. You can also look for new leaf growth.
Common Pitfalls: The biggest enemy is usually overwatering, which leads to rot. You’ll notice a mushy, black stem base, and the cutting will likely wilt and die. Keep the soil consistently moist but not waterlogged. If your cuttings shrivel and curl up, it might be a sign of too much direct sun or not enough humidity. Don’t be discouraged if a few don’t make it; it’s all part of the learning curve.
Go Forth and Grow!
Propagating Corchorus walcottii is such a personal and satisfying experience. Be patient with yourself and your little leafy charges. Watch them closely, offer them the right conditions, and before you know it, you’ll have a whole new generation of these lovely plants to enjoy. Happy gardening!
Resource:
https://identify.plantnet.org/k-world-flora/species/Corchorus%20walcottii%20F.Muell./data