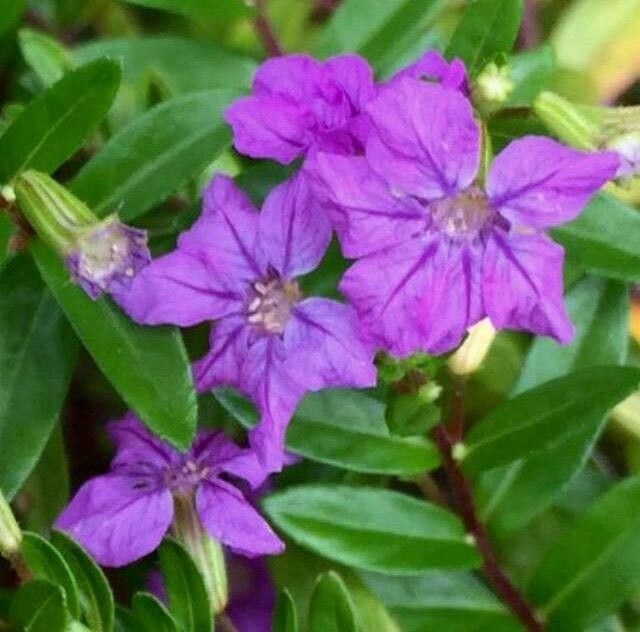
Hey there, fellow garden lovers! You know, sometimes the most unassuming plants turn out to be absolute superstars in the garden. That’s definitely true for Cuphea hyssopifolia, or False Heather as it’s often called. It’s just a delight with its delicate, lavender (or sometimes pink or white!) blooms and fine, green foliage. It spills over edges beautifully and attracts pollinators like a magnet. And the best part? Propagating it is wonderfully rewarding, and I’d say it’s quite beginner-friendly. You’ll be amazed at how easily you can fill your garden or pots with more of these charming little plants.
The Best Time to Start
For the absolute best success, I always reach for my pruners in late spring or early summer. This is when the plant is actively growing, and the stems are firm but not yet woody. You want to take cuttings from healthy, vigorous growth. Think of it as harvesting the prime bits of the plant, full of life and ready to put down roots.
Supplies You’ll Need
Before we get our hands dirty, let’s make sure we have everything at the ready. It makes the whole process so much smoother!
- Sharp, clean pruning shears or scissors: A clean cut is crucial to prevent disease.
- A well-draining potting mix: I like a blend of peat moss, perlite, and a little compost. You can also buy specialized seed-starting mix.
- Small pots or trays: Yogurt cups with drainage holes poked in the bottom work in a pinch!
- Rooting hormone (optional but recommended): This really gives your little cuttings a boost.
- Plastic bags or a clear propagation dome: To create a humid environment.
- A watering can with a fine rose or a mister: Gentle watering is key.
Propagation Methods
There are a couple of ways to get more Cuphea hyssopifolia, but my go-to is stem cuttings because they’re so reliable.
Stem Cuttings:
- Select your cutting: Look for healthy, non-flowering stems. Gently bend a stem; if it snaps cleanly, it’s a good candidate.
- Make the cut: Using your clean pruners, cut a stem about 4-6 inches long. Make the cut just below a node (the little bumpy part where leaves grow).
- Prepare the cutting: Carefully remove the lower leaves. You want to keep at least two sets of leaves at the top. If the remaining leaves are very large, I’ll trim them in half to reduce water loss.
- Apply rooting hormone (if using): Dip the cut end into the rooting hormone, tapping off any excess.
- Plant your cuttings: Fill your small pots with your prepared potting mix. Make a small hole in the center with your finger or a pencil. Gently insert the cutting, ensuring the nodes where you removed leaves are buried.
- Water gently: Water well to settle the soil around the cutting.
- Create humidity: Pop a plastic bag over the pot or cover it with a propagation dome. A rubber band can help seal the bag around the pot. Make sure the leaves don’t touch the plastic if possible.
- Place in bright, indirect light: Find a warm spot that gets plenty of light but no direct, scorching sun.
Water Propagation (for a quick peek):
If you’re feeling impatient and just want to see some roots form, you can try water propagation.
- Follow steps 1-3 for stem cuttings.
- Place the cuttings in a jar or glass of clean water.
- Crucially, ensure no leaves are submerged in the water. This is a common mistake that leads to rot.
- Place in bright, indirect light and change the water every few days to keep it fresh.
- You should start seeing tiny roots emerge within a few weeks. Once the roots are about an inch long, carefully transplant them into pots with soil, treating them like your stem cuttings.
The “Secret Sauce” (Pro Tips)
After years of doing this, I’ve learned a few tricks that really make a difference:
- Bottom Heat is Your Friend: If you have a seedling heat mat, using it under your pots will significantly speed up rooting. It mimics the warmth of spring soil perfectly. Don’t overdo it, though; just a gentle warmth is ideal.
- Don’t Disturb Too Soon: Resist the urge to tug on your cuttings to check for roots! It’s much better to wait until you see signs of new growth at the top. This usually means roots are forming below.
- The “Gentle Wiggle” Test: Once you think they might be rooted (after several weeks), give a cutting the slightest gentle wiggle. If there’s resistance, you’ve got roots!
Aftercare & Troubleshooting
Once your cuttings have developed a good root system (you’ll see roots poking out of the drainage holes, or new growth above), it’s time for a little more focused care.
- Acclimatize them: Gradually remove the plastic bag or dome over a few days to let them adjust to normal humidity.
- Water them consistently: Keep the soil evenly moist but not soggy. Overwatering is the quickest way to invite trouble.
- Fertilize lightly: Once you see active new growth, you can start feeding them with a diluted liquid fertilizer every few weeks.
What if things go wrong? The most common issue is rot, which usually thanks to too much moisture and not enough air circulation. If a cutting turns black and mushy, it’s best to pull it out and discard it. Sometimes, cuttings just don’t take, and that’s okay too! Don’t get discouraged; try again with fresh material.
So there you have it! Propagating Cuphea hyssopifolia is a wonderfully accessible way to expand your collection or share these lovely plants with friends. Be patient with your little ones, enjoy the process, and soon you’ll have a whole new generation of False Heather to admire. Happy gardening!
Resource:
https://identify.plantnet.org/k-world-flora/species/Cuphea%20hyssopifolia%20Kunth/data