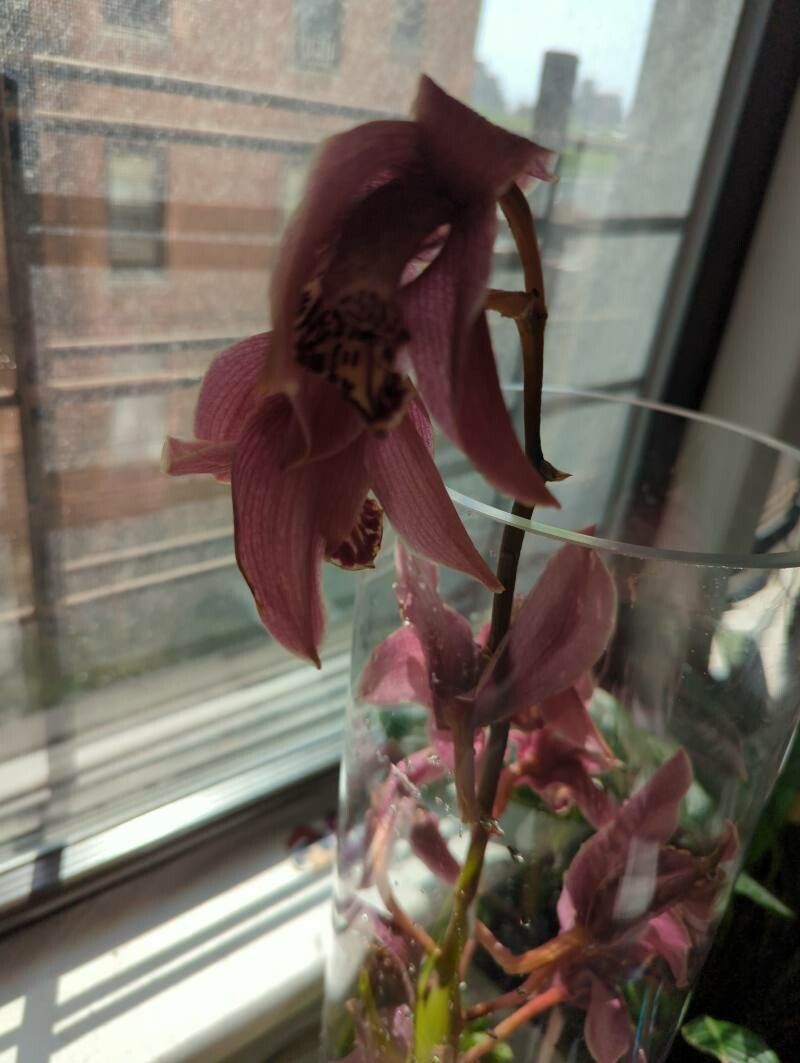
Oh, Gongora claviodora! If you’ve ever marveled at its wonderfully strange, pendulous blooms, you know why it’s such a treasure. These orchids are like botanical jewels, each one a unique masterpiece. And the joy of coaxing a brand new Gongora to life from a piece of your own beloved plant? Pure gardening magic!
Now, I won’t lie to you. Gongora can be a bit of a diva sometimes, and propagating them isn’t quite like sticking a basil cutting in a jar. It requires a touch of patience and a keen eye. For absolute beginners, this might be a delightful challenge to grow into. But if you have a little experience with other orchids or fussy plants, you’ll find it incredibly rewarding.
The Best Time to Start
For Gongora claviodora, the golden window for propagation is really when the plant is in its active growing phase. Think spring and early summer, after the plant has finished its major blooming cycle and is pushing out new pseudobulbs or leaves. This is when it has the most energy reserves to dedicate to rooting. Trying to propagate when it’s dormant or stressed is just setting yourself up for disappointment.
Supplies You’ll Need
Here’s what you’ll want to have on hand before you get started:
- Sharp, sterile pruning shears or a clean knife: You want clean cuts to prevent disease. I always give mine a quick wipe with rubbing alcohol.
- Orchid-specific potting mix: For Gongoras, a mix that drains exceptionally well is key. Look for something with bark, perlite, and perhaps a bit of charcoal or sphagnum moss.
- New propagation pots or suitable containers: Small, clean pots with good drainage are perfect.
- Rooting hormone (optional but recommended): A powder or gel can give your cuttings a helpful boost.
- Clear plastic bags or propagation domes: To maintain humidity around your cuttings.
- Long-fiber sphagnum moss (optional): Great for retaining moisture.
- A spray bottle: For misting.
Propagation Methods: The Gentle Art of Division
For Gongoras, the most reliable and common method of propagation is division. These orchids grow in clumps, and you can carefully separate these clumps to create new plants.
- Prepare Your Mother Plant: Gently remove your Gongora from its pot. If it’s heavily overgrown, you might need to have a bit of a wrestle. The goal is to get a good look at the root ball and the pseudobulbs.
- Inspect and Plan Your Divisions: Look for natural divisions where a pseudobulb has at least two or three healthy pseudobulbs attached to its base, and ideally, some decent roots. You don’t want to pull a single lonely pseudobulb that has no roots to start with – that’s a recipe for heartbreak.
- Make the Cut (Carefully!): Using your sterile shears or knife, gently separate the rhizome connecting the division you want to take from the main plant. Be as gentle as you can with the roots. It’s okay if you lose a few, but try to preserve as many as possible.
- Trim and Dry: Once you have your division, inspect the roots again. Trim away any dead or mushy roots. If you’ve had to make a larger cut into the rhizome, you can let the cut surface air dry for a day or two in a well-ventilated spot. This helps callous over the wound and prevent rot. Some growers skip this, but I find it gives me peace of mind.
- Apply Rooting Hormone (Optional): If you’re using rooting hormone, lightly dust the cut end of the rhizome and any compromised roots.
- Potting Up Your New Plant: Place your division into a clean pot, using your well-draining orchid mix. Anchor the base of the pseudobulbs firmly so they don’t wobble around. You want the new growth to be able to point upwards, not buried too deeply.
The “Secret Sauce” (Pro Tips)
- Humidity is Your Friend, Not a Swamp: After potting, you want to create a humid microclimate for your new division. I like to place the pot inside a clear plastic bag, leaving it slightly open or using a propagation dome. Mist the potting medium and the leaves lightly every few days, but never let water sit stagnant on the leaves or in the crown of the pseudobulb. This is a fast track to rot.
- Patience and a Warm Foot: Gongoras are not the fastest rooters. They need time. Crucially, they appreciate a bit of gentle bottom heat. If you have an orchid heating mat, place your pots on it. Otherwise, a warm windowsill (but not direct scorching sun!) can help. This warmth encourages root development.
- Observe, Don’t Overwater: When you think about watering, feel the potting medium. It should be starting to feel dry. If it’s still cool and damp, wait. Overwatering is the number one killer of new orchid divisions.
Aftercare & Troubleshooting
Once your new Gongora has been potted, keep it in a spot with bright, indirect light. Avoid direct sun, which can scorch its leaves. Continue to monitor the humidity. You’ll know your new plant is happy when you see new root growth emerging from the base of the pseudobulbs. This can take several weeks, or even a few months.
The most common sign of failure is rot. If you see pseudobulbs turning mushy and black, or if the entire division shrivels and dies, it’s usually a sign of too much moisture and not enough ventilation. If you catch it early, you might be able to salvage it by trimming away the rotten bits and repotting in fresh, dry mix, but often it’s too late. Another sign of stress is shriveling pseudobulbs. This can be due to dehydration, but also root damage. Again, observe carefully.
A Gentle Encouragement
Growing Gongora claviodora from divisions is a journey. It’s a chance to understand your plant on a deeper level and to share its beauty. Be patient, keep your eye on those crucial details like moisture and ventilation, and don’t be discouraged if your first attempt isn’t a roaring success. Every gardener has lost a plant or two. Just keep trying, keep learning, and enjoy the process. Happy growing!
Resource:
https://identify.plantnet.org/k-world-flora/species/Gongora%20claviodora%20Dressler/data