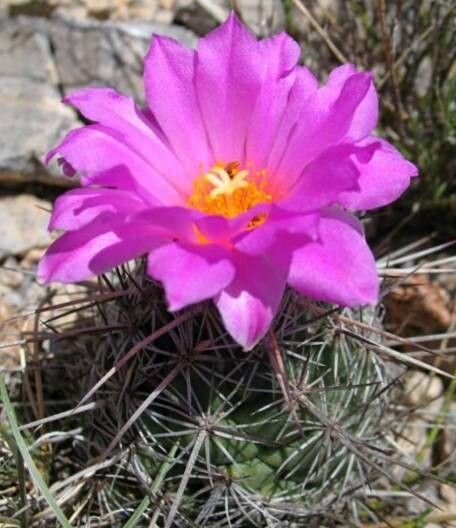
Hello there, fellow plant lovers! I’m so excited to chat with you today about one of my absolute favorite cacti: Cochemiea conoidea. If you’ve ever seen this beauty gracing a windowsill or garden, you’ll know why I’m smitten. Its charming, often clustered growth and those gorgeous, bright red flowers are simply captivating. And the best part? Propagating it is a wonderfully rewarding adventure, opening the door to sharing its beauty with friends (or just filling up your own space!). For those just starting out, I’d say Cochemiea conoidea is moderately easy to propagate. It might take a little patience, but the payoff is absolutely worth it.
The Best Time to Start
When it comes to getting new Cochemiea conoidea plants going, spring and early summer are your golden ticket. This is when the plant is actively growing, and cuttings or divisions will have the best chance to establish themselves before cooler weather arrives. You’re essentially catching it at its most vigorous, ready to put out new roots.
Supplies You’ll Need
To get your propagation station set up, you’ll want a few things handy. Don’t worry, it’s not an overwhelming list!
- Sharp Pruning Shears or a Clean Knife: For making those precise cuts. Sterilize them with rubbing alcohol to prevent any yucky bacteria from spreading.
- Well-draining Cactus/Succulent Potting Mix: You can buy this ready-made or create your own by mixing equal parts coarse sand, perlite, and a good quality potting soil.
- Small Pots or Seedling Trays: Whatever you have on hand that will hold your new little cacti. Make sure they have drainage holes!
- Rooting Hormone (Optional but Recommended): This can give your cuttings a nice little boost. Look for one specifically for cacti and succulents.
- Perlite or Coarse Sand: For adding extra drainage to your soil mix if needed.
- Gloves: Cacti spines can be a bit feisty!
Propagation Methods
Cochemiea conoidea is quite amenable to propagation, and I usually find the following methods to be most successful:
Division
This is probably the most straightforward way to propagate Cochemiea conoidea, especially if your plant is already a clumper.
- Gently Remove from Pot: Carefully take your mature Cochemiea conoidea out of its current pot. You might need to loosen the soil around the edges with a trowel or knife.
- Inspect the Roots: Once out, gently brush away excess soil to see where the offsets (baby plants) are attached. You’re looking for sections that have their own root system.
- Separate Gently: Use your hands or a clean, sharp knife to gently separate the offsets from the mother plant. Try to keep as many roots attached to the offset as possible.
- Allow to Callus: Place the divided offsets in a dry, airy spot for a few days to a week. This allows any cut surfaces to dry and form a protective callus. This is super important to prevent rot!
- Potting Up: Once callused, pot each offset in its own small pot filled with your well-draining cactus mix. Don’t water immediately. Wait a week or so to give any tiny wounds time to heal.
Stem Cuttings (Offsets)
This method is perfect if your Cochemiea conoidea is producing offshoots at its base.
- Identify Healthy Offsets: Look for plump, healthy-looking offsets that are at least an inch or two in size.
- Make a Clean Cut: Using your sterilized shears or knife, carefully cut the offset away from the main plant, just above where it attaches.
- Allow to Callus: Just like with division, the crucial step here is to let the cut end dry and callus over. This can take anywhere from a week to two weeks, depending on humidity. Place it on a paper towel in a bright, dry spot. No direct sun!
- Planting: Once callused, you can plant the offset into a small pot filled with your cactus mix. You can stick the callused end about half an inch to an inch deep into the soil. Again, do not water immediately. Wait about 7-10 days.
The “Secret Sauce”
Here are a couple of little tricks I’ve learned over the years that really help new propagations thrive:
- Airflow is Key: When your cuttings or divisions are callusing, make sure they have plenty of air circulation. I often place mine on a tray on my porch, where a gentle breeze can help them dry out. This dramatically reduces the risk of rot.
- Don’t Overwater – Ever! This is the cardinal sin of cactus propagation. When you do finally water after planting, do it sparingly. It’s much better to err on the side of too dry than too wet. A good soak then letting it dry out completely is the way to go.
Aftercare & Troubleshooting
Once your Cochemiea conoidea has started to show signs of life – maybe a little pup forming or the potting mix starting to hold moisture a bit better – you’re on the right track! Continue to keep them in a bright location (indirect sunlight is best for new cuttings) and water only when the soil is completely dry.
The most common issue you’ll face is rot. This usually happens from overwatering or not letting cuttings callus properly. If you see a cutting turn mushy, brown, or black, it’s likely rotten. Sadly, there’s usually no coming back from that. A healthy cutting, however, will feel firm and might even sprout roots that you can feel when gently tugging.
A Warm Encouragement
Propagating plants is a journey, and Cochemiea conoidea is a wonderful friend to experiment with. Be patient with your new little cacti, give them the right conditions, and enjoy the process of watching them grow. Before you know it, you’ll have a whole collection to admire! Happy gardening!
Resource: