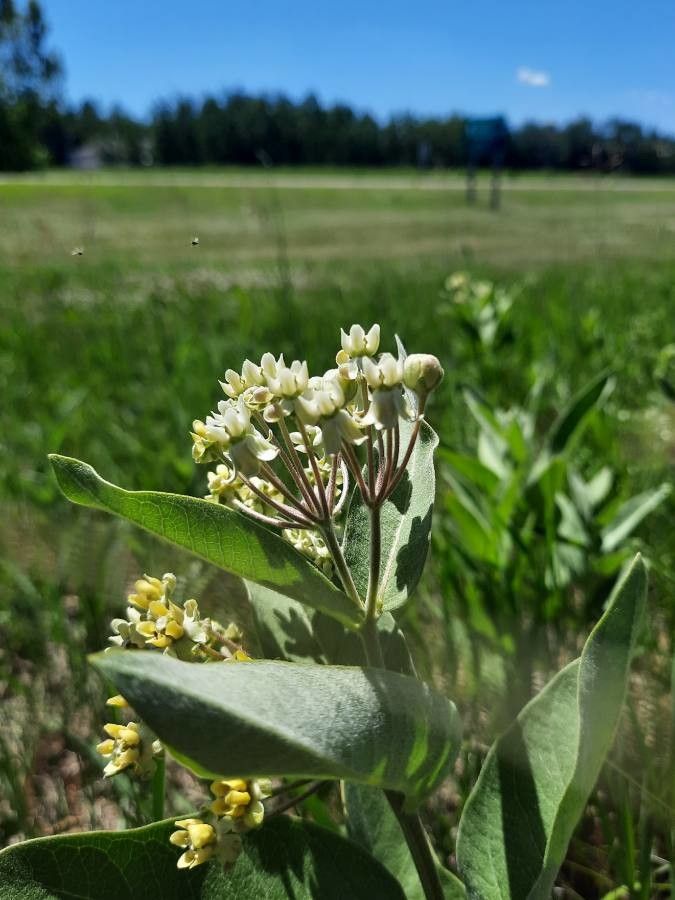
Hello, fellow garden lovers! I’m so happy you’re here today to talk about one of my absolute favorite plants: Asclepias ovalifolia, or Oval Milkweed. If you haven’t met this beauty yet, imagine delicate, pale pink flowers that unfurl like tiny parasols, attracting all sorts of wonderful pollinators. It’s a true gem in any native garden. And the best part? Propagating it is not only super rewarding but also a fantastic way to fill your garden with these cheerful blooms.
While some members of the Asclepias family can be a bit finicky, Asclepias ovalifolia is surprisingly forgiving. I’d say it’s a wonderful plant for beginners looking to dip their toes into the world of propagation. You’ll get a real sense of accomplishment watching these little ones grow!
The Best Time to Start
For the highest success, I always recommend starting your Asclepias ovalifolia propagation efforts in late spring to early summer. This is when the plant is actively growing and has plenty of energy to dedicate to rooting. You’ll want to look for new, tender stems that are green and flexible, not woody or fully mature.
Supplies You’ll Need
Gathering your supplies beforehand makes the whole process so much smoother. Here’s what I usually have on hand:
- Sharp pruning shears or a clean knife: For taking stem cuttings. Sterilize them with rubbing alcohol first!
- Rooting hormone (optional but helpful): A powder or gel to encourage root development.
- Well-draining potting mix: I like a blend of equal parts peat moss, perlite, and sand for my milkweed. You can also buy a good quality seed-starting mix.
- Small pots or propagation trays: Clean ones, with drainage holes, are essential.
- Watering can or spray bottle: For gentle watering.
- Clear plastic bags or propagation dome: To maintain humidity.
- Labels: Don’t forget to label your pots! Trust me on this one.
- A warm spot: This could be a sunny windowsill or a heated mat.
Propagation Methods
There are a couple of reliable ways to get new Asclepias ovalifolia plants going. I often use stem cuttings as it’s super efficient.
Stem Cuttings: My Go-To Method
- Take your cuttings: On a healthy Asclepias ovalifolia plant, select a stem that’s about 4-6 inches long. Make a clean cut just below a leaf node (where a leaf attaches to the stem).
- Prepare the cutting: Gently remove the lower leaves, leaving just one or two at the very top. This prevents them from rotting in the soil.
- Apply rooting hormone (optional): Dip the cut end into rooting hormone, tapping off any excess.
- Plant your cuttings: Fill your small pots with your prepared potting mix, making a small hole in the center. Insert the cut end of the stem into the hole, and gently firm the soil around it.
- Water and cover: Water gently until the soil is moist but not soggy. Then, cover the pot with a clear plastic bag or place it under a propagation dome to create a mini-greenhouse. This is crucial for keeping humidity high.
- Provide warmth and light: Place the pots in a bright location that receives indirect sunlight. A heat mat underneath can really speed things up.
Water Propagation (A Fun Alternative!)
While I lean towards soil for milkweed, water propagation can still work.
- Take cuttings as described above.
- Place cuttings in a jar of water. Make sure no leaves are submerged – this is key to preventing rot! Only the stem should be in contact with the water.
- Change the water regularly. Every couple of days is ideal to keep it fresh.
- Place in bright, indirect light. You’ll see roots emerging from the nodes. Once the roots are about an inch long, you can carefully transplant them into soil.
The “Secret Sauce” (Pro Tips)
Here are a few tricks I’ve learned over the years that can really boost your success with Asclepias ovalifolia:
- Don’t be afraid to experiment with multiple cuttings per pot. Even if only half take, you’ll still have a nice start.
- Bottom heat is your friend. Many plants, especially those being propagated from stem cuttings, absolutely thrive with a little warmth from below. It mimics the conditions of being in the ground and encourages root formation much faster. I find a dedicated seedling heat mat works wonders.
- Observe your cuttings daily. Look for signs of wilting or the beginning of rot. Catching problems early makes a huge difference.
Aftercare & Troubleshooting
Once you see new leaf growth, it’s a very good sign that roots have formed!
- Gradually acclimate your new plants: If you’ve used a plastic bag, slowly start to open it up over a few days to let the plant adjust to lower humidity.
- Continue to water gently. Keep the soil consistently moist but not waterlogged.
- Transplant when ready: When your new plants have a good root system and a few sets of leaves, you can transplant them into larger pots or directly into your garden.
The most common issue you’ll encounter is rot. This usually happens if the cuttings are kept too wet or don’t have enough air circulation. You’ll see the cutting turn mushy and black. If this happens, sadly, it’s best to discard it. Don’t be discouraged, though! Just make a note of what might have gone wrong and try again.
A Little Patience Goes a Long Way
Propagating plants is a journey, and like any good journey, it requires a bit of patience. Don’t get discouraged if your first few attempts aren’t perfect. Enjoy the process of nurturing these little beginnings, and soon you’ll have a whole garden full of these delightful Oval Milkweeds, buzzing with happy pollinators. Happy propagating!
Resource:
https://identify.plantnet.org/k-world-flora/species/Asclepias%20ovalifolia%20Decne./data