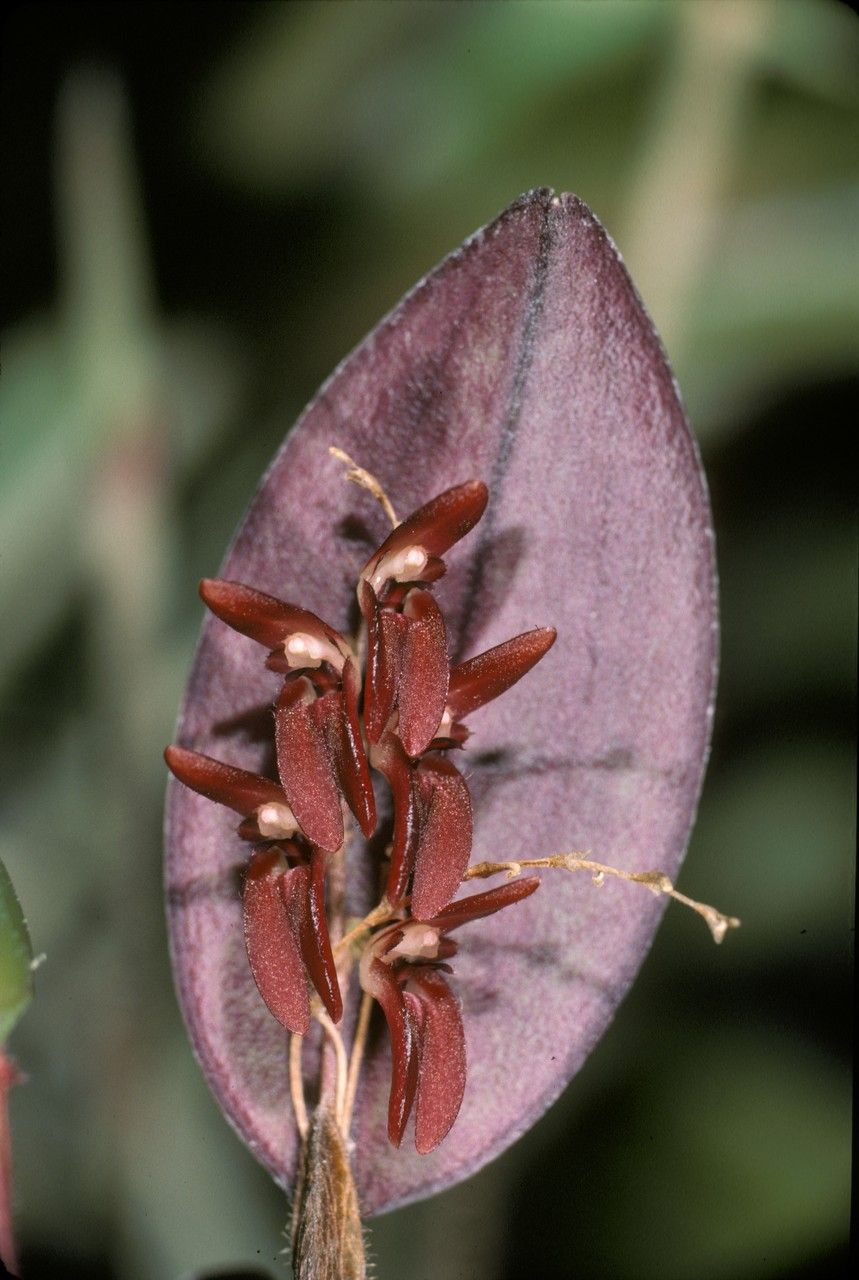
Oh, hello there! I’m so glad you’ve stopped by. Today, we’re going to talk about a truly delightful little orchid, Trichosalpinx blaisdellii. If you’re looking for an orchid that’s a bit out of the ordinary, with its charming, textured leaves and delicate blooms, you’ve found a winner. Propagating them is a wonderfully rewarding experience, like gifting yourself more of something you love. Now, I’ll be honest, Trichosalpinx blaisdellii isn’t always the most straightforward plant for absolute beginners, but with a little patience and the right approach, you can absolutely succeed.
When to Get Your Hands Dirty
The absolute best time to start propagating Trichosalpinx blaisdellii is during its active growing season. For most of us, this means spring and early summer. You’ll be looking for new pseudobulbs or active leaf growth. This is when the plant has the most energy to put into developing new roots and shoots, which really maximizes your chances of success. Trying to propagate when it’s dormant or stressed is like asking someone to run a marathon on an empty stomach – it’s just not going to go well!
Your Propagation Toolkit
Gathering your supplies beforehand makes the whole process much smoother. Here’s what I always keep on hand:
- Sharp, sterile pruning shears or a clean razor blade. Sanitation is key to preventing disease.
- A well-draining orchid mix. I often use a blend of fine-grade bark, perlite, and a touch of horticultural charcoal.
- Orchid pots or small containers. Clean, with good drainage holes.
- Optional: Rooting hormone. While not strictly necessary for Trichosalpinx blaisdellii, it can give an extra boost.
- Water. Preferably distilled or rainwater, to keep things pure.
- A spray bottle. For gentle misting.
- A humidity dome or plastic bag. To keep things cozy and moist during the initial rooting phase.
Nurturing New Life: Propagation Methods
The most effective way to propagate Trichosalpinx blaisdellii is through division. These orchids tend to grow in clumps, and separating these clumps is the best bet for creating new, independent plants.
- Gently remove the orchid from its pot. If it’s been in there a while, you might need to loosen the edges with a knife.
- Inspect the root ball. You’re looking for natural divisions. Each division should ideally have at least two or three healthy pseudobulbs and a decent amount of intact roots.
- Carefully tease the divisions apart. Sometimes a gentle pull is enough. If you encounter stubborn roots holding things together, use your sharp, sterile shears to make a clean cut. Try to minimize damage to the roots.
- Remove any old, dead growth. Trim away any brown, shriveled pseudobulbs or dried-out leaves.
- Pot up your new divisions. Place each division in its own pot with your fresh orchid mix. Ensure the base of the pseudobulbs is just at the surface of the mix.
- Water lightly. Just enough to settle the mix around the roots.
While stem cuttings aren’t the typical method for Trichosalpinx blaisdellii, if you happen to have a strong growing tip that has aerial roots, you could theoretically try it. However, for this particular orchid, focusing on division is your most reliable path to success.
The “Secret Sauce” for Success
Over the years, I’ve learned a few little tricks that seem to make a difference. Here are a couple that have served me well:
- Don’t overwater stressed divisions. After dividing, new plants are vulnerable. Resist the urge to drench them. A light watering initially and then keeping the mix barely moist is much better than waterlogged roots, which can lead to rot. They’ll tell you when they’re thirsty with slightly less plump pseudobulbs.
- Provide gentle warmth. If you have a seedling heat mat, placing your newly potted divisions on it can really encourage root development. It mimics the warmth of spring and gives them that little extra push to get going. Just a low setting is perfect.
Tending to Your Tiny Treasures
Once your divisions are potted, the waiting game begins, but it’s an active wait! Keep them in a bright, indirect light location, and maintain good humidity. Mist them lightly every few days, ensuring the foliage dries relatively quickly to prevent fungal issues. You can also place them under a humidity dome or inside a clear plastic bag with a few small air holes. This creates a mini-greenhouse environment that helps them establish.
Watch for signs of roots emerging from the potting mix or new leaf growth. This is your cue that they’re settling in well!
Troubleshooting can sometimes feel discouraging, but it’s just part of gardening. The most common issue you might encounter is root rot. This usually happens if the mix stays too wet for too long, or if the air circulation is poor. If you see mushy, black roots or the pseudobulbs start to shrivel dramatically, it’s a sign of trouble. You might have to unpot, trim away the rot with sterile tools, and repot into drier mix. Sometimes, sadly, divisions don’t make it. Don’t be too hard on yourself – it happens!
Keep Growing!
Propagating Trichosalpinx blaisdellii is a beautiful way to expand your collection and share the joy of these unique orchids. Be patient, give them a good start, and trust the process. Before you know it, you’ll have more of these charming plants to admire. Happy growing!
Resource: