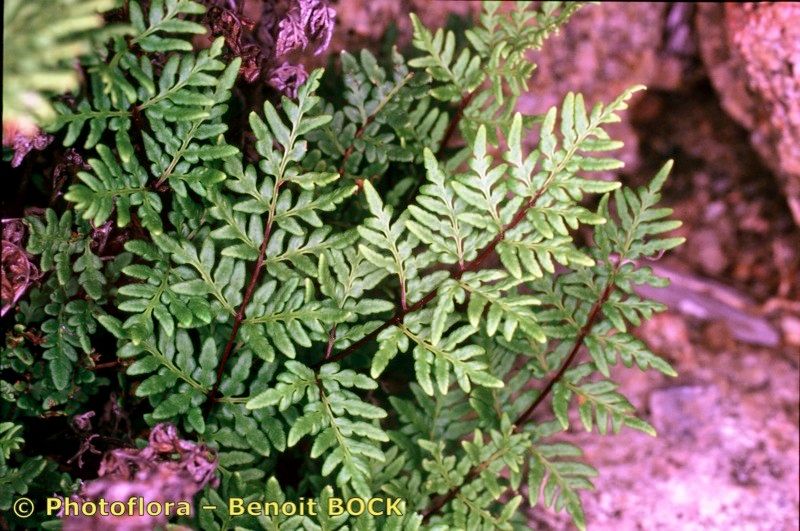
Hello fellow plant lovers! Today, we’re going to talk about a fern that has truly captured my heart: Hemionitis guanchica. Also known as the “velvet fern” or “star fern,” its delicate, velvety fronds unfurl with such elegance. Growing it is a pleasure, but the real joy comes from multiplying it. Sharing these beauties with friends, or simply having more of them to admire, is incredibly rewarding.
Now, Hemionitis guanchica isn’t the absolute easiest plant to propagate for a complete beginner, but with a little attention and the right approach, you can absolutely succeed. Don’t let that deter you! It’s a plant that rewards your efforts beautifully.
The Best Time to Start
For the most vigorous growth and best chance of success, I find late spring to early summer to be the sweet spot. This is when your mature plants are naturally putting on new growth, meaning they have plenty of energy to share. You want to propagate from healthy, actively growing fronds, not from any struggling or dying bits.
Supplies You’ll Need
Here’s what you’ll want to have on hand before you get started:
- Sterilized sharp pruners or scissors: Crucial for clean cuts that heal well.
- Well-draining potting mix: A blend of regular potting soil with perlite or orchid bark usually works wonders.
- Small pots or trays: Clean ones, of course!
- Clear plastic bags or a propagation dome: To create a humid environment.
- Rooting hormone (optional but helpful): A powder or gel can speed things up.
- Watering can with a fine rose: For gentle watering.
- Labeling markers: So you don’t forget what’s what!
Propagation Methods
While Hemionitis guanchica can be a bit tricky with division, leaf cuttings have been my most reliable method.
Leaf Cuttings:
- Select your frond: Choose a healthy, mature frond that has a good-sized leaf blade.
- Make the cut: Using your sterilized pruners or scissors, carefully cut the frond near its base, right where it emerges from the rhizome.
- Prepare the cutting: If the leaf is very large, you can gently cut it in half or into smaller sections. Make sure each section has at least one healthy vein running through it.
- Apply rooting hormone (optional): Dip the cut end of your frond segment into rooting hormone, tapping off any excess.
- Planting: Fill your small pots with your well-draining potting mix. Gently insert the cut end of the frond segment into the soil, ensuring it’s making good contact. You can plant several segments per pot.
- Create humidity: Mist the soil lightly and then cover the pot with a clear plastic bag or place it in a propagation dome. This is crucial for keeping the humidity high, which the fern needs to survive and root.
- Placement: Find a warm spot with bright, indirect light. Avoid direct sun, as this can scorch your cuttings.
The “Secret Sauce” (Pro Tips)
Here are a couple of things I’ve learned over the years that really make a difference with ferns like these:
- Don’t let the leaves touch the water: When you mist, try to keep the cut ends moist but avoid water pooling on the leaves themselves. This can lead to rot, and we want to encourage rooting, not decay!
- Bottom heat is a game-changer: If you have a heat mat designed for seedlings, placing your pots on it can significantly speed up root development. Ferns love a bit of warmth from below.
- Patience is key: I know I’ve said it before, but it bears repeating. Ferns can be slow rollers. Don’t be discouraged if you don’t see new growth for several weeks. Keep the humidity high and the soil consistently moist – that’s your job.
Aftercare & Troubleshooting
Once you start seeing tiny new fronds emerging from the soil, congratulations! That means roots have formed.
- Acclimatize: Gradually introduce your new plants to your home’s normal humidity. Poke a few holes in the plastic bag, or open the dome for a few hours each day, slowly increasing the time over a week or two.
- Watering: Continue to keep the soil moist but not soggy. Water when the top inch of soil feels slightly dry.
- Fertilizing: Once your new plants are established and showing good growth, you can start feeding them with a diluted liquid fertilizer about once a month during the growing season.
Troubleshooting:
- Rotting: If your cuttings turn mushy and black, it’s usually a sign of too much moisture and not enough air circulation. Ensure your soil is well-draining and don’t overwater.
- Wilting: If the fronds look sad and droopy, they’re likely not getting enough humidity. Make sure your plastic cover is sealed tightly again.
A Encouraging Closing
So there you have it! Propagating your Hemionitis guanchica is a journey of observation and gentle care. Don’t worry if your first attempt isn’t perfect. Every plant is a learning experience, and I promise, the moment you see those first tiny, perfect fronds unfurling from your own propagated cuttings will make it all worthwhile. Now, go on, get your hands a little dirty, and enjoy the magic of growth!
Resource: