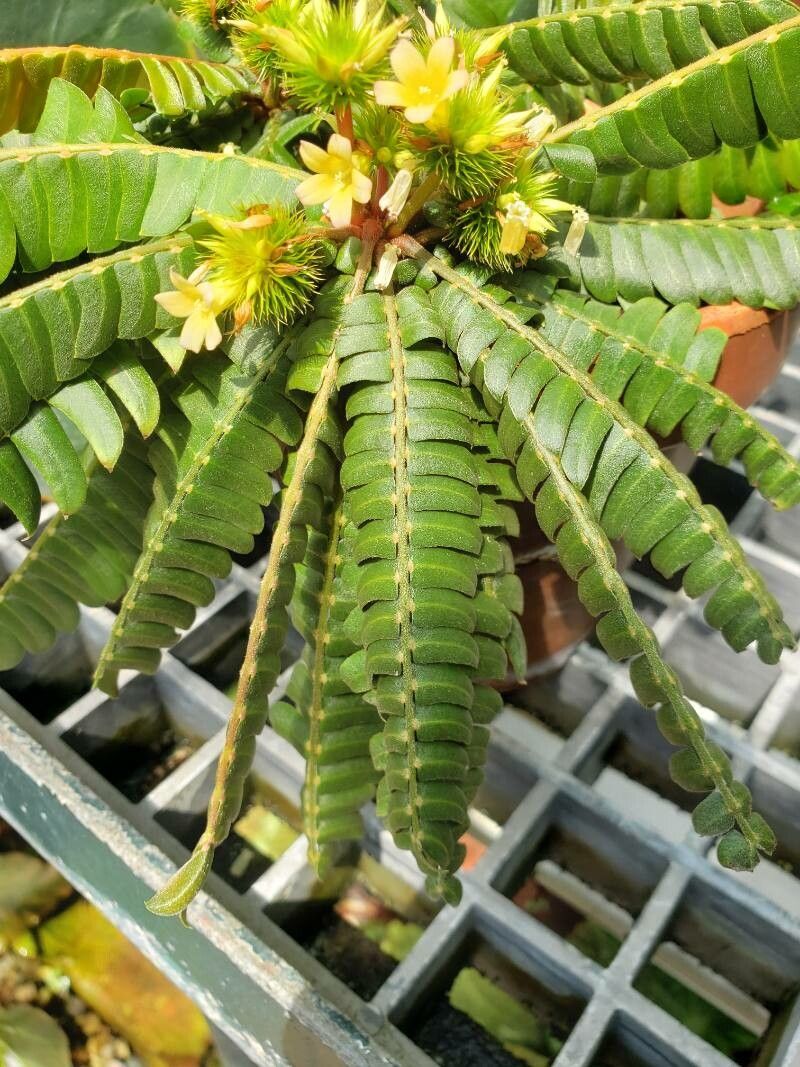
Oh, hello there! Pull up a chair and let’s chat about a plant that’s always brought a little bit of magic into my garden – Biophytum zenkeri. You might know it as the “little tree plant” or the “sensitive plant” because of how its leaves fold up. It’s got this wonderfully fractal, palm-like structure that’s just captivating. Propagating them is such a joy, and it never fails to make me feel like I’m really getting to know my plants. While Biophytum can be a tad particular, I wouldn’t call it downright challenging. It just requires a gentle hand and a bit of observation.
The Best Time to Start
When I’m looking to make more Biophytum, I always aim for spring or early summer. This is when the plant is naturally bursting with energy and ready to grow. You’ll find it’s much more receptive to propagation during its active growing season. Trying to propagate when it’s cooler or the plant is dormant is like asking for a hug when someone just wants to sleep – it’s just not the right time!
Supplies You’ll Need
Here’s what I usually gather before I start:
- Sharp secateurs or a clean knife: For taking cuttings. Sterilize them with rubbing alcohol to prevent disease.
- Well-draining potting mix: A good blend of peat moss or coco coir, perlite, and a little bit of orchid bark works wonders. You want it to hold moisture but drain freely.
- Small pots or seedling trays: Clean ones are key!
- Rooting hormone (optional but helpful): A powdered or gel form can give those cuttings a nice boost.
- Plastic bag or humidity dome: To create a humid environment around your cuttings.
- Watering can or spray bottle: For gentle watering.
Propagation Methods
There are a couple of ways to get new Biophytum plants going, and both can be quite successful if you’re patient.
Stem Cuttings
This is my go-to method for Biophytum.
- First, select a healthy, mature stem. Look for one that’s not too old and woody, but also not just a tender new shoot.
- Using your sharp secateurs or knife, take a cutting that is about 3-4 inches long. Make sure it has at least a few sets of leaves.
- Remove the lower leaves. You want to expose a bit of bare stem to encourage rooting.
- Dip the cut end into rooting hormone if you’re using it. Tap off any excess.
- Fill your clean pots with your well-draining mix. Make a little hole in the center with your finger or a pencil.
- Insert the cutting into the hole, making sure the bare stem is nestled in the soil.
- Gently firm the soil around the base of the cutting.
- Water thoroughly but gently. You don’t want to dislodge the cutting.
- Pop the pot inside a plastic bag or cover it with a humidity dome. This is crucial for keeping the humidity high.
- Place in bright, indirect light. A spot on a windowsill that doesn’t get direct hot sun is perfect.
Division
This method is best when your Biophytum has started to clump up at the base.
- Gently remove the mother plant from its pot.
- Carefully tease apart the root ball, looking for natural divisions where smaller plants are attached.
- If you find a section with its own roots, you can carefully separate it. Try not to damage the roots too much.
- Pot up the new divisions into their own small pots with fresh, well-draining soil.
- Water them in and treat them like established plants.
The “Secret Sauce” (Pro Tips)
Now, here are a few little tricks I’ve learned over the years that really seem to help:
- Don’t let the leaves touch the water when doing water propagation (if you ever try it, though stem cuttings are generally better for this plant). If any leaves dip below the water line, they tend to rot and can take the whole cutting down with them.
- Bottom heat is your friend! Placing your pots on a seedling heat mat can significantly speed up the rooting process. The warmth encourages root development from below.
- Be patient with the leaf folding. It’s their natural response, but it can make you worry they’re dying. As long as the stems are firm and there’s no rot, they’re usually just being sensitive!
Aftercare & Troubleshooting
Once you start to see new growth, or if you gently tug on the cutting and feel resistance, it means roots have formed!
- Gradually acclimate your new plants. Once roots are established, start airing out the plastic bag or dome for a few hours each day to help them adjust to normal humidity.
- Continue to provide bright, indirect light and keep the soil consistently moist but not soggy.
- Watch out for rot. This is the most common enemy. If you see mushy stems or leaves turning yellow and falling off, your soil is likely too wet. Let it dry out a bit more between waterings, and ensure excellent drainage. If rot sets in severely, it’s often best to discard the affected cutting to prevent it from spreading.
A Little Encouragement
Growing plants from cuttings is such a rewarding journey. It’s a beautiful way to connect with nature and create more of the beauty you love. Don’t be discouraged if your first few attempts aren’t perfect. Every plant tells a story, and the process of propagating Biophytum zenkeri is full of little lessons. Enjoy the magic unfolding in your hands, and happy growing!
Resource:
https://identify.plantnet.org/k-world-flora/species/Biophytum%20zenkeri%20Guillaumin/data