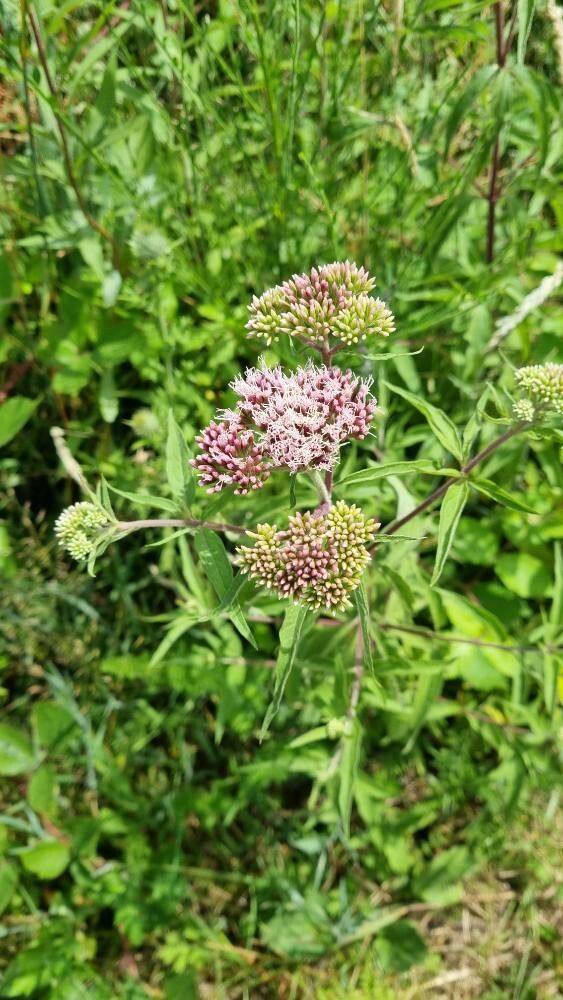
Hello, fellow garden lovers! It’s so wonderful to connect with you today. We’re going to talk about one of my absolute favorite plants – Eupatorium lindleyanum, or as many of us affectionately call it, ‘Joe-Pye Weed’. This magnificent plant brings such a dreamy, informal charm to the garden with its tall stalks, fluffy flower heads, and the wonderful buzzing of pollinators it attracts. If you’ve ever admired its beauty and thought, “I wish I had more of those!”, you’re in luck. Propagating Eupatorium lindleyanum is a deeply satisfying endeavor, and I’m here to guide you through it. Don’t worry, it’s quite forgiving and even beginners can have a great deal of success.
The Best Time to Start
When it comes to getting your new Eupatoriums off to a flying start, late spring to early summer is your golden window. This is when the plant is actively growing, and new shoots are fresh and full of vigor. They haven’t hardened off yet, meaning they’re pliable and full of life, making them perfect candidates for taking cuttings or dividing. If you miss this window, don’t fret too much – early autumn can also work, but you’ll want to get them established before the hard frost sets in.
Supplies You’ll Need
Before we get our hands dirty, let’s gather our tools. Having everything ready makes the process so much smoother.
- Sharp Pruning Shears or a Knife: Clean cuts are crucial for healthy propagation.
- Potting Mix: A good quality, well-draining mix is essential. I often use a blend of equal parts peat moss (or coco coir) and perlite.
- Small Pots or Seed Trays: Whatever you have available for your cuttings.
- Rooting Hormone (Optional but Recommended): This little helper can significantly boost your success rate.
- Clear Plastic Bags or Propagation Domes: To create a humid environment.
- Watering Can with a Fine Rose: For gentle watering.
- Labels: Trust me, you’ll thank yourself later for labeling your efforts!
Propagation Methods
There are a couple of reliable ways to create new Eupatorium lindleyanum plants. I’ll walk you through the ones I use most often.
Stem Cuttings
This is my go-to method for increasing my Eupatorium numbers. It’s straightforward and really effective.
- Select Healthy Shoots: In late spring or early summer, look for young, non-flowering stems that are about 4-6 inches long. They should be firm but still a bit bendy. Avoid woody or very soft, floppy stems.
- Take Your Cuttings: Using your clean pruning shears or knife, make a clean cut just below a leaf node (the spot where a leaf emerges from the stem).
- Prepare the Cuttings: Gently remove the lower leaves from the bottom half of the stem, leaving just one or two sets of leaves at the top. If your remaining leaves are quite large, you can even cut them in half horizontally to reduce water loss.
- Use Rooting Hormone (Optional): Dip the cut end of each stem into your rooting hormone, tapping off any excess. This isn’t strictly necessary for Eupatorium, but it can give your cuttings a significant advantage.
- Insert into Potting Mix: Fill your pots or trays with moistened potting mix. Make a small hole with a pencil or your finger and gently insert the cutting. Firm the soil around the base of the stem to ensure good contact.
- Water Gently: Water the soil lightly, being careful not to dislodge your cuttings.
- Create a Humid Environment: Cover the pots with a clear plastic bag or a propagation dome. This traps moisture and creates the humid microclimate your cuttings need to encourage root development. Make sure the leaves aren’t touching the plastic if possible.
Division
If you have an established Eupatorium plant that’s looking a little crowded or you simply want to multiply it, division is a fantastic option.
- Dig Carefully: In early spring (before new growth really takes off) or early autumn (after flowering has finished), dig around the perimeter of the Eupatorium clump. Try to get your spade or fork in as far as you can without damaging the main root ball too much.
- Lift the Plant: Gently lift the entire clump out of the ground.
- Separate the Roots: You can often gently pull the clump apart with your hands. If it’s stubborn, use a clean, sharp spade or knife to divide it into sections. Each section should have at least one good bud or shoot and a healthy portion of roots.
- Replant Immediately: As soon as you have your divisions, replant them in their new spots or in pots with fresh soil. Water them well.
The “Secret Sauce” (Pro Tips)
Here are a few little tricks I’ve learned over the years that really make a difference.
- Bottom Heat is Your Friend: For stem cuttings, placing your pots on a heated propagator mat can dramatically speed up root formation. Eupatorium roots love a bit of warmth from below!
- Don’t Fear the Slump: Newly taken cuttings can look a bit sad and droopy for the first few days, even in a humid environment. Don’t be tempted to overwater or remove the plastic cover too soon. They usually perk up once they start to establish roots.
- The “Wiggle Test”: After a few weeks, you can gently tug on a cutting. If you feel resistance, it means roots have formed! If it comes out easily, it hasn’t rooted yet, so pop it back in and give it more time.
Aftercare & Troubleshooting
Once your cuttings have successfully rooted (usually after 3-6 weeks for stem cuttings), it’s time for a little TLC.
- Acclimate Gradually: Slowly remove the plastic bag or propagation dome over a few days to help your new plants get used to normal humidity levels.
- Water Consistently: Keep the soil moist but not waterlogged. As they grow, you can begin to water them as you would any other young plant.
- Potting Up: Once the new plants are strong enough and have filled their initial pots, you can pot them up into larger containers or plant them directly in the garden if the weather is suitable.
- Watch for Rot: The most common culprit for failed cuttings is rot. This usually happens when there’s too much moisture and not enough airflow, or if the potting mix is too heavy and doesn’t drain well. If you see dark, mushy stems, unfortunately, that cutting is likely lost. Prevention is key: ensure good drainage and don’t let the leaves sit in water.
Embrace the Greening!
Watching a tiny cutting transform into a robust plant is one of the most rewarding aspects of gardening. Be patient with the process; nature has its own timeline. Don’t get discouraged if every single cutting doesn’t make it – it happens to the best of us! Just enjoy the journey of learning and creating more of these beautiful Eupatoriums to grace your garden, and those of your friends. Happy propagating!
Resource:
https://identify.plantnet.org/k-world-flora/species/Eupatorium%20lindleyanum%20DC./data