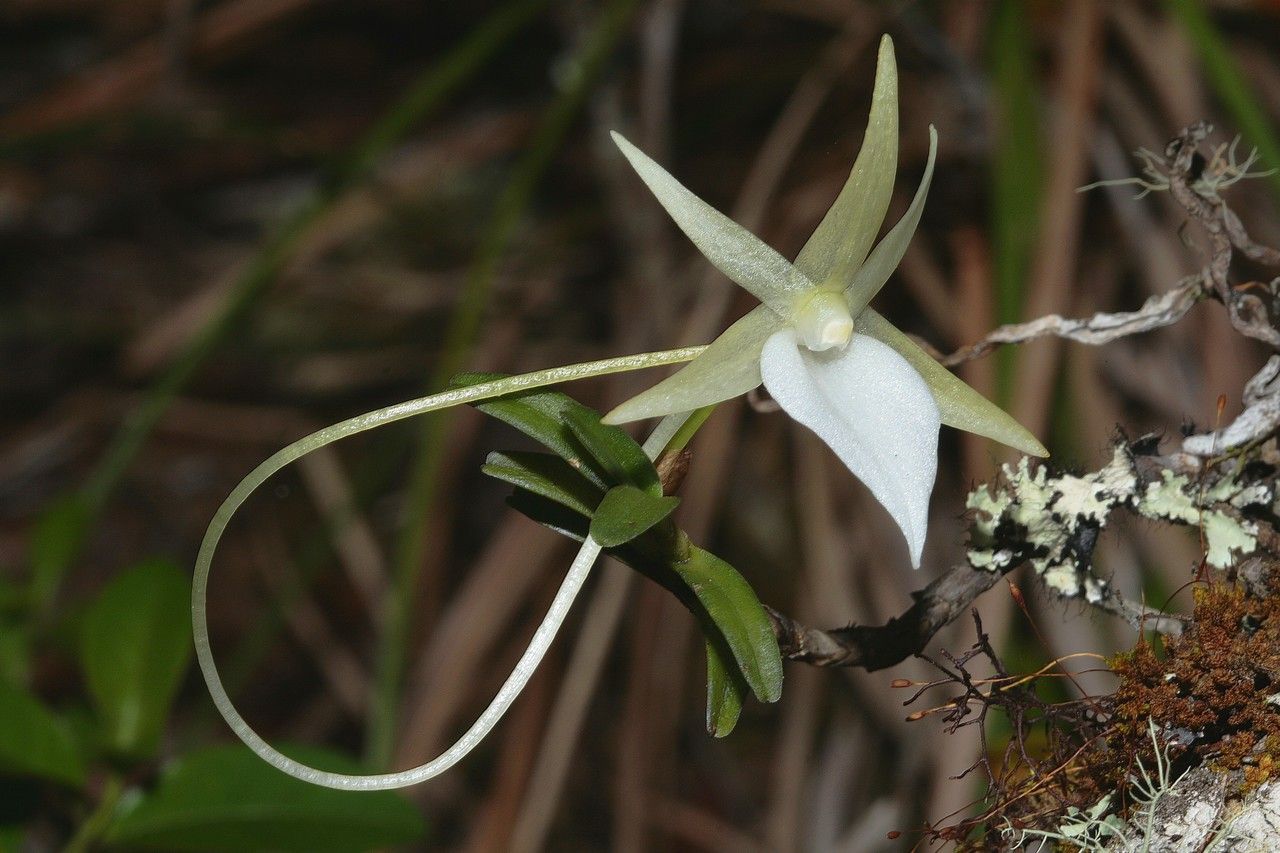
Oh, hello there! Come on in, grab a mug. Let’s chat about these extraordinary Angraecum dryadum. I’ve always been utterly smitten with their ethereal, waxy blooms and that unique almost moss-like fragrance. Growing them is a joy, but propagating them? Well, that’s where the real magic happens, and it’s incredibly rewarding to nurture a tiny new life from a parent plant. Now, I won’t sugarcoat it entirely: Angraecum dryadum can be a bit of a diva when it comes to propagation. It’s not the absolute easiest for a brand-new orchid grower, but with a little patience and attention, it’s absolutely achievable!
The Best Time to Start
For unlocking the best success with Angraecum dryadum propagation, I’ve found that early to mid-spring is your golden ticket. This is when the plant is naturally gearing up for healthy new growth after its cooler rest period. You’re looking for active, vigorous growth – think new shoots or leaves that are plump and showing good color, not something that’s struggling or dormant.
Supplies You’ll Need
Gathering your tools beforehand will make the process so much smoother. Here’s what I always keep handy:
- Sharp, sterile pruning shears or a razor blade: Cleanliness is paramount to prevent any nasty infections.
- Potting mix specifically for orchids: I love a chunky blend of bark, perlite, and sphagnum moss.
- Small pots or divisions containers: Cleaned thoroughly, of course.
- Potting stake or small supports: To keep your new plant upright.
- Rooting hormone (optional but recommended): A powder or gel can give your cuttings a helpful boost.
- Clear plastic bags or a mini-greenhouse: To maintain humidity.
- Spray bottle: For misting.
- Watering can or small pitcher: For controlled watering.
Propagation Methods
While Angraecum dryadum can be propagated by seed, that’s a whole different, highly specialized ballgame! For most of us, division is the way to go.
Division: The Most Common Approach
This method is best when your Angraecum dryadum has grown large enough to have multiple pseudobulbs or growths.
- Gently remove the plant from its pot. Take your time here. If it’s stuck, you might need to carefully loosen the roots from the edges.
- Inspect the root system. Look for natural breaks between the growths. You’re aiming to separate sections that have their own healthy roots attached. Sometimes, you might need to use your sterile shears, but try to tease them apart with your fingers first. Your goal is to minimize damage to those precious roots.
- Prepare your divisions. Each division should have at least two to three healthy pseudobulbs and a good set of roots. If a division has very few roots, it’s best to wait until it’s more substantial.
- Pot up your divisions. Fill your clean pots with your orchid mix. Make a small well in the center and place your division, spreading out the roots as much as possible. Gently firm the mix around the roots, ensuring the base of the pseudobulbs is at the same level it was before. You want the plant to be stable.
- Water sparingly. Don’t drench it immediately. A light watering is usually sufficient.
- Provide humidity. This is crucial! Place the potted division in a clear plastic bag, a mini-greenhouse, or create a humid microclimate around it.
The “Secret Sauce” (Pro Tips)
Here are a few things I’ve learned over the years that can really make a difference:
- Don’t overwater early on. This is probably the biggest mistake people make. Your newly divided plant needs time to establish. Too much moisture, especially before new roots form, is a recipe for rot. Let the potting mix dry out slightly between waterings.
- Think about humidity, not direct water. While you don’t want the potting mix soggy, the leaves and surrounding air need to be humid. Misting the leaves occasionally is fine, but never let water sit in the crown or between the leaves for long periods, as this can also lead to rot.
- Bottom heat can be a lifesaver. If your home is on the cooler side, placing your newly potted divisions on a seedling heat mat set to a gentle warmth (around 70-75°F or 21-24°C) can encourage root development and speed things along.
Aftercare & Troubleshooting
Once your division is potted, keep an eye on it. You’re looking for signs of new growth – a new leaf emerging, or perhaps even a tiny root tip pushing through the potting mix. This can take weeks, sometimes even months!
Common Signs of Failure:
- Shriveling leaves or pseudobulbs: This usually means the plant isn’t getting enough water or isn’t able to take it up. Check your humidity levels and the moisture in the potting mix.
- Mushy, black pseudobulbs or roots: This is rot, and it’s usually caused by overwatering or poor air circulation. If you spot rot, you may need to remove the rotted portion with sterile tools and adjust your watering habits immediately. Sometimes, a severely rotted division can’t be saved.
- No growth after a very long time: Be patient! Orchids, especially Angraecum dryadum, can take their sweet time. If the plant looks healthy but dormant, it’s likely just resting or building up energy.
A Encouraging Closing
Propagating orchids like Angraecum dryadum is a journey, not a race. There will be moments of anticipation, and maybe a little bit of anxiety too, but the satisfaction of seeing a new plant flourish is truly unparalleled. Be patient with yourself and with your new divisions. Enjoy the quiet observation, the careful watering, and the hopeful waiting. You’ve got this! Happy growing!
Resource:
https://identify.plantnet.org/k-world-flora/species/Angraecum%20dryadum%20Schltr./data