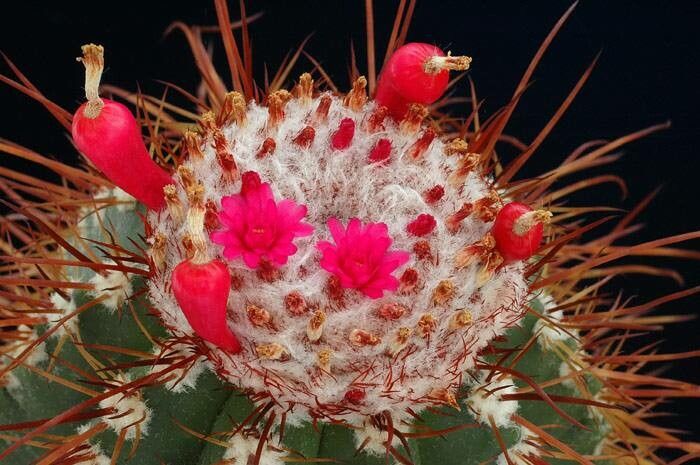
Oh, hello there! Come on in and grab a mug. We’re going to talk about something truly special today: Melocactus ernestii. If you’ve ever seen one of these beauties, you know exactly what I mean. They have this wonderful, round, ribbed body often topped with a fuzzy, pinkish-red cephalium – that’s the crown-like structure where the flowers emerge. They’re like little desert jewels, aren’t they? And propagating them? It’s incredibly rewarding. Now, being honest, Melocactus ernestii can be a bit of a diva when it comes to propagation, especially for absolute beginners. But don’t let that deter you! With a little care and the right approach, you can absolutely have success.
The Best Time to Start
Timing is everything in the garden, and for our Melocactus ernestii, the absolute best time to start propagating is during its active growing season. This typically means late spring through summer. You want the plant to be healthy and have plenty of energy to put into developing roots. Trying to propagate when it’s dormant in cooler months often leads to disappointment. So, let’s aim for when the days are getting longer and warmer.
Supplies You’ll Need
Before we get our hands dirty, let’s gather our tools. Think of it as packing for a little gardening adventure!
- Well-draining cactus and succulent mix: This is non-negotiable. You can buy a pre-made one, or mix your own with equal parts coarse sand, perlite, and a good quality potting soil.
- Sharp, sterilized pruning shears or a clean knife: For taking cuttings. Sterilize with rubbing alcohol to prevent disease.
- Rooting hormone (optional but helpful): A powder or gel that encourages root development. I often use it, especially for trickier plants.
- Pots or seedling trays: Small ones are perfect for starting out. Ensure they have drainage holes!
- Gravel or small stones: For the bottom of the pot to improve drainage further.
- A good spray bottle: For gentle watering.
- Labels and a permanent marker: Trust me, you’ll thank yourself later!
Propagation Methods
Now for the fun part – getting new plants started! For Melocactus ernestii, the most reliable method is stem cuttings.
Stem Cuttings
- Select Your Cutting: Look for a healthy, mature stem section. It should be firm and free of any blemishes. You’re aiming for a piece that’s at least a few inches long, but it can be longer.
- Make the Cut: Using your sterilized shears or knife, make a clean cut through the stem. Try to do this at a node if possible.
- Let it Callus: This is a critical step for succulents and cacti. Place the cutting in a dry, airy spot out of direct sunlight for several days, or even a week or two. You want the cut end to dry and form a hardened callus. This prevents rot when you plant it. Don’t rush this!
- Apply Rooting Hormone (Optional): Once the cut end is callused, you can dip it in rooting hormone. Just lightly coat the cut surface.
- Plant the Cutting: Fill your small pot with your well-draining mix. You can add a layer of gravel at the bottom first for extra insurance against soggy roots. Make a small hole in the soil with your finger or a pencil. Gently insert the callused end of the cutting into the hole.
- Settle In: Firm the soil gently around the base of the cutting. Do not water immediately. Let it sit for a few more days.
The “Secret Sauce” (Pro Tips)
I’ve learned a few tricks over the years, and these really make a difference with Melocactus ernestii:
- Bottom Heat is Your Friend: Cacti and succulents love warmth when they’re trying to root. Using a seedling heat mat under your pots can significantly speed up the process and improve success rates. Just keep it on consistently.
- Humidity, But Not Soaked: Once you do start watering (which I’ll get to next), mist the soil lightly rather than flooding it. The goal is to provide a bit of humidity to encourage root growth without waterlogging the cutting. The top layer of soil should be just barely moist.
- Observe, Don’t Poke: Resist the urge to constantly pull up your cuttings to check for roots. This can damage delicate new growth. Patience is key! You’ll usually see new growth on the top of the plant, or feel a slight resistance when you gently tug on it, indicating roots have formed.
Aftercare & Troubleshooting
Once you’ve planted your callused cutting and waited a week or so, it’s time for the first light watering.
- First Watering: Water lightly around the base of the cutting. You want the soil to be slightly moist, but not wet. You can use your spray bottle for a gentle misting.
- Ongoing Care: Continue to water sparingly, only when the soil is dry to the touch. Misting the soil surface is often enough. Place the pot in a bright location with indirect sunlight. As the new plant develops, you can gradually introduce it to more direct sun, but be careful not to scorch it.
- Signs of Trouble: The most common issue is rot, which will manifest as a mushy, dark, or discolored base. If you see this, act fast. Remove the affected part or the whole cutting and start again, ensuring your soil is even better draining and you’re watering less frequently. If your cutting shrivels dramatically and doesn’t show any signs of rooting, it might also indicate a problem, but shriveling can also happen if it’s simply trying to draw moisture from its own tissues while it roots.
And there you have it! Propagating Melocactus ernestii is a journey, not a race. There will be times when things don’t quite work out, and that’s part of the learning process for all of us. But when you see those tiny roots emerging and a new little cactus pushing towards the sun, it’s an incredibly satisfying feeling. So, go on, give it a try! Be patient, be observant, and most importantly, enjoy the magic of creating new life. Happy gardening!
Resource:
https://identify.plantnet.org/k-world-flora/species/Melocactus%20ernestii%20Vaupel/data