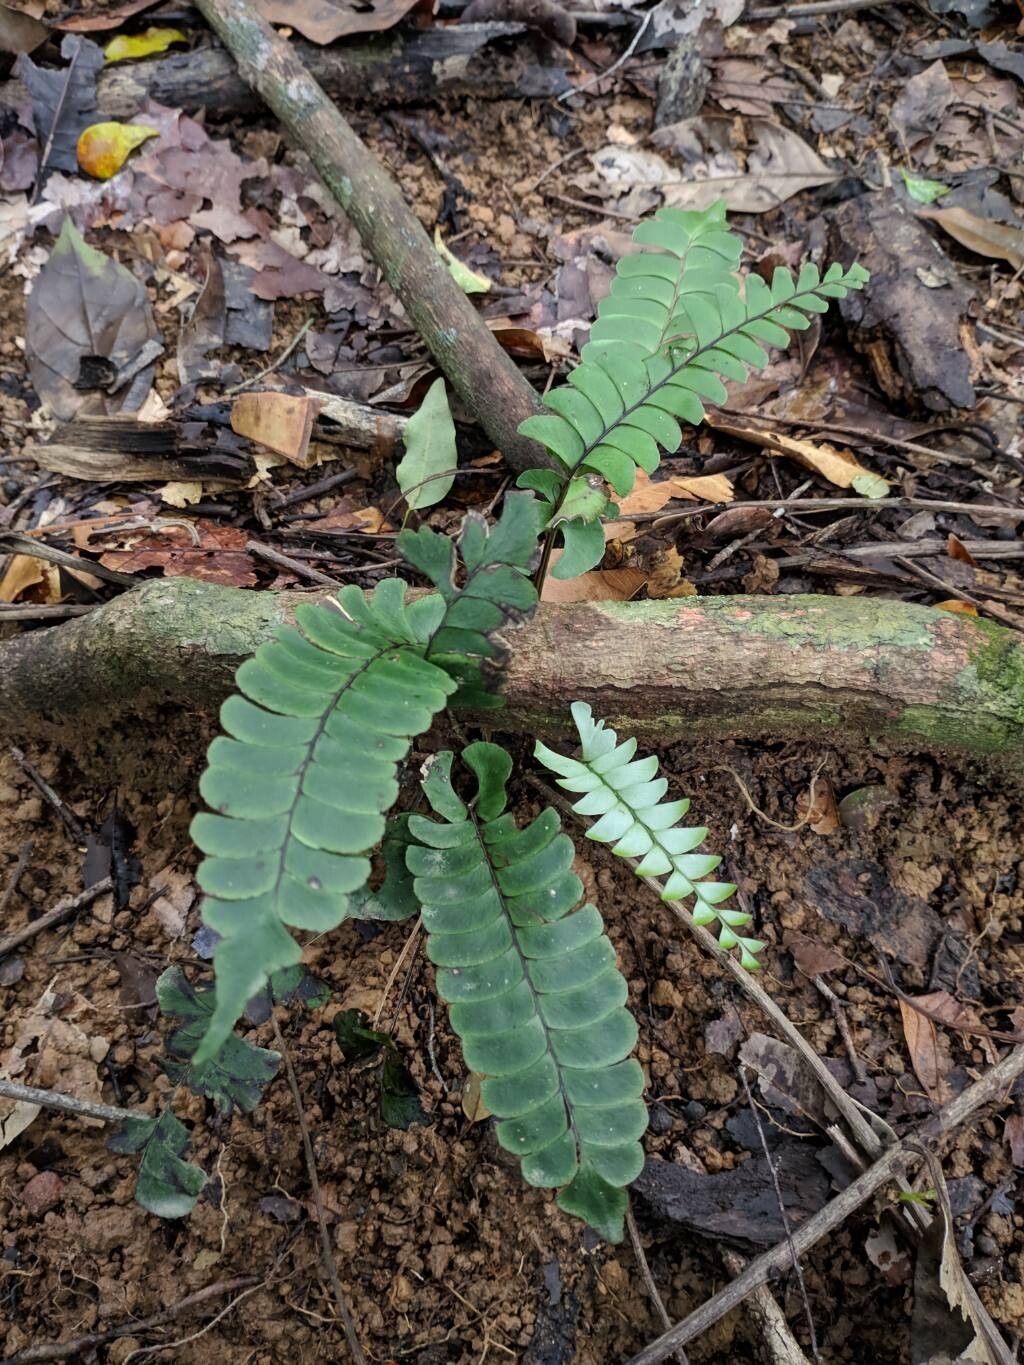
Hello there, fellow plant enthusiasts! It’s so lovely to have you here. Today, we’re diving into the wonderful world of Lindsaea lancea, also known as the lance-leaved fringe fern. If you’re drawn to delicate, lacy fronds and the whisper of a bygone era, this fern is a real charmer. Watching this beauty unfurl and grow is one of those quiet joys that makes gardening so special.
Now, about propagating it. I’ll be honest, Lindsaea lancea isn’t the absolute easiest fern to multiply. It’s definitely a project that requires a bit of patience and attention to detail. But the reward of nurturing a new fern from a tiny piece of its parent? Absolutely worth it, in my book! Don’t let that deter you; with a little know-how, you can absolutely succeed.
The Best Time to Start
For the highest chance of success, I always recommend starting your Lindsaea lancea propagation in the spring. As the days lengthen and the temperatures begin to warm up consistently, the plant has a good surge of energy. This is when it’s most vigorous and willing to put its efforts into making new roots. You can also try in early summer if your spring gets away from you, but aim for that period of active, happy growth.
Supplies You’ll Need
Here’s a little kit to get you started:
- Sterile razor blade or sharp pruning shears: For clean cuts.
- A good quality potting mix: I often use a blend of peat moss, perlite, and a bit of orchid bark. This provides aeration and moisture retention.
- Small pots or trays: Clean and with drainage holes are a must!
- A clear plastic bag or a humidity dome: To keep things moist.
- Watering can with a fine rose: For gentle watering.
- Optional: Rooting hormone (powder or gel): This can give your cuttings a helpful boost.
- Optional: Small pebbles or gravel: For added drainage in your pots.
Propagation Methods
Lindsaea lancea is best propagated through division or stem cuttings. Let’s explore those.
Division
This is my go-to method for ferns like Lindsaea lancea. It’s like giving your plant a little haircut and getting new plants in the process!
- Gently remove the fern from its pot. Turn it out onto a clean surface.
- Inspect the root ball. Look for distinct sections or clumps of growth. You’re looking for areas where the rhizomes (the underground stems) are naturally separating.
- With clean hands or a sterile tool, carefully pull the root ball apart. Try to keep as much of the root system intact as possible for each section. If it’s a bit stubborn, you can use your sterile razor blade or pruning shears to make a clean cut through the rhizomes.
- Pot up each division. Place them into their own small pots filled with your prepared potting mix. Make sure the crown (where the fronds emerge from the roots) is at or slightly above the soil surface.
- Water thoroughly and place in a humid environment.
Stem Cuttings
While division is often more successful, stem cuttings can work with careful attention.
- Select a healthy, mature frond. Look for one that is fully developed but not yet old and yellowing.
- Using your sterile razor blade or shears, make a cut close to the base of the frond’s stalk. You want to get a good portion of the stem attached.
- Optional: Dip the cut end in rooting hormone. Tap off any excess.
- Plant the cutting. Fill a small pot with your well-draining potting mix. Make a small hole in the center and gently insert the cut end of the frond, burying it about an inch deep.
- Water gently.
- Cover the pot with a clear plastic bag or a humidity dome. This is crucial to keep the very high humidity levels the cutting needs.
The “Secret Sauce” (Pro Tips)
Here are a few things I’ve learned over the years that can really make a difference:
- Don’t let excess water pool around the fronds or cuttings. While they love humidity, soggy conditions can lead to rot very quickly. When watering, aim for the soil, not the leaves.
- Bottom heat is your friend! Lindsaea lancea roots are often spurred on by consistent warmth from below. A seedling heat mat, set to a gentle temperature, can drastically speed up root development, especially for cuttings.
- Watch the humidity levels like a hawk. These ferns are tropical beauties. If the air gets too dry, your propagation efforts might stall or fail. That plastic bag or dome is your best tool here, but peek under it daily to ensure there isn’t too much condensation building up, which can also cause issues.
Aftercare & Troubleshooting
Once you see new growth or feel a gentle tug when tugging lightly on a cutting (that’s a good sign of roots!), you’re on your way!
- Gradually acclimate your new plants to lower humidity. Once they’re showing good signs of development, you can start opening the plastic bag or dome for a few hours each day, slowly increasing the time until they’re used to ambient humidity.
- Continue to water when the top inch of soil feels dry. Avoid letting them dry out completely.
- Watch for rot. The most common sign of failure is blackening or mushy stems and fronds. This usually indicates overwatering and poor air circulation. If you see this, you may need to trim away the affected parts with sterile tools and try to improve drainage and air flow. Sometimes, it’s just a loss, and that’s part of learning!
A Little Encouragement
Growing new plants is such a rewarding journey. There will be moments when you question your choices, and perhaps a cutting or two won’t make it. That’s perfectly okay! The key is to observe, learn, and try again. Be patient with your Lindsaea lancea, and enjoy the process of nurturing these delicate beauties. Happy propagating!
Resource:
https://identify.plantnet.org/k-world-flora/species/Lindsaea%20lancea%20(L.)%20Bedd./data