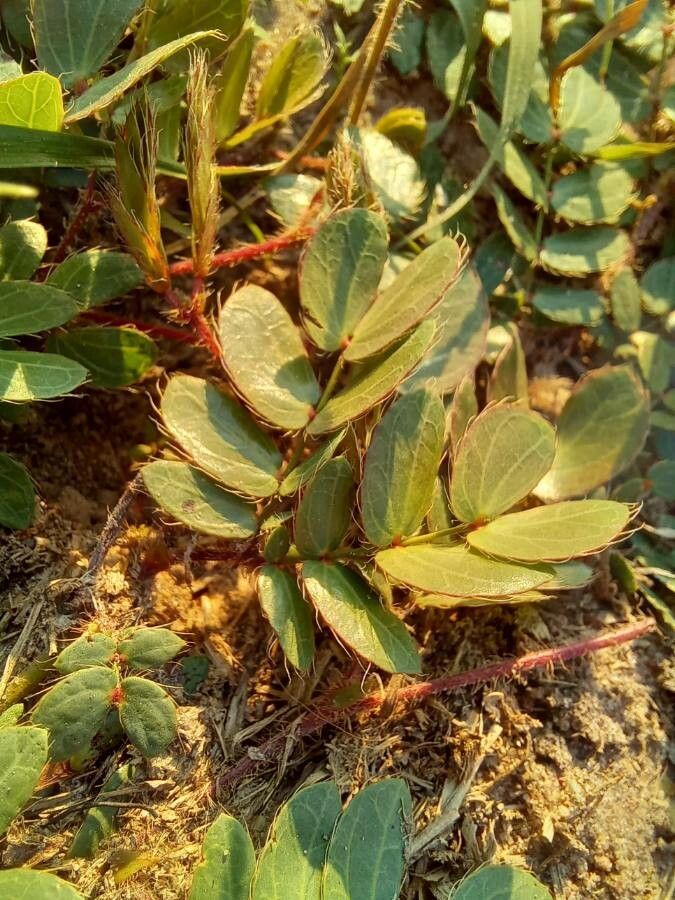
Oh, hello there! Pull up a chair and let’s chat about one of my absolute favorite plants to grow and multiply: Mimosa flagellaris. You know the one – that delicate, lacy foliage that shimmers with a silvery-green hue, often adorned with those charming little puffball flowers. It brings such an ethereal lightness to any garden or indoor space. And the best part? Sharing its beauty by propagating it yourself is incredibly rewarding. Now, I won’t lie, it’s not the absolute easiest plant for a complete novice to propagate, but with a little guidance and a touch of patience, you’ll be a Mimosa flagellaris pro in no time.
The Best Time to Start
For the highest success rate, I find the late spring or early summer to be your sweet spot. This is when the plant is actively growing, brimming with energy. You’ll want to take cuttings from healthy, vigorous stems that are neither brand new and soft nor old and woody. Think of it as grabbing a stem that’s just hitting its stride – firm but still pliable.
Supplies You’ll Need
Here’s what you’ll want to have on hand before you dive in:
- Sharp Pruning Shears or a Knife: Cleanliness is key! Make sure they’re disinfected.
- Well-Draining Potting Mix: A blend of perlite or vermiculite with your favorite potting soil works wonders. I often use about a 50/50 mix.
- Small Pots or Seed Trays: Anything clean and with drainage holes will do.
- Rooting Hormone (Optional but Recommended): This gives your cuttings a lovely little boost. Clonex is a personal favorite.
- Plastic Bags or a Propagator Lid: To create a humid microclimate.
- Watering Can with a Fine Rose or a Spray Bottle: Gentle watering is crucial.
Propagation Methods
My go-to method for Mimosa flagellaris is stem cuttings. It’s reliable and yields great results.
Stem Cuttings:
- Select Your Cuttings: With your clean shears, take cuttings that are about 4-6 inches long. Make the cut just below a leaf node (where a leaf attaches to the stem).
- Prepare the Cuttings: Gently remove the lower leaves, leaving about 2-3 sets of leaves at the top. If your leaf nodes are very close together, you might need to strip more leaves to avoid them rotting when contacting the soil.
- Apply Rooting Hormone (If Using): Dip the bottom inch of the cutting into your rooting hormone, coating the cut end and the nodes where leaves were removed. Tap off any excess.
- Potting Up: Fill your small pots with your prepared, moist potting mix. Make a small hole in the center of the soil with your finger or a pencil.
- Insert the Cuttings: Place the prepared cutting into the hole, ensuring the nodes where you removed leaves are below the soil surface. Gently firm the soil around the base of the cutting.
- Create Humidity: Water the soil gently. Then, cover the pot with a clear plastic bag, creating a tent over the cutting. Ensure the bag doesn’t touch the leaves too much. Alternatively, use a propagator lid.
- Provide Warmth and Light: Place the pots in a bright spot with indirect sunlight. A spot on a windowsill that doesn’t get harsh midday sun is perfect.
The “Secret Sauce” (Pro Tips)
Here are a couple of things I’ve learned over the years that make a real difference:
- Don’t Drown Your Dreams (or Your Cuttings!): While Mimosa flagellaris likes humidity, waterlogged soil is the enemy of cuttings. Ensure your soil mix is airy and that your pots have excellent drainage. If you’re using a plastic bag, open it for an hour or so each day to allow for some air circulation and prevent fungal issues.
- A Little Warmth Goes a Long Way: If your home tends to be on the cooler side, consider using a heating mat designed for propagation. Placing your pots on a gentle bottom heat can significantly speed up root development. You won’t need it to be scorching, just a cozy warmth.
Aftercare & Troubleshooting
Once you see new growth emerging from the top of your cuttings, that’s a fantastic sign! It usually means roots are forming below. Resist the urge to tug on them to check. After a few weeks, when the new growth is robust, you can gradually acclimate your new plants to normal household humidity. Start by taking the plastic bag off for longer periods each day.
The most common adversary you’ll face is rot. If your cuttings turn black and mushy at the base or the leaves start to wilt and yellow without explanation, it’s likely due to too much moisture and not enough air. Don’t be discouraged! Just start again with fresh cuttings and adjust your watering and humidity levels. Also, watch out for tiny pests like spider mites – they can sometimes be attracted to stressed cuttings.
A Little Encouragement
Growing new plants is a journey, and with Mimosa flagellaris, it’s a journey filled with delicate beauty. Be patient with your little cuttings. Some will take root faster than others. Embrace the process, watch for those tiny signs of life, and don’t be afraid to try again if something doesn’t work out the first time. Happy propagating!
Resource:
https://identify.plantnet.org/k-world-flora/species/Mimosa%20flagellaris%20Benth./data