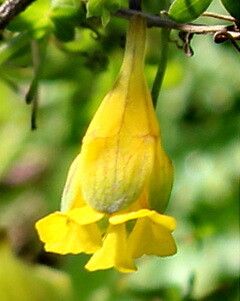
Hey there, fellow garden enthusiasts! Today, we’re diving into the wonderful world of Tropaeolum brachyceras, also known as the Yellow Nasturtium. If you haven’t met this gem yet, imagine delicate, ruffled, bright yellow blooms trailing or climbing with a persistent charm. It’s truly a showstopper in any garden, and the joy of creating more of these beauties from just one is practically unparalleled.
Now, you might be wondering if this is a project for the seasoned pro or if a beginner can jump right in. I’m happy to report that Tropaeolum brachyceras is wonderfully rewarding to propagate, and I’d say it’s quite accessible for most gardeners. With a little patience and a few key steps, you’ll be well on your way to a garden bursting with these cheerful flowers.
The Best Time to Start
For the highest success rates with Tropaeolum brachyceras, I always recommend starting in late spring or early summer. This is when the plant is actively growing and has plenty of robust energy to put into developing new roots. You want to work with healthy, non-flowering stems if possible. Think of it as tapping into the plant’s peak vigor – it’s just begging to grow!
Supplies You’ll Need
Gathering your supplies beforehand makes the whole process a breeze. Here’s what I usually have on hand:
- Sharp pruning shears or a clean knife: For making clean cuts.
- Rooting hormone (powder or gel): This is a personal preference, but I find it really helps give cuttings a boost.
- Well-draining potting mix: A good mix for me is usually equal parts peat moss or coco coir, perlite, and a bit of compost.
- Small pots or seed trays with drainage holes: Cleanliness is key here – wash them well!
- A misting bottle: For keeping humidity levels up.
- Plastic bags or a propagator: To create a mini-greenhouse effect.
- Water: For watering and misting.
Propagation Methods
We’ll focus on the most reliable way to get more Tropaeolum brachyceras: stem cuttings. This is where the magic truly happens!
- Select Your Cuttings: Gently look over your healthy Tropaeolum brachyceras plant. You’re searching for softwood or semi-hardwood stems that are at least 4-6 inches long. These are typically the newer growth. Avoid woody old stems or any that are currently flowering if you can.
- Make the Cut: Using your sharp shears or knife, make a clean cut just below a leaf node. A leaf node is where a leaf emerges from the stem – this is where the magic happens for root formation.
- Prepare the Cuttings: Carefully remove the lower leaves from the cutting, leaving just two or three sets of leaves at the top. If the leaves are very large, you can even cut them in half to reduce water loss as the cutting tries to establish itself.
- Apply Rooting Hormone: Dip the cut end of the stem into your rooting hormone. Swirl it gently to get an even coating. Tap off any excess.
- Plant Your Cuttings: Fill your small pots with your well-draining potting mix. Gently poke a hole in the center of the soil with your finger or a pencil. Insert the prepared cutting into the hole, ensuring the leaf nodes that were buried are now in contact with the soil. Firm the soil gently around the base.
- Water and Cover: Water the soil thoroughly but gently. You want it moist, not soggy. Now, here’s where we create that humid environment: cover the pot with a clear plastic bag or place it inside a propagator. You can use stakes to keep the plastic from touching the leaves.
The “Secret Sauce” (Pro Tips)
Over the years, I’ve learned a few little tricks that often make all the difference.
- Bottom Heat is Your Friend: If you have a heat mat designed for seedlings, placing your pots on it can significantly speed up root development. Tropaeolum brachyceras just loves that gentle warmth from below.
- Don’t Over-Mist (But Keep Them Humid!): While it’s crucial to maintain high humidity, I’ve found that avoiding letting the leaves sit in water for extended periods helps prevent fungal issues. Misting the air around the cuttings and the inside of the plastic cover is often better than directly soaking the leaves.
- Patience with the Nasturtium: Nasturtiums, in general, can be a bit slow to show obvious signs of rooting when you’re working with cuttings. Don’t be discouraged if you don’t see new growth immediately. Check gently for rooting about 3-4 weeks in by giving a very slight tug. If you feel resistance, roots are forming!
Aftercare & Troubleshooting
Once you start to see those first signs of new leaf growth, it’s a good indication that roots are developing well. Gradually acclimate your new plants to drier air by opening the plastic bag for a few hours each day before removing it completely. Continue to keep the soil consistently moist.
The most common issue you might encounter is rot. If you see a cutting turning mushy, black, or developing mold, it’s likely succumbed to a fungal infection, usually due to too much moisture and poor air circulation. Unfortunately, this usually means that particular cutting is lost. Prevent this by ensuring good drainage, not overwatering, and providing adequate air flow once they start to root.
A Word of Encouragement
Propagating Tropaeolum brachyceras is such a satisfying way to expand your collection. Be patient with the process; gardening is always a journey, and sometimes the slowest blooms are the most rewarding. Enjoy watching those little stems transform into thriving new plants – happy propagating!
Resource:
https://identify.plantnet.org/k-world-flora/species/Tropaeolum%20brachyceras%20Hook.%20&%20Arn./data