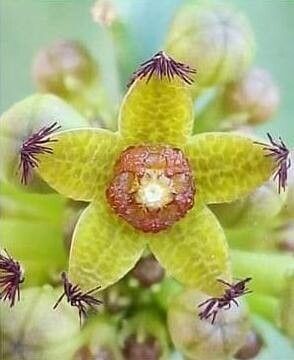
Hey there, fellow plant lovers! I’m so excited to chat with you today about a plant that has truly captured my heart over the years: Desmidorchis penicillata. This isn’t your everyday houseplant, and that’s part of its charm. If you’re looking for something a bit unique, with fascinating, almost sculptural growth and delicate blooms, you’re in for a treat. Propagating it might sound a little intimidating, but trust me, it’s a journey filled with rewarding moments. Desmidorchis penicillata is best described as moderately easy – not a throw-it-in-any-pot kind of plant, but definitely achievable with a little thoughtful care. It’s a wonderful way to share its beauty with friends or simply expand your own collection.
The Best Time to Start
When it comes to getting new Desmidorchis penicillata plants going, spring is your absolute best friend. Think of it as nature’s big wake-up call. The plant is gearing up for its most vigorous growth period, meaning any cuttings you take will have the best chance of developing strong roots and healthy new shoots. This is when they have the most energy to dedicate to growing!
Supplies You’ll Need
Gathering your tools before you begin makes the whole process so much smoother. Here’s what I reach for:
- Sharp, clean pruning shears or a sharp knife: Disinfection is key here to prevent spreading any unwelcome nasties. A quick dip in rubbing alcohol does the trick.
- A well-draining potting mix: I usually go for a special succulent or cactus mix, or I create my own by combining equal parts peat moss, perlite, and coarse sand.
- Small pots or propagation trays: Terracotta pots are great because they breathe and help prevent waterlogging.
- Rooting hormone (optional but recommended): This can give your cuttings a little extra nudge. Look for one formulated for stem cuttings.
- A spray bottle: For gently misting your cuttings.
- Labels: You’ll want to know what you planted and when!
Propagation Methods
Desmidorchis penicillata is primarily propagated through stem cuttings, and it’s quite a satisfying method to master.
-
Take Your Cuttings: Look for healthy, mature stems that are at least 3-4 inches long and have a few sets of leaves. Using your sterilized pruning shears or knife, make a clean cut just below a leaf node. A leaf node is that little bump where a leaf emerges from the stem – that’s where the magic (roots!) will happen.
-
Let Them Callus: This is a crucial step for succulents and succulent-like plants. Before planting, let your cuttings air dry in a well-ventilated spot for 2-3 days, or even up to a week. A callus will form over the cut end. This protective layer prevents rot when the cutting is placed in soil.
-
Apply Rooting Hormone (Optional): Once callused, you can dip the cut end into rooting hormone powder, tapping off any excess.
-
Plant Your Cuttings: Fill your small pots with your prepared well-draining soil. Make a small hole in the center with your finger or a pencil. Gently insert the callused end of the cutting into the hole. Firm the soil gently around the base to ensure good contact.
-
Initial Watering: After planting, give your cuttings a light watering. You don’t want to drown them, just moisten the soil.
The “Secret Sauce” (Pro Tips)
Now, for a couple of tricks I’ve learned over the years that can really make a difference:
- Don’t let leaves touch the soil: When you’re planting, or if your cuttings have leaves close to the cut end, try to keep those leaves above the soil line. Any foliage submerged in soil is more prone to rot, and we want to avoid that at all costs! Sometimes I even trim off the lowest leaves if they’re getting too close.
- Bottom heat is your friend: If you can provide gentle bottom heat, your cuttings will thank you for it. A seedling heating mat, set to a low temperature, can significantly speed up root development. It mimics the warmth of spring soil and really encourages those roots to start exploring.
Aftercare & Troubleshooting
Once your cuttings are planted, patience is key. Keep them in a bright location, but out of direct, harsh sunlight for the first few weeks. This protects their delicate cuttings from scorching.
Water sparingly. Allow the soil to dry out almost completely between waterings. Overwatering is the quickest way to a soggy, rotted end. You can lift the pot to feel its weight – a light pot means it’s time for a drink.
You’ll know roots are forming when you see new growth appearing at the top of the stem, or when you gently tug on the cutting and feel a bit of resistance. This usually takes anywhere from 4-8 weeks, sometimes longer.
Watch out for signs of rot: a mushy, black stem base is a clear indicator. If you see this, unfortunately, that cutting is probably lost. Preventative measures like proper callusing, well-draining soil, and careful watering are your best defense. If you catch a bit of rot early, you might be able to salvage the healthy part of the stem by taking a new cutting from it, letting it callus, and starting again.
A Encouraging Closing
Watching a new plant emerge from a simple cutting is one of the most rewarding aspects of gardening, in my opinion. Don’t be discouraged if your first attempts aren’t perfectly successful. Each try is a learning experience! Be patient with your Desmidorchis penicillata cuttings, give them consistent, thoughtful care, and enjoy the delightful process of bringing new life into your home. Happy propagating!
Resource: