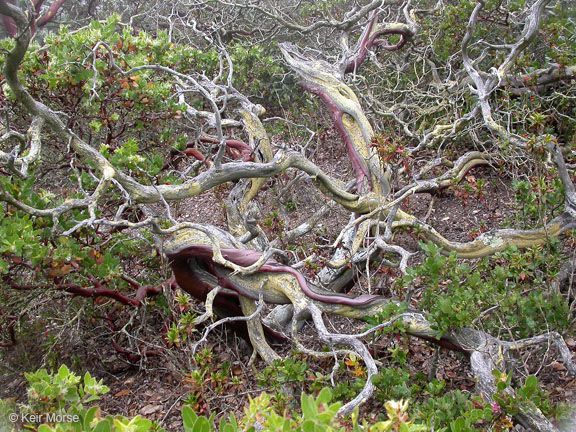
Hey there, fellow garden enthusiasts! Today, we’re diving into the wonderful world of a truly special native shrub: Arctostaphylos viridissima, often known as the Greenleaf Manzanita. If you’re looking for a plant that offers stunning architecture, beautiful rosy-pink flowers in late winter, and fantastic wildlife appeal with its berries, you’re in for a treat. And the best part? Learning to propagate this beauty yourself is incredibly rewarding. Now, I’ll be honest, Greenleaf Manzanita can be a bit fussy to start from scratch, so it might not be the easiest plant for a brand-new propagator, but with a little care and patience, you can absolutely do it!
The Best Time to Start
For stem cuttings, which is my go-to method for Manzanitas, timing is everything. You’ll want to aim for mid to late spring or early summer. This is when the plant is actively growing, and you can take what we call “softwood” or “semi-hardwood” cuttings. Think of it as grabbing a stem that’s green and flexible but has just started to firm up a little. These cuttings have the energy to root.
Supplies You’ll Need
Gathering your tools beforehand makes the whole process smoother. Here’s what I always have on hand:
- Sharp Pruning Shears or a Sharp Knife: Clean cuts are crucial.
- Rooting Hormone: A good powder or gel will give your cuttings a helpful boost.
- Propagating Mix: I like a gritty, well-draining blend. A good starting point is half perlite and half peat moss or coco coir. Some folks use coarse sand, too. The key is drainage!
- Small Pots or Trays: Clean pots are a must to avoid disease. Small ones are perfect for cuttings.
- Plastic Bags or a Propagator Dome: To create a humid environment.
- Labels and a Marker: To keep track of what you’ve planted and when.
- Watering Can with a Fine Rose: Gentle watering is important.
- Bottom Heat (Optional but Recommended): A heating mat can really speed up root development.
Propagation Methods: Stem Cuttings
This is where the magic happens!
- Take Your Cuttings: Head out to your Greenleaf Manzanita when the conditions are right. Look for healthy, non-flowering stems. Using your clean shears, snip off pieces that are about 4-6 inches long. Make sure each cutting has at least a couple of sets of leaves. Cut just below a leaf node (where a leaf attaches to the stem) – this is usually where the best rooting happens.
- Prepare the Cuttings: Gently remove the lower leaves from the bottom half of the cutting. This prevents them from rotting when buried in the soil.
- Apply Rooting Hormone: Dip the cut end of the stem into your rooting hormone, tapping off any excess.
- Plant Your Cuttings: Fill your clean pots with your prepared propagating mix. Make a small hole with a pencil or your finger. Carefully insert the base of the cutting into the hole, making sure the rooting hormone coating stays intact. Gently firm the soil around the cutting.
- Water Gently: Water the soil thoroughly but gently, using your watering can with a fine rose. You want the soil to be moist but not waterlogged.
- Create Humidity: Place a plastic bag loosely over the pot, or put the pots inside a propagator with a lid. This traps moisture and keeps the cuttings from drying out. If you’re using a bag, you might want to prop it up with sticks so it doesn’t touch the leaves.
- Place in a Bright Spot: Find a bright spot that gets indirect sunlight. Direct sun will scorch your tender cuttings.
The “Secret Sauce” (Pro Tips)
Here are a few little tricks I’ve learned over the years that make a big difference:
- Don’t let the leaves touch the water: If you’re using a misting system or are worried about the humidity within your propagation dome, make sure the lower leaves are trimmed so they aren’t sitting in any standing water. Rot is the enemy here!
- Bottom Heat is your friend: While not strictly necessary, placing your pots on a seedling heat mat can significantly speed up the rooting process. Manzanitas often prefer a bit of warmth at their base to encourage roots to form.
- Be patient with the Medium: A truly gritty mix is non-negotiable for Manzanitas. They hate sitting in soggy soil. If you’re unsure about your mix, err on the side of making it even more open and airy.
Aftercare & Troubleshooting
Once your cuttings have rooted – this can take anywhere from 6 weeks to several months – you’ll see new growth appearing! That’s your sign of success.
- Acclimatize: Gradually introduce your rooted cuttings to less humid conditions. You can start by opening the plastic bag or propagator lid for a few hours each day.
- Potting Up: Once they have a good root system, you can carefully pot them into slightly larger containers with a well-draining potting mix, perhaps one that’s a bit richer than your propagating mix, but still with good drainage.
- Watering: Water them when the top inch of soil feels dry. Don’t overwater! This is the most common mistake.
- Troubleshooting: The biggest worry is rot. If your cuttings turn black and mushy, it’s usually a sign of too much moisture and not enough air circulation. If you see this, try to improve drainage and air flow immediately. Sometimes, sad, wilting cuttings are simply drying out. If you gently tug on a cutting and feel resistance, that’s a good sign roots are forming. If it pulls out easily with no resistance, it likely hasn’t rooted.
A Little Encouragement
Propagating plants, especially those with a bit of a personality like the Greenleaf Manzanita, is a journey. Not every cutting will make it, and that’s perfectly okay. Celebrate the successes, learn from the failures, and most importantly, enjoy the process of nurturing new life. Happy propagating!
Resource: