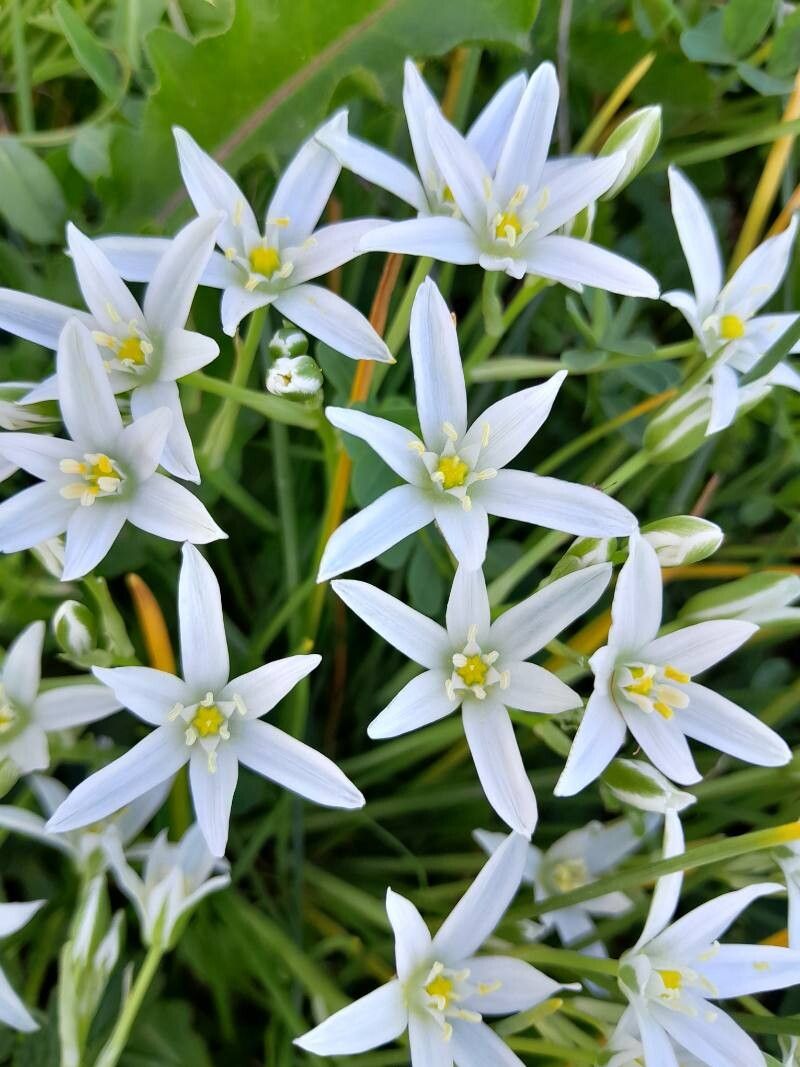
Oh, hello there! Pull up a chair, and let’s chat about a truly special plant: Ornithogalum divergens. If you’re looking for something a little out of the ordinary, something with delicate, starry blooms that seem to glow, then this is it. I’ve nurtured these beauties for years, and honestly, propagating them has become one of my favorite gardening pastimes. It’s incredibly rewarding to watch a tiny piece of a plant transform into a whole new life.
Now, for the big question: is it beginner-friendly? I’d say it’s moderately easy. It’s not a plant that throws a tantrum if you miss a watering, but it does appreciate a bit of thoughtful care. With a few pointers, you’ll be well on your way to a flourishing collection.
The Best Time to Start
For Ornithogalum divergens, the sweet spot for propagation is really during its active growing season. Think late spring through early summer. This is when the plant is full of energy, producing new shoots and bulbs, which means it’s more inclined to take root. Avoid propagating when the plant is dormant or stressed.
Supplies You’ll Need
Here’s a little kit to get you going:
- Sharp Pruning Shears or a Clean Knife: For making clean cuts. Sterilize them!
- Well-Draining Potting Mix: I often use a 50/50 blend of good quality potting soil and perlite or coarse sand.
- Small Pots or Seed Trays: With drainage holes, of course.
- Rooting Hormone (Optional but Recommended): A shallow dish to dip your cuttings into.
- Watering Can or Mister: For gentle hydration.
- Labels: To keep track of what you’ve planted!
Propagation Methods
Ornithogalum divergens is most commonly propagated through offsets (baby bulbs) and, with a little more finesse, leaf cuttings.
Propagating with Offsets (Bulblets)
This is my go-to method, and it’s quite foolproof.
- Gently Excavate: When your Ornithogalum is finished flowering and the foliage starts to yellow, it’s time. Carefully tip the pot on its side or gently loosen the soil around the base of the plant. You’re looking for little baby bulbs (offsets) attached to the main bulb.
- Separate with Care: Using your fingers or a clean knife, gently twist or cut the offsets away from the parent bulb. Try to keep a tiny bit of the parent bulb’s base attached if possible, though they can often root from scratch.
- Let Them Callus (Optional but Good): If you have time, let the offsets sit out in a dry, airy spot for a day or two. This helps the cut surface dry and heal, reducing the risk of rot.
- Plant Them Up: Fill your small pots with your prepared potting mix. Make a little hole and plant the offsets about an inch deep, with the pointed end (if you can see one) facing up.
- Water Lightly: Give them a gentle watering. It’s better to err on the side of underwatering at this stage. Place them in bright, indirect light.
- Be Patient: Roots should start to form within a few weeks to a couple of months, depending on the conditions.
Propagating with Leaf Cuttings
This method requires a bit more patience and careful observation.
- Select Healthy Leaves: Choose robust, healthy leaves from a mature plant.
- Make the Cut: Using your sterilized shears, cut the leaf into sections, each about 2-3 inches long. You can also try just inserting the entire base of the leaf, similar to how you would propagate a Sansevieria.
- Dip in Rooting Hormone: If using, dip the cut end of each leaf section into rooting hormone.
- Plant the Cuttings: Insert the cut end of the leaf sections about half an inch deep into your well-draining potting mix. If you’re using whole leaves, just insert the base.
- Provide Humid Conditions: This is crucial! You can cover the pot with a clear plastic bag or place it in a mini-greenhouse. Just make sure there’s a little airflow to prevent mold.
- Keep Warm and Bright: Place them in a warm spot with bright, indirect light.
- The Waiting Game: This method can take several months. You’re looking for tiny bulblets to form at the base of the cutting.
The “Secret Sauce” (Pro Tips)
- Don’t Overwater Those New Shoots! This is probably the most common pitfall. Young offsets and leaf cuttings are susceptible to rot. Let the soil surface dry out between waterings. You’ll learn to tell by the weight of the pot.
- Bottom Heat Works Wonders: If you’re propagating leaf cuttings, placing the pot on a gentle seedling heat mat can significantly speed up root development. It mimics the warmth the soil would naturally receive in its prime growing season.
- Observe Your Bulbs: When dealing with offsets, sometimes they just need a little time to establish themselves. Don’t be discouraged if one doesn’t take immediately. Some will thrive while others might need a second try next season.
Aftercare & Troubleshooting
Once you see signs of new growth – a tiny shoot or a hint of a root peeking out – it’s time to adjust.
- Gentle Watering: Continue to water sparingly. As the plant grows larger, you can gradually increase the frequency, but always ensure good drainage.
- Light Levels: Move your new plants into brighter, indirect light. They can handle a bit more sun as they mature, but avoid harsh midday rays initially.
- Repotting: When your new bulbs have grown to a decent size and filled their initial pot, you can carefully transplant them into slightly larger containers with fresh potting mix.
The most common issue you’ll face is rot, often caused by overwatering. If you notice a bulb turning mushy, brown, and smelly, it’s usually a lost cause. Promptly remove it to prevent it from affecting other cuttings. Another sign of trouble can be a lack of growth after a long period, which might indicate the cutting wasn’t viable or conditions aren’t quite right.
A Encouraging Closing
Growing plants from cuttings is a testament to nature’s resilience and your own nurturing spirit. Be patient with your Ornithogalum divergens. Some take their time, and that’s perfectly okay. Enjoy the process, celebrate the small victories, and before you know it, you’ll have a delightful scattering of these star-like beauties gracing your garden or home. Happy propagating!
Resource:
https://identify.plantnet.org/k-world-flora/species/Ornithogalum%20divergens%20Boreau/data