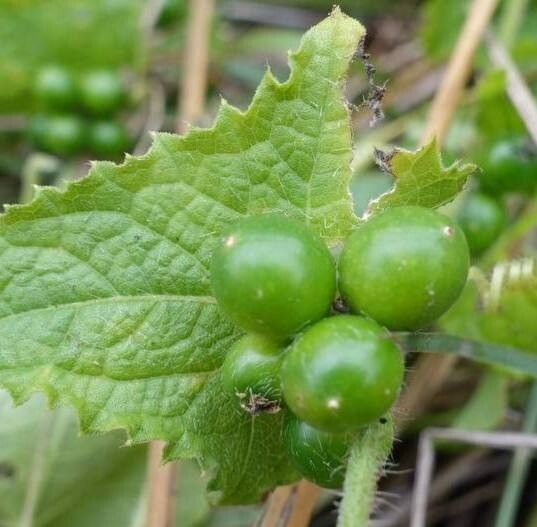
Hey there, fellow plant lovers! I’m so excited to chat with you today about a truly special plant: Cucumis maderaspatanus. You might know it as the Madagascar Cucumber or, more poetically, the “Clock Vine” for its wonderful, fast-growing tendrils that seem to keep perfect time with the sun. This plant is a gem for its beautiful, often deeply lobed leaves and the delicate, star-shaped yellow flowers it produces. Plus, the sheer joy of watching it unfurl and fill a space is incredibly rewarding.
Now, if you’re new to the plant propagation game, don’t you worry. Cucumis maderaspatanus is a pretty generous plant when it comes to making more of itself. I’d say it’s moderately easy, making it a fantastic project for beginners looking to expand their green collection without too much fuss.
The Best Time to Start
My favorite time to get propagating Cucumis maderaspatanus is when the plant is in its active growing season. Think late spring or early summer. You’ll want to take cuttings from healthy, vigorous stems that are neither brand new and wispy nor old and woody. These are the ones that have all the energy to root and take off.
Supplies You’ll Need
To set yourself up for success, gather these essentials:
- Sharp pruning shears or a clean knife: for making those crucial cuts.
- Rooting hormone powder or gel: this is optional but can really give your cuttings a boost.
- Well-draining potting mix: a good blend of peat moss, perlite, and a little bit of compost works wonders. You can also use a seed-starting mix.
- Small pots or trays: with drainage holes, of course!
- A watering can or spray bottle: for gentle hydration.
- Plastic bags or a propagator: to create a humid environment.
- Optional: A heat mat: for a little extra warmth at the roots.
Propagation Methods
Cucumis maderaspatanus really shines when propagated from stem cuttings. It’s straightforward and highly effective.
Stem Cuttings: My Go-To Method
- Select your cutting: Look for a healthy stem that’s about 4-6 inches long. Make sure it has at least two to three sets of leaves.
- Make the cut: Using your clean shears or knife, make a cut just below a leaf node (where a leaf meets the stem). This is where the magic happens and roots are most likely to form.
- Prepare the cutting: Gently remove the lower leaves from the cutting, leaving only the top two or three leaves. If these top leaves are very large, you can even snip them in half to reduce water loss.
- Rooting hormone (optional): Dip the cut end into rooting hormone, tapping off any excess.
- Planting: Fill your small pots or tray with your well-draining potting mix. Make a small hole in the center and insert the cutting, ensuring the nodes where you removed the leaves are buried. Gently firm the soil around the stem.
- Water and cover: Water the soil thoroughly but gently. Then, cover the pot or tray with a plastic bag or dome to create a mini-greenhouse. This keeps humidity high, which is crucial for rooting.
Water Propagation (A Fun Alternative)
If you’re feeling adventurous or just want to watch the roots grow, you can try water propagation:
- Prepare your cutting: Follow steps 1-3 above.
- Place in water: Put the prepared cutting in a clean jar or glass filled with fresh water. Ensure the leaf nodes are submerged but don’t let the leaves themselves touch the water.
- Location: Place the jar in a bright spot, but out of direct sunlight.
- Change water: Change the water every few days to keep it fresh and prevent bacterial growth.
- Wait for roots: You should see roots forming in a couple of weeks. Once the roots are about an inch long, you can carefully transplant them into your potting mix.
The “Secret Sauce” (Pro Tips)
Here are a couple of things I’ve learned that make a big difference:
- Bottom Heat is Your Friend: Even a little warmth from a gentle heat mat placed underneath your pots can dramatically speed up root development. It mimics the conditions a cutting would experience in warmer soil outdoors.
- Don’t Crowd Them: While it’s tempting to pack lots of cuttings into one pot, give them a little space. This improves air circulation, which helps prevent fungal issues and gives each cutting the best chance to thrive.
- Patience with the Potting Mix: For stem cuttings, I like to let the cut end callous over for a few hours before dipping it in rooting hormone and planting. This can help prevent rot.
Aftercare & Troubleshooting
Once you start seeing new growth on your cuttings, that’s a great sign roots are forming! You can gently tug on the stem to feel for resistance.
- Gradual Acclimation: If you’ve used a plastic bag or dome, gradually introduce your new plants to normal humidity over a few days by opening the bag or propagator a little more each day.
- Watering: Water when the top inch of soil feels dry. Avoid overwatering, which is the quickest way to invite root rot – a common foe. If your cutting turns yellow and mushy, it’s likely a sign of rot, and sadly, it’s often too late to save. You might also see wilting or a blackening stem base.
A Encouraging Closing
Propagating Cucumis maderaspatanus is such a rewarding process. It’s a chance to witness life unfurling right before your eyes. Be patient with your little green charges; they take their time. Enjoy the journey, and soon you’ll have an abundance of these beautiful vines to share or to fill your home with leafy goodness! Happy planting!
Resource:
https://identify.plantnet.org/k-world-flora/species/Cucumis%20maderaspatanus%20L./data