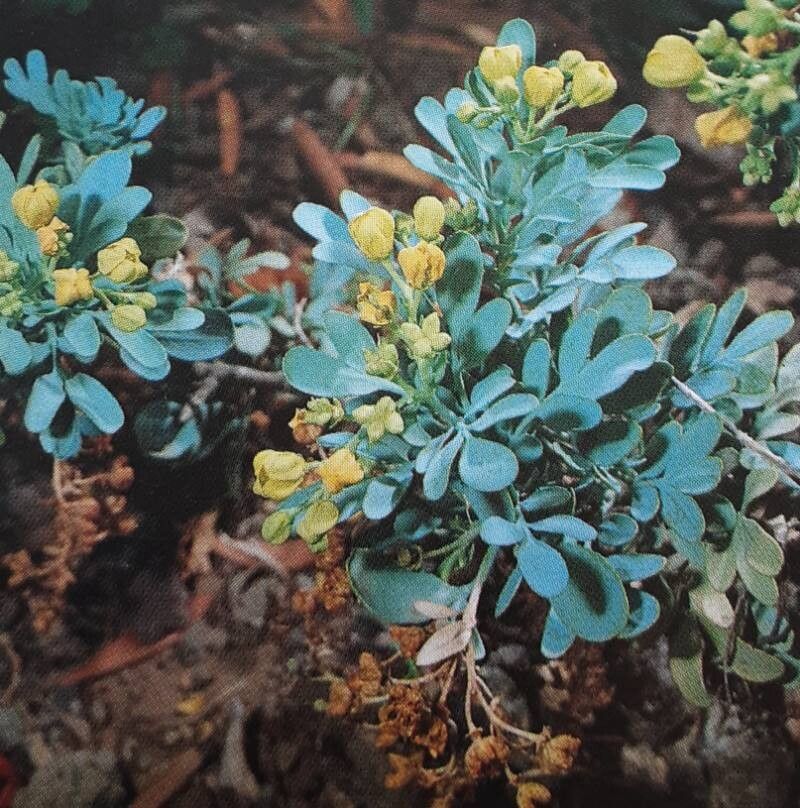
Hello, fellow plant lovers! Back in the garden again, and today we’re diving into the delightful world of Ruta oreojasme. If you’re drawn to its unique, almost architectural beauty and fragrant foliage, you’re in for a treat. Propagating this beauty is a wonderfully rewarding way to multiply your collection or share its charm with friends. For those just starting their plant journey, I’d say Ruta oreojasme is moderately easy to propagate. It requires a bit of attention, but with a few key steps, you’ll be well on your way to success.
The Best Time to Start
My favorite time to get new Ruta oreojasme babies going is in late spring to early summer. This is when the plant is actively growing and has plenty of energy. You’ll find it much easier to get cuttings to root when the days are longer and warmer. Avoid trying to propagate during the heat of dead summer or when things are cooling down for autumn; aim for that sweet spot of vigorous growth.
Supplies You’ll Need
Here’s what I always have on hand:
- Sharp pruning shears or a clean knife: Precision is key for clean cuts.
- Rooing hormone powder (optional but helpful): This little boost can make a big difference.
- Well-draining potting mix: I like a blend of peat moss, perlite, and a bit of coarse sand. A cactus or succulent mix works wonders here too.
- Small pots or seed trays: Whatever you have that’s clean and has drainage holes.
- A spray bottle: For gentle misting.
- Labels and a marker: To keep track of your projects!
- A clear plastic bag or propagator: To create a humid environment.
Propagation Methods
Let’s get our hands dirty!
1. Stem Cuttings: This is my go-to method for Ruta oreojasme.
- First, select a healthy, non-flowering stem from your mature plant. Look for one that’s sturdy but not woody.
- Using your clean shears, take a cutting about 4-6 inches long. Make the cut just below a leaf node (where a leaf attaches to the stem).
- Gently remove the lower leaves from the cutting, leaving just the top few to catch the light. This prevents them from rotting in the soil.
- If you’re using rooting hormone, dip the cut end into the powder, tapping off any excess.
- Prepare your pots with the well-draining mix. Make a small hole in the center with your finger or a pencil.
- Insert the cutting into the hole, making sure at least one leaf node is buried in the soil. Gently firm the soil around the base.
- Water gently to settle the soil.
- Cover the pot with a clear plastic bag or place it in a propagator to maintain high humidity. This is crucial! Make sure the leaves don’t touch the plastic.
2. Water Propagation (for the patient observer): While I prefer soil for Ruta oreojasme, you can try rooting cuttings in water.
- Follow the same steps as above for taking and preparing stem cuttings, but skip the rooting hormone.
- Place the cuttings in a jar or glass of clean water, ensuring the leaf nodes are submerged. Crucially, ensure no leaves are touching the water. This will cause them to rot.
- Place the jar in a bright spot out of direct sunlight.
- Change the water every few days to keep it fresh.
- You’ll see roots emerge within a few weeks. Once the roots are about an inch long, carefully pot them into soil, treating them like the stem cuttings above, ensuring they get the same humid environment.
The “Secret Sauce” (Pro Tips)
Here are a few tricks I’ve learned over the years:
- Bottom Heat is Your Friend: If you have a heated propagator or can place your pots on a heat mat, this can significantly speed up root development. Ruta oreojasme loves a bit of warmth from below, especially during cooler indoor temperatures.
- Don’t Overwater, But Don’t Let Them Dry Out: This is a delicate balance. The soil should be consistently moist but never soggy. Overwatering is the quickest way to invite rot. Check the soil moisture by feeling it with your finger.
- Patience with New Growth: You’ll know your cutting has taken root when you see new, tiny leaves unfurling at the top. This can take anywhere from 3 weeks to a couple of months. Until then, resist the urge to tug on the cutting!
Aftercare & Troubleshooting
Once you see those encouraging signs of new growth, it’s time to transition your little ones.
- Gradually Acclimate: If your cuttings are under a plastic bag, start by opening it for a few hours each day, increasing the time until you can remove it completely. This helps them adjust to lower humidity.
- Continue Watering as Needed: Keep the soil lightly moist. They’ll still be establishing a strong root system.
- Watch for Rot: The most common issue is stem or root rot. This usually happens from overwatering or poor drainage. If you notice a cutting turning mushy and black, it’s sadly best to discard it to prevent it from spreading. Keep an eye on the leaves; if they look yellow and wilted with no sign of new growth, it could also indicate too much or too little water.
A Little Patience Goes a Long Way
There you have it! Propagating Ruta oreojasme is a journey, and like any good garden project, it thrives on a bit of care and a whole lot of patience. Don’t be discouraged if your first attempt isn’t perfect. Each plant we grow teaches us something new. Enjoy the process, celebrate every little new leaf, and soon you’ll have a whole happy family of Ruta oreojasme to brighten your space! Happy gardening!
Resource:
https://identify.plantnet.org/k-world-flora/species/Ruta%20oreojasme%20Webb/data