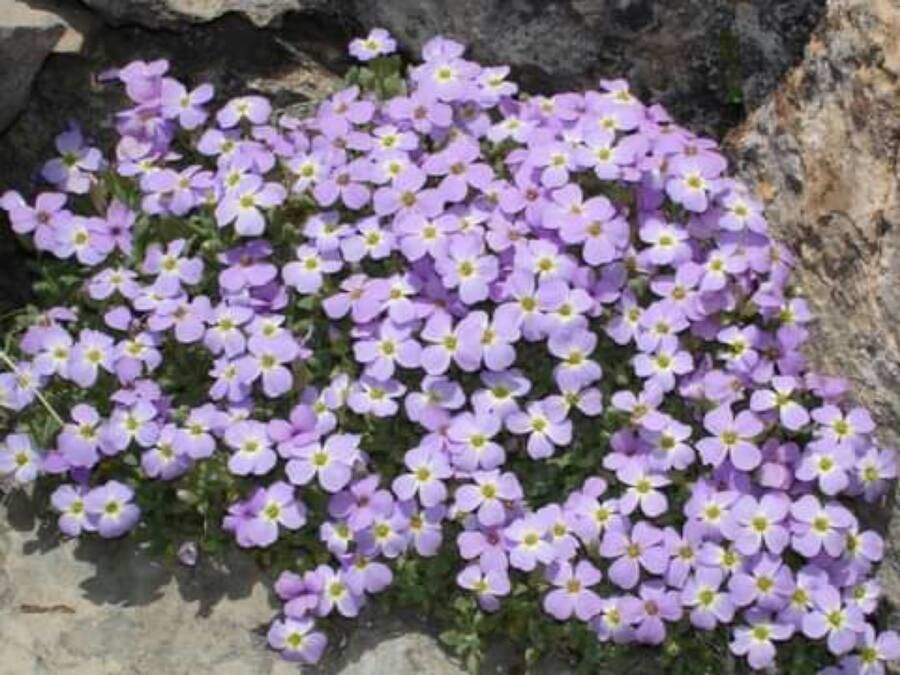
Oh, Aubrieta libanotica! If you’ve ever seen these beautiful mats of tiny, vibrant flowers carpeting a rock garden or spilling over a wall, you know exactly why I adore them. They’re like jewels in the spring, a real splash of color when we gardeners are all craving it most. And the best part? They’re surprisingly easy to share! Propagating them has always been one of my favorite little gardening joys. For beginners, you’ll be happy to know this is a very forgiving plant. You’re in for a treat!
The Best Time to Start
For the highest success rate with Aubrieta, I’ve found that late spring or early summer is your golden window. After the main flowering flush has passed, the plant is putting out lovely new, soft growth. This tender new material is much more eager to root than the older, woody stems. Think of it like a young sapling versus an old oak – much more flexible and ready to get going.
Supplies You’ll Need
Gathering your tools makes the whole process smoother. Here’s what I always have on hand:
- Sharp pruning shears or a clean knife: For making neat cuts.
- Rooting hormone powder or gel: While not strictly necessary for Aubrieta, it can give you a bit of an extra boost.
- A well-draining potting mix: I like a mix of about two parts peat moss or coco coir, one part perlite, and one part fine grit or coarse sand. This ensures good aeration.
- Small pots or seedling trays: Clean, with drainage holes, of course!
- A spray bottle: For gentle misting.
- A plastic bag or transparent cover: To create a mini-greenhouse effect.
- (Optional) A heated propagator or heat mat: This can really speed up root development.
Propagation Methods
Let’s get our hands dirty! For Aubrieta, I find stem cuttings to be the absolute easiest and most reliable method.
- Take Your Cuttings: Head out to your plant in late spring or early summer. Look for those non-flowering, soft, green shoots that are about 3-4 inches long. Using your sharp secateurs or knife, make a clean cut just below a leaf node (where a leaf joins the stem). This is where the magic happens!
- Prepare the Cuttings: Gently remove the lower leaves from your cuttings. You only want to leave a couple of leaves at the very tip. This prevents them from rotting in the soil.
- Apply Rooting Hormone (Optional but Recommended): Dip the cut end of each cutting into your rooting hormone powder or gel. Tap off any excess.
- Plant Your Cuttings: Fill your small pots or trays with your prepared, well-draining mix. You can pop a few cuttings into each pot, or dedicate individual pots. Gently insert the cut end of each cutting into the soil, about an inch deep, making sure the remaining leaves aren’t touching the soil surface.
- Water and Cover: Water the soil gently but thoroughly. Then, cover the pots with a clear plastic bag or a dome lid. This is crucial for maintaining humidity, which is vital for cuttings to root.
The “Secret Sauce” (Pro Tips)
Here are a couple of little things I’ve learned over the years that can really make a difference:
- Don’t let those leaves touch the water! I know I mentioned it, but it bears repeating. If the lower leaves get soggy, they’re guaranteed to rot before the cutting even has a chance to root. Keep them elevated!
- Bottom heat is your friend. If you have the space and a propagator, placing your pots on a gentle heat mat can seriously speed up the rooting process. It mimics the warm soil that roots love to grow into. Plus, it makes them feel so cozy!
- Label everything! Even if you’re only propagating one variety, trusty labels can save you confusion later on, especially if you start propagating other plants.
Aftercare & Troubleshooting
Once your cuttings are potted, find them a bright spot, but avoid direct, scorching sun for the first few weeks. Keep the soil consistently moist but not waterlogged. A light misting with your spray bottle every few days, especially if you don’t have a very tight cover, will help keep things hydrated.
You’ll know your cuttings are rooting when you see new green growth appearing at the tips. You can also give them a very gentle tug – if there’s resistance, you have roots! This usually takes anywhere from 3 to 6 weeks. Once they’ve clearly rooted and are showing new growth, you can gradually remove the plastic cover to let them acclimatize to normal humidity.
Now, what if things go wrong? The most common culprit for Aubrieta cuttings is rot. If you see your cuttings turning black and mushy, it’s usually a sign of too much moisture and not enough air circulation. This is why that airy soil mix and the drainage holes are so important. If you suspect rot, remove the affected cuttings immediately.
A Encouraging Closing
Don’t be discouraged if not every single cutting takes. Gardening is a journey, and propagation is all about learning and experimenting. Be patient, enjoy the process of nurturing these little bits of plant life, and soon you’ll have beautiful new Aubrieta plants to fill your garden with even more color. Happy propagating!
Resource:
https://identify.plantnet.org/k-world-flora/species/Aubrieta%20libanotica%20Boiss.%20&%20Hohen./data