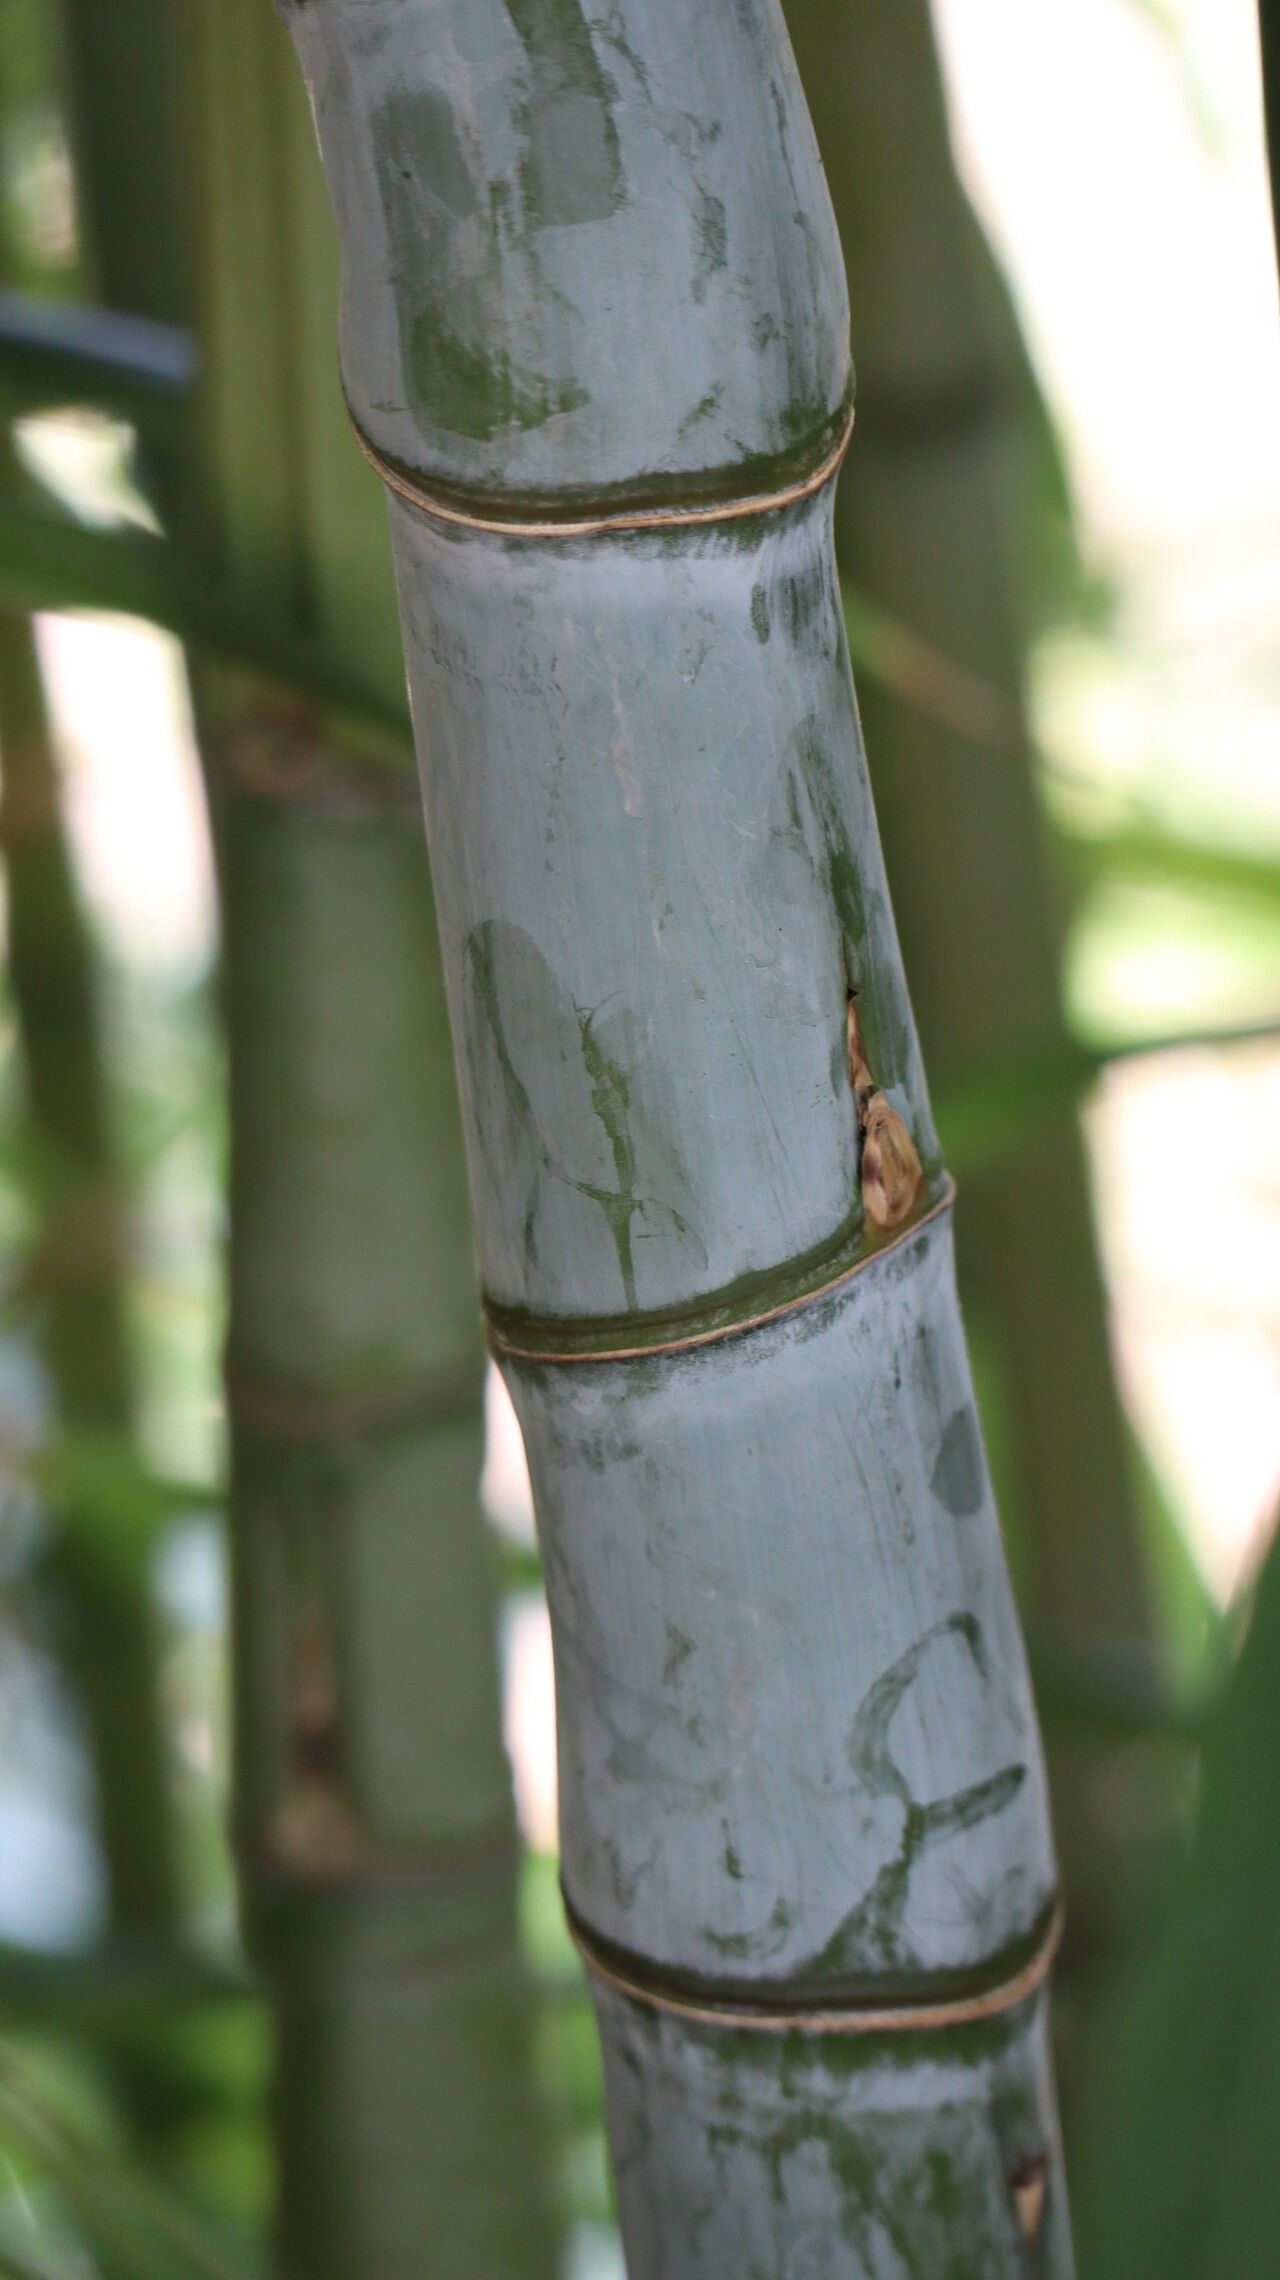
Hello, fellow plant enthusiasts! I’m so delighted to share some wisdom today about a plant that truly captures the heart: Himalayacalamus hookerianus. You know, the one with those graceful, arching culms and that beautiful, almost ethereal, powdery blue-green hue? It’s a real stunner in any garden, adding a touch of the exotic and a whisper of the Himalayas.
Propagating this beauty is not just about getting more plants; it’s about expanding your own little green sanctuary and sharing that joy with others. It’s a deeply satisfying process, and honestly, after 20 years of playing with plants, I can tell you that while it might seem a little intimidating at first, it’s quite achievable.
So, let’s dive in and learn how to multiply your Himalayacalamus hookerianus!
The Best Time to Start
For Himalayacalamus hookerianus, you’ll have the best luck if you propagate during its active growing season, which is typically late spring to early summer. This is when the plant has plenty of energy reserves to dedicate to developing new roots. You’re looking for new, vigorous growth, not old, woody stems.
Supplies You’ll Need
Gathering your tools beforehand makes the whole process so much smoother. Here’s what I always have on hand:
- Sharp Pruning Shears or a Knife: Make sure they are clean and sterilized to prevent disease.
- Rooting Hormone (Optional but Recommended): A good quality powder or gel can significantly boost your success rate, especially with trickier propagations.
- Well-Draining Potting Mix: I swear by a blend of equal parts coco coir, perlite, and a bit of compost. It keeps things airy and prevents waterlogging.
- Small Pots or Trays: Seedling pots or even repurposed yogurt containers with drainage holes work perfectly.
- Watering Can or Spray Bottle: For gently moistening the soil.
- Plastic Bag or Cloche: To create a humid environment for cuttings.
- Labels and a Marker: To keep track of your propagation efforts!
Propagation Methods
Now, for the exciting part! There are a couple of ways we can go about this, and I find both to be quite effective with Himalayacalamus hookerianus.
Stem Cuttings: My Go-To Method
This is where we take a piece of the parent plant and encourage it to grow roots into a new, independent plant.
- Select Your Cutting: Look for a healthy stem that hasn’t flowered yet. Aim for a piece that’s about 6-8 inches long and has at least two or three nodes (the small bumps where leaves emerge).
- Make the Cut: Using your clean shears, make a clean cut just below a node. This is where the magic of root development often starts.
- Prepare the Cutting: Gently remove the lower leaves from the cutting, leaving just one or two at the very top. This prevents them from rotting in the soil. You can also lightly scrape a small section of the bark near the bottom node to expose the cambium layer, which can help with rooting.
- Apply Rooting Hormone: Dip the cut end of the stem into your rooting hormone, tapping off any excess.
- Plant Your Cutting: Fill your small pot with your well-draining potting mix. Make a small hole with your finger or a pencil and carefully insert the cutting, ensuring at least one node is buried in the soil. Gently firm the soil around the base.
- Provide Humidity: Water the soil lightly until it’s moist but not soggy. Then, cover the pot with a plastic bag or place it under a cloche. This creates a mini-greenhouse, keeping the humidity high for the cutting. You can poke a few holes in the bag for a little air circulation.
Division: Expanding from the Base
If your Himalayacalamus hookerianus is already a mature clump, division is a fantastic way to get multiple new plants.
- Prepare the Parent Plant: Water the plant well a day or two before you plan to divide it. This helps the roots stay hydrated during the process.
- Carefully Remove from Pot: Gently slide the entire plant out of its pot.
- Loosen the Root Ball: You want to gently separate the clump into smaller sections. You can use your hands to tease the roots apart, or if it’s very dense, a clean spade or sharp knife can be used to cut through the root ball.
- Ensure Each Division Has Roots and Shoots: Each new division should have a good portion of roots and at least one or two healthy shoots.
- Replant: Pot each division into its own container with your fresh potting mix, or replant it directly into the ground if the conditions are right. Water thoroughly.
The “Secret Sauce” (Pro Tips)
Here are a few little tricks I’ve learned over the years that can make a difference:
- Don’t Let Those Leaves Touch the Water! If you choose to root cuttings in water (though I find soil is generally more reliable for Himalayacalamus hookerianus), make sure no leaves are submerged. Rotting leaves will quickly infect your cutting and prevent rooting. If you see any, snip them off.
- Bottom Heat is Your Friend: A gentle warmth from below can really encourage robust root development. Heated propagation mats, available at most garden centers, are a game-changer, especially if your home is on the cooler side.
- Patience is Key with Woody Plants: Himalayacalamus hookerianus can be a bit slow to root. Don’t be discouraged if you don’t see signs of new growth for several weeks. That’s perfectly normal for these types of plants.
Aftercare & Troubleshooting
Once your cuttings show signs of new growth – little leaves popping out or resistance when you gently tug on the cutting – it’s time to transition them.
- Gradual Acclimation: If your cuttings were under plastic, slowly introduce them to normal room humidity by opening the bag or cloche a little more each day for about a week.
- Watering: Keep the soil consistently moist but not waterlogged. Let the top inch of soil dry out slightly between waterings.
- Light: Place your new plants in a bright, indirect light location. Avoid direct sun, which can scorch young leaves.
- Troubleshooting: The most common sign of failure is rot. If your cutting turns black and mushy, it’s likely rotted. This often happens due to overwatering or poor drainage. If you see a cutting wilting and drying out, it might be that it just didn’t establish roots and dried out too quickly. Don’t be afraid to try again!
A Little Bit of Hope and a Whole Lot of Green
Propagating plants, especially something as lovely as Himalayacalamus hookerianus, is a journey. There will be successes, and there might be a few little learning experiences along the way. The most important thing is to be patient with yourself and the process. Enjoy the anticipation, celebrate every little green shoot and root you see, and know that you’re doing a wonderful thing for your garden and for the plants themselves.
Happy propagating!
Resource: