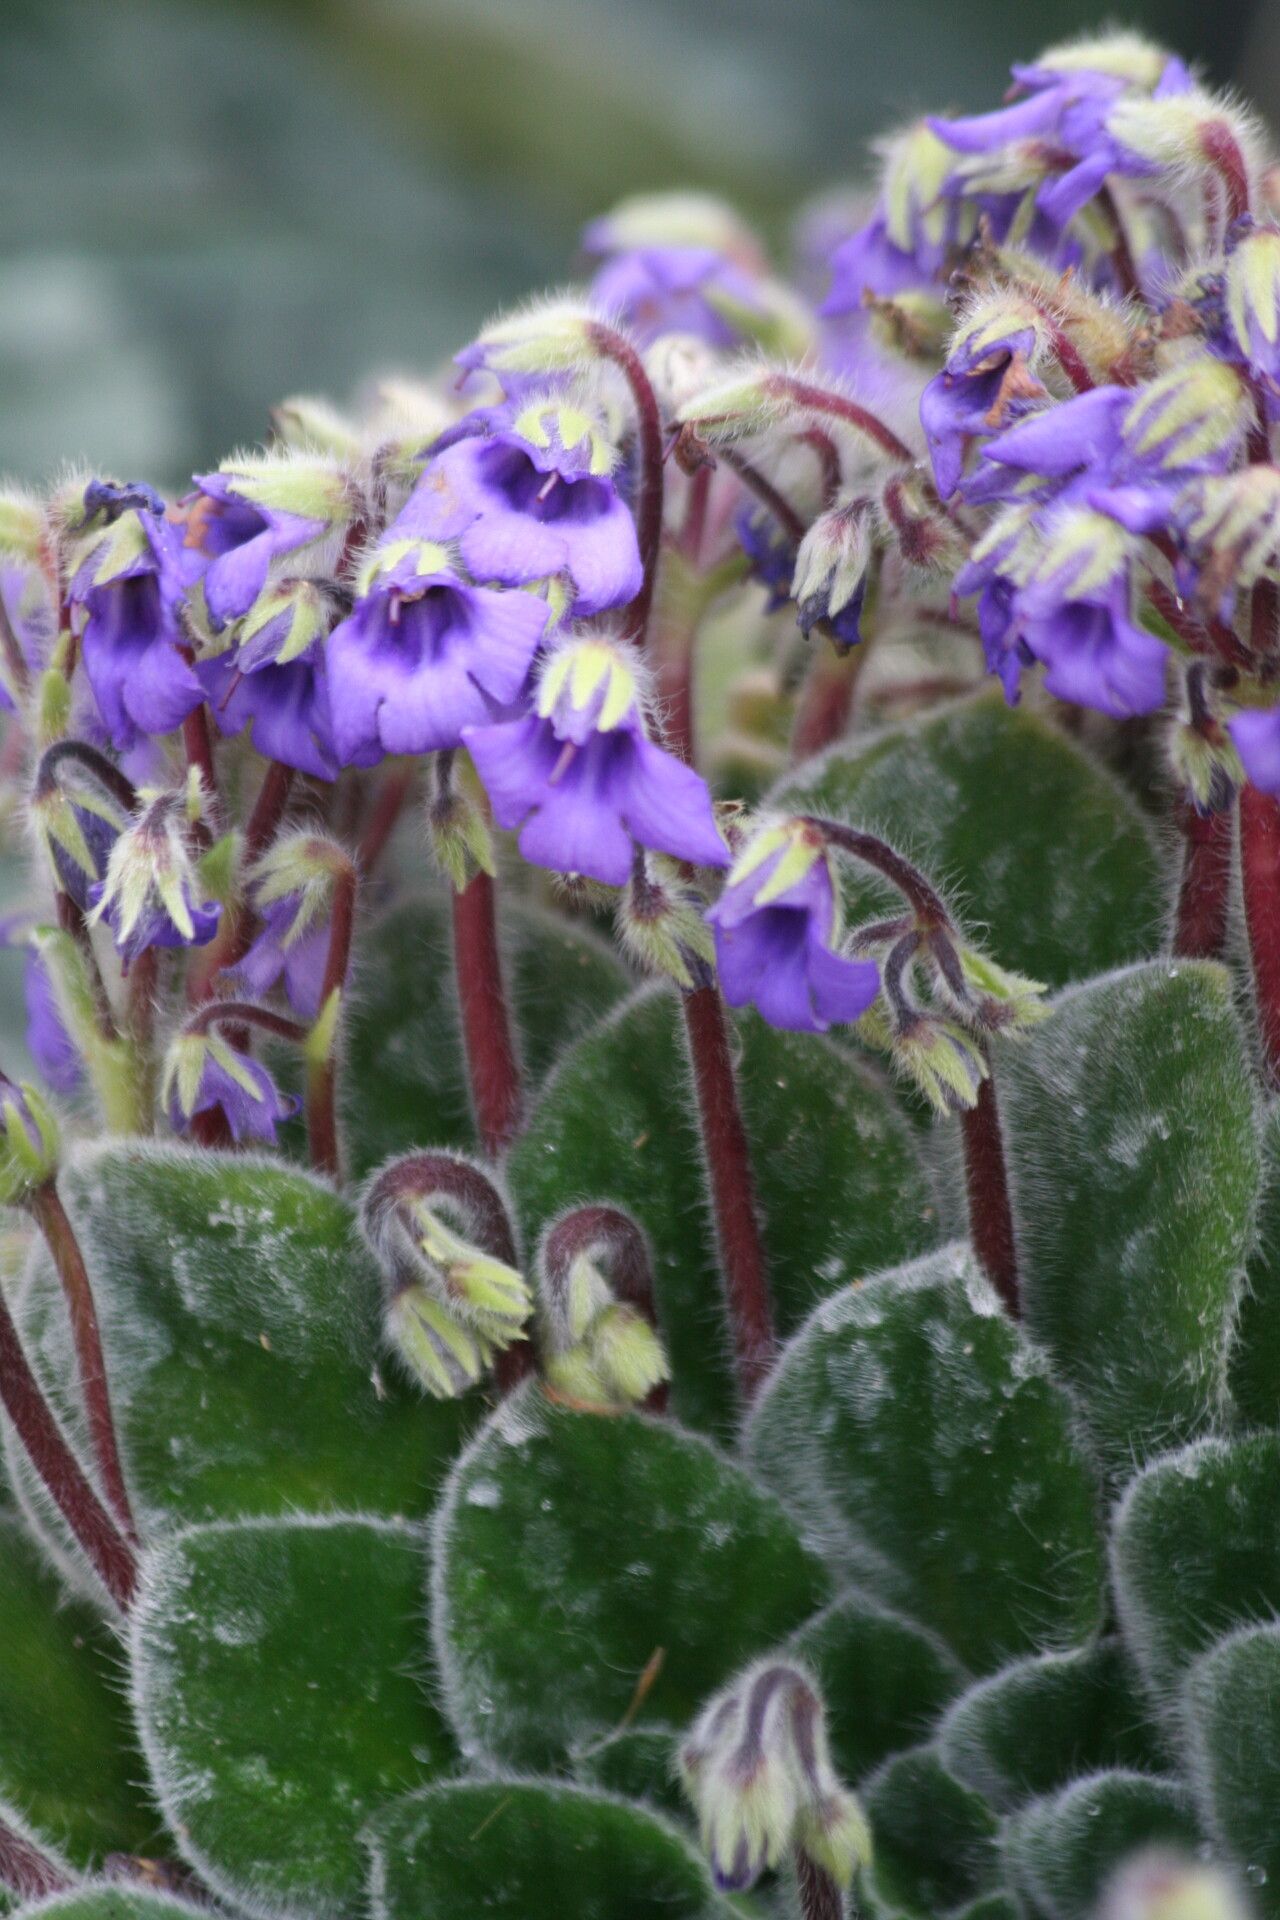
Hey there, fellow plant lovers! I’m so excited to chat with you today about a truly special little gem: Petrocosmea iodioides. If you’re looking for a plant that brings a delicate, almost ethereal beauty to your collection, this is it. With its charming rosettes of fuzzy, patterned leaves and lovely little flowers, Petrocosmea is a delight to behold.
Now, about propagating it. Is it a walk in the park for a complete beginner? Honestly, it can be a bit of a learning curve, but don’t let that deter you! With a little patience and a few key insights, you’ll be well on your way to having a whole family of these beauties. The reward of nurturing a new life from a piece of an existing plant is just… well, it’s pure gardening joy, isn’t it?
The Best Time to Start
For Petrocosmea iodioides, the sweet spot for propagation is generally during its active growing season. Think late spring through summer. This is when the plant has the most energy to put into producing new growth and forming roots. Starting them in warmer, brighter months gives them the best chance to establish themselves before cooler, less light-filled periods.
Supplies You’ll Need
Gathering your tools beforehand makes the whole process smoother. Here’s what I like to have on hand:
- Sterile sharp knife or pruning shears: Clean tools are crucial to prevent diseases from entering your cuttings.
- Well-draining potting mix: A mix formulated for African violets or a blend of peat moss, perlite, and vermiculite works wonders. I often add a bit of horticultural charcoal too.
- Small pots or seedling trays: Make sure they have drainage holes!
- Clear plastic bag or humidity dome: This creates a humid environment for your cuttings.
- Rooting hormone (optional but recommended): A dip in rooting powder or gel can give them a boost.
- Water: For misting and potentially for water propagation.
- Small labels and a pen: To keep track of your plants and when you started them.
Propagation Methods
Petrocosmea is a bit versatile, so you have a couple of good options.
1. Leaf Cuttings (My Favorite!)
This is often my go-to method as it’s quite efficient with Petrocosmea.
- Select a healthy leaf: Look for a mature, healthy leaf from the parent plant.
- Make the cut: Using your sterile knife, carefully cut the leaf stalk (petiole) from the parent plant, trying to get about an inch of the stalk attached to the leaf.
- Prepare the leaf: If your leaf is quite large, you can gently cut it in half horizontally or make a single slit down the center of the leaf blade itself. This helps to create more points for root development.
- Apply rooting hormone: Dip the cut end of the leaf stalk into rooting hormone, tapping off any excess.
- Plant the cutting: Fill your small pots with your well-draining mix. Make a small hole in the soil and insert the leaf stalk, ensuring the cut end is buried. If you’ve cut the leaf blade, gently press the cut surface into the soil.
- Mist and cover: Lightly mist the soil surface. Then, cover the pot with a clear plastic bag or place it under a humidity dome. This keeps the humidity high, which is essential for leaf cuttings to root.
- Provide bright, indirect light: Place the pots in a location that gets bright, indirect light. Avoid direct sun, which can scorch the leaves.
2. Division
As your Petrocosmea matures, it will naturally produce offsets (baby plants) around its base. This is a super straightforward way to get new plants!
- Gently remove the plant: Carefully take the parent plant out of its pot.
- Identify offsets: Look for small rosettes that have started to form their own roots.
- Separate the offsets: Using your fingers or a clean knife, gently separate the offset from the parent plant, making sure to include any attached roots.
- Pot them up: Pot each separated offset into its own small pot filled with your well-draining mix.
- Water and care: Water them lightly and place them in bright, indirect light. They might look a little sad for a day or two as they adjust, but they usually bounce back quickly.
The “Secret Sauce” (Pro Tips)
Here are a couple of things I’ve learned that can really make a difference:
- Don’t let those leaves touch the water! If you’re trying water propagation (though I find leaf cuttings in soil more reliable for Petrocosmea), make sure the leaf blade itself is never submerged in the water. Only the cut stem should be in contact with the water. This prevents rot.
- Bottom heat is your friend. If you’re serious about rooting, a warmth mat placed under your pots can significantly speed up the process. Petrocosmea roots tend to form faster when the soil temperature is a bit warmer, around 70-75°F (21-24°C).
Aftercare & Troubleshooting
Once you start seeing tiny roots emerging from the soil or the leaf stalk, you’re on your way!
- Gradually acclimatize: As the new plant establishes, you can gradually start to reduce the humidity. Poke a few holes in your plastic bag or lift the dome for a bit longer each day.
- Watering: Water when the top inch of soil feels dry. Avoid overwatering.
- Signs of trouble: The most common issue you’ll face is rot. This usually happens due to overwatering or poor drainage. If you see a leaf turning black and mushy, it’s best to remove it immediately to prevent it from spreading. Yellowing leaves can sometimes indicate too much light or not enough water.
A Little Patience Goes a Long Way
Propagating Petrocosmea iodioides is a journey, not a race. Some cuttings will take off like tiny rockets, while others might need a little more coaxing. Don’t get discouraged if your first attempt isn’t a roaring success. Keep experimenting, keep observing, and most importantly, enjoy the process of bringing new life into your home. Happy growing!
Resource:
https://identify.plantnet.org/k-world-flora/species/Petrocosmea%20iodioides%20Hemsl./data