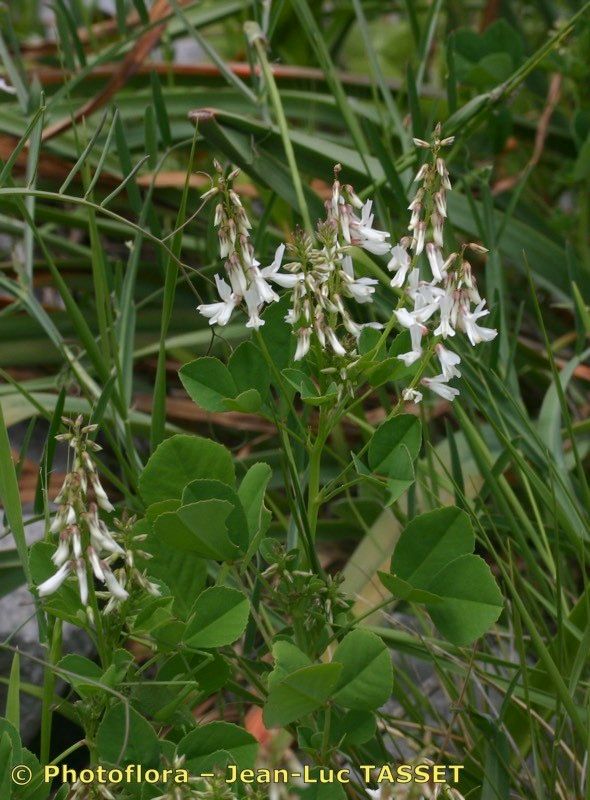
Hello, fellow garden lovers! It’s wonderful to connect with you again. Today, I want to talk about a plant that has truly captured my heart over the years: Melilotus speciosus. If you’re not familiar with it, imagine a cascade of delicate, often fragrant blooms, drawing in pollinators with their charm. Whether you’re drawn to their gentle beauty or their ecological benefits, propagating Melilotus is a highly rewarding journey. And guess what? It’s a fantastic plant for beginners to try their hand at – you’ll likely find success quite readily!
The Best Time to Start
For the highest success rate with Melilotus speciosus, the late spring or early summer, just as the plant is in its active growth phase, is your sweet spot. This is when cuttings are most vigorous and have the best chance of forming healthy roots. You can also attempt propagation from seed in early spring, but cuttings tend to be a bit more reliable for getting established plants quickly.
Supplies You’ll Need
To get your Melilotus propagation off to a flying start, gather these essentials:
- Sharp pruning shears or a clean, sharp knife: For making precise cuts.
- Rooting hormone (optional but recommended): A powdered or gel form can give those cuttings a helpful boost.
- Well-draining potting mix: A blend of equal parts peat moss and perlite or coarse sand works wonders. You can also buy a specific seed-starting mix.
- Small pots or trays with drainage holes: Six-inch pots are a good starting point for cuttings.
- Plastic bags or a propagation dome: To create a humid environment around your cuttings.
- Watering can or spray bottle: For gentle watering.
Propagation Methods
Let’s dive into how we can multiply these beauties.
Stem Cuttings
This is my go-to method for Melilotus because it’s so effective.
- Take Cuttings: In late spring or early summer, select healthy, non-flowering stems from a mature plant. Using your sharp shears, make a clean cut just below a leaf node (where a leaf emerges from the stem). Aim for cuttings that are about 4-6 inches long.
- Prepare the Cuttings: Gently remove the lower leaves from the bottom half of the cutting. This prevents them from rotting once they’re in the soil.
- Apply Rooting Hormone (Optional): Dip the cut end of each stem into rooting hormone, tap off any excess.
- Plant the Cuttings: Fill your pots with the well-draining potting mix. Make a small hole with your finger or a pencil, and insert the cuttings about an inch deep, ensuring the leaf nodes are below the soil surface. Gently firm the soil around them.
- Water Gently: Water the soil thoroughly but gently. You don’t want to wash the cuttings out!
- Create Humidity: Cover the pots with a plastic bag, large enough not to touch the leaves, or place them under a propagation dome. Seal it loosely so there’s still some air exchange.
Seed Propagation (Less Common for Cuttings, but Worth Mentioning)
If you’re starting from seed, sow them directly into well-draining soil in early spring, keeping the soil consistently moist. You can also try scarifying (lightly scratching the seed coat) or soaking the seeds overnight in warm water to improve germination.
The “Secret Sauce” (Pro Tips)
Here are a few little tricks I’ve picked up that can make a big difference:
- Bottom Heat is Your Friend: If you have a propagation mat or can place your pots on top of a gently warmed surface (like a cable box!), this can significantly speed up root development. Melilotus loves that little bit of warmth from below.
- Don’t Drown Them! While humidity is crucial, soggy soil is the fastest way to invite rot. Ensure your pots have excellent drainage and water only when the top inch of soil feels dry. It’s better to let them get a tiny bit dry than too wet.
- Patience with Rooting Hormone: If you use rooting hormone, give those cuttings a good shake to remove any excess. Too much can actually inhibit rooting by creating a barrier.
Aftercare & Troubleshooting
Once you see tiny roots emerging from the drainage holes or new growth on your cuttings, you know you’re on your way!
- Transition Slowly: Gradually remove the plastic bag or dome over a week or two. This allows the young plants to adjust to the lower humidity.
- Keep Them Moist: Continue to keep the soil consistently moist but not waterlogged.
- Potting Up: When the roots are well-established and the plants are a few inches tall, you can gently transplant them into their own individual pots.
Troubleshooting: The most common issue you’ll encounter is rot. If your cuttings start looking mushy and dark, or develop black spots, it’s usually a sign of too much moisture and not enough air circulation. You might need to start again with fresh cuttings, ensuring better drainage and a lighter hand with the watering. Yellowing leaves can sometimes indicate too much direct sun when they’re still young and vulnerable, or nutrient deficiency if they’ve been in the same pot for a long time.
A Little Patience Goes a Long Way
Successfully propagating Melilotus speciosus is a wonderfully gratifying experience. It’s a process that teaches you so much about plant resilience and the simple magic of bringing new life into your garden. Don’t be discouraged if your first attempt isn’t perfect. Every gardener learns through trial and error. Just keep at it, enjoy the rhythm of the seasons, and soon you’ll have a beautiful abundance of these lovely plants to share and admire. Happy gardening!
Resource:
https://identify.plantnet.org/k-world-flora/species/Melilotus%20speciosus%20Durieu/data