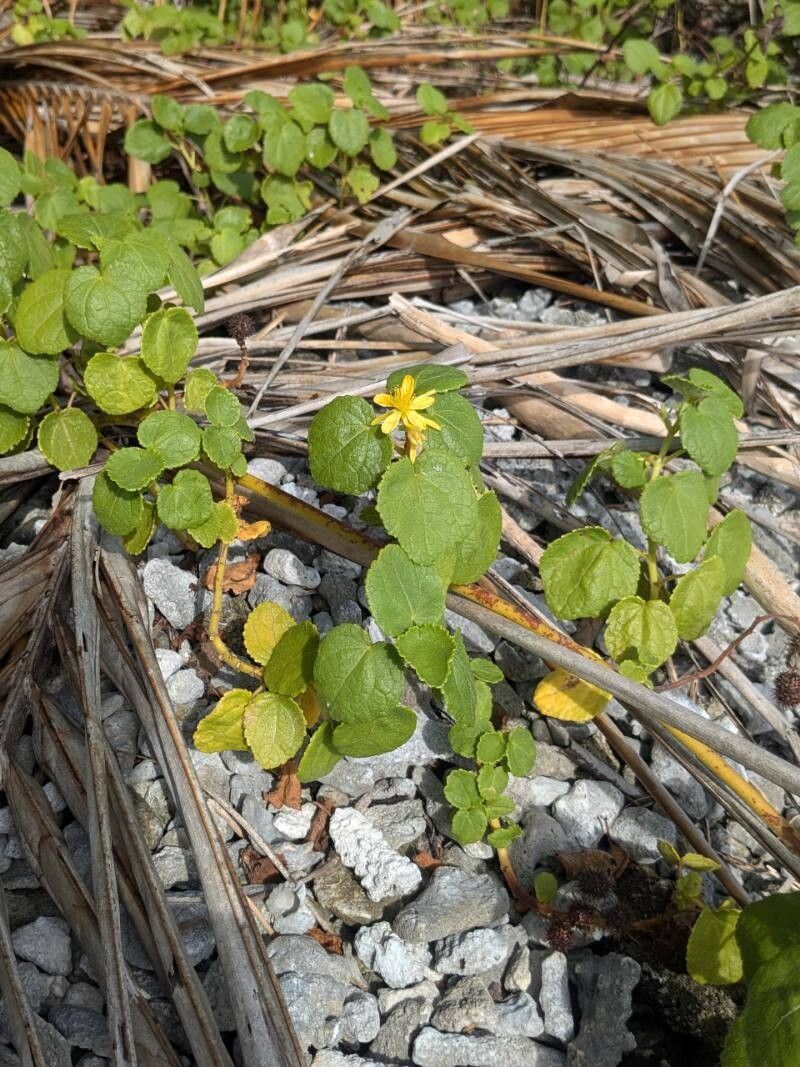
Oh, hello there! Pull up a chair. I’m so excited to chat with you today about what I think is a truly delightful little plant: Triumfetta procumbens. If you haven’t met it before, it’s a wonderfully low-growing, groundcover-type of plant with these lovely, textured leaves and, when it’s happy, a scattering of small, cheerful flowers. It brings a wonderful texture and color to sunny spots in the garden, and honestly, watching it spread and fill in is incredibly rewarding. And the best part? Propagating it is surprisingly straightforward, making it a fantastic project for folks just starting out on their propagation journey.
The Best Time to Start
For Triumfetta procumbens, spring is really your golden ticket. Think of it like waking up after a long winter nap. The plant is bursting with new growth, and those young, pliable stems root with gusto. You’re looking for stems that have started to firm up a bit but aren’t yet woody. Late spring and early summer are also great windows. Generally, when the days are getting longer and warmer temperatures are settling in, your Triumfetta will be in the mood to multiply.
Supplies You’ll Need
Before we dive into the fun part, let’s gather our tools. You won’t need much, which is part of why I love this plant so much:
- Sharp Pruning Shears or a Craft Knife: For clean cuts that heal well.
- Small Pots or Seed Trays: Anything that can hold your cuttings and potting mix.
- Well-Draining Potting Mix: A good quality seedling mix or a blend of potting soil and perlite/sand works wonders.
- Rooting Hormone (Optional but Recommended): A powder or gel will give your cuttings an extra boost.
- Clear Plastic Bag or Dome: To create a humid environment for your cuttings.
- Watering Can with a Fine Rose: To water gently.
- Labels and a Pen: So you don’t forget what’s what!
Propagation Methods
Triumfetta procumbens is a champion of propagation, and for good reason. It’s happy to be coaxed into new life through stem cuttings. Here’s how we’ll do it:
Stem Cuttings
- Take Your Cuttings: With your clean shears or knife, select healthy, non-flowering stems. Look for growth from the current season. You want to take cuttings that are about 4-6 inches long. Make the cut just below a leaf node, which is where new roots are most likely to form.
- Prepare the Cuttings: Gently remove the leaves from the bottom half of the cutting. This prevents them from rotting in the soil or water. Leave 2-3 leaves at the very top to help the cutting photosynthesize. If the top leaves are quite large, you can even snip them in half.
- Apply Rooting Hormone (Optional): Dip the cut end of each stem into your rooting hormone, coating about an inch of the stem. Tap off any excess.
- Pot Them Up: Fill your small pots or trays with your well-draining potting mix. Make small holes in the soil with a pencil or your finger. Gently insert the cuttings into the holes, ensuring the rooting hormone (if used) doesn’t rub off. Firm the soil around the base of each cutting.
- Water Gently: Water the soil thoroughly with your fine rose watering can. You want the soil to be moist but not waterlogged.
- Create Humidity: Cover each pot or the entire tray with a clear plastic bag, anchoring it around the rim with a rubber band or tape. If you have a propagation dome, that works beautifully, too. This creates a humid microclimate that helps prevent the cuttings from drying out before they can root.
- Find Their Spot: Place the pots in a warm location with bright, indirect light. Avoid direct sunlight, as this can scorch the new cuttings.
The “Secret Sauce” (Pro Tips)
Now, here are a couple of things I’ve learned over the years that give Triumfetta cuttings a real edge:
- Bottom Heat is Your Friend: If you can, place your pots on a gentle heat mat. This is especially helpful if your house tends to be on the cooler side. Warm soil encourages root development from below, giving your cuttings a significant head start. Just make sure it’s not too hot – think “warm bath” temperature, not “sauna.”
- Don’t Overwater, but Don’t Let Them Drought: This is a delicate balance. The soil should feel consistently moist, like a wrung-out sponge. Check the moisture level regularly by gently poking your finger into the soil. If the top inch feels dry, it’s time for a gentle watering. Too much water and you risk rot; too little and they’ll shrivel.
Aftercare & Troubleshooting
Once your cuttings have some established roots – and you’ll know this because you can gently tug on a stem and feel a bit of resistance, or you might even see new leafy growth appearing – it’s time to give them a bit more freedom.
Carefully remove the plastic bag or dome. Continue keeping them in bright, indirect light and water them when the top inch of soil feels dry. As they grow stronger, you can gradually introduce them to more direct sunlight.
What if things go wrong? The most common culprit is rot. If you see your cuttings turning mushy, blackening, or just wilting dramatically and unexpectedly, it’s usually a sign of too much moisture and not enough air circulation. Don’t be discouraged if a few don’t make it! It happens to the best of us. Just remove any affected cuttings and adjust your watering and airflow for the remaining ones. Sometimes, a cutting might just sit there for a while, looking uninspired. Be patient! With a bit of warmth and consistent moisture, most Triumfetta cuttings are surprisingly resilient.
A Little Hope for Your Garden
And there you have it! Propagating Triumfetta procumbens is such a rewarding process, a true testament to nature’s generosity. Don’t be afraid to get your hands dirty. Be patient, observe your little green charges, and enjoy the magic of watching something new come to life. Happy propagating!
Resource:
https://identify.plantnet.org/k-world-flora/species/Triumfetta%20procumbens%20G.Forst./data