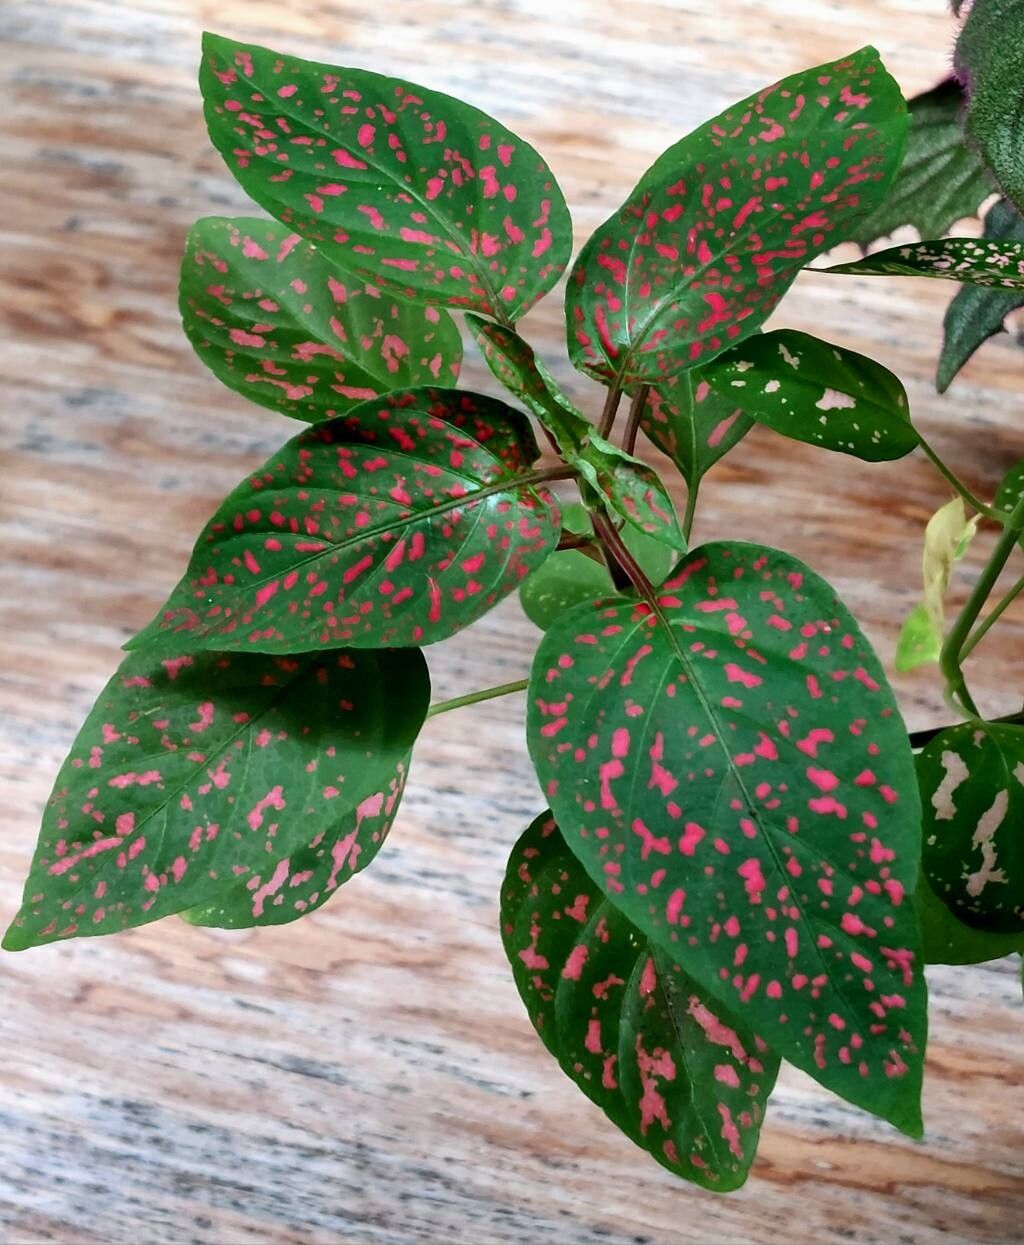
Hello, green thumbs! It’s so wonderful to connect with you again. Today, we’re diving into the delightful world of Polka Dot Plants, or Hypoestes phyllostachya as they’re known botanically. If you love a splash of color and a bit of playful pattern in your home, you’ve likely admired these beauties. Their vibrant leaves, splashed with pink, white, or red, bring instant cheer.
The best part? They’re surprisingly easy to propagate! This means you can fill your home with these cheerful plants, share them with friends, or even create a whole new landscape of color without breaking the bank. For beginners, this is a fantastic plant to start with. You’ll be amazed at how quickly you can fill your windowsill!
The Best Time to Start
Honestly, you can propagate Polka Dot Plants pretty much all year round indoors, as long as you provide them with consistent warmth and light. However, I find the sweetest spot is from late spring through summer. This is when the plants are actively growing, bursting with energy, and have plenty of lush, new stems to work with. Think of it as striking while the iron is hot!
Supplies You’ll Need
Gathering your supplies beforehand makes the whole process smooth sailing. Here’s what I always have on hand:
- Sharp Pruning Shears or Scissors: Clean cuts are key.
- Rooting Hormone (Optional but helpful): Especially for stem cuttings. I like a powder or gel.
- Small Pots or Propagation Trays: 3-4 inch pots are perfect.
- Well-Draining Potting Mix: A good quality potting mix mixed with some perlite or perlite helps prevent soggy roots.
- Watering Can or Spray Bottle: For gentle watering.
- Clear Plastic Bags or Domes (Optional): To create a mini-greenhouse effect.
- A Sunny, Indirect Light Location: Bright, but no direct scorching sun.
Propagation Methods
Polka Dot Plants are wonderfully versatile! Here are my two favorite ways to make more of them:
1. Stem Cuttings: My Go-To Method
This is how I usually fill up my plant collection. It’s incredibly effective!
- Take Your Cuttings: Find a healthy, non-flowering stem. Using your clean shears, cut a stem that is about 4-6 inches long. Make your cut just below a leaf node (that little bump where a leaf grows from). Remove the lower leaves, leaving just two or three at the top.
- Apply Rooting Hormone (If using): Dip the cut end of the stem into your rooting hormone, tapping off any excess. This encourages faster root development.
- Pot Them Up: Fill your small pots with your well-draining mix. Make a hole in the center with your finger or a pencil.
- Plant the Cutting: Gently insert the cutting into the hole, ensuring the leaf nodes are just below the soil surface (this is where roots will emerge). Firm the soil gently around the stem.
- Water Gently: Give your newly potted cuttings a good, gentle watering. You want the soil to be moist but not waterlogged.
- Create a Humid Environment: This is crucial! You can cover the pot with a clear plastic bag (poke a few holes for ventilation) or place it under a propagation dome. This keeps the humidity high, which helps the cuttings stay hydrated until they develop roots. Place in bright, indirect light. Keep the soil consistently moist.
2. Water Propagation: The “Watch and See” Method
This is a fun one because you get to watch the roots grow!
- Prepare Your Cuttings: Same as step 1 above: Take 4-6 inch cuttings from healthy stems, and remove the lower leaves.
- Place in Water: Find a clean glass or jar. Fill it with water and place your cuttings in the water, making sure the leaf nodes are submerged.
- Change the Water Regularly: This is key to preventing rot. Change the water every few days to keep it fresh and oxygenated.
- Find the Right Spot: Place your jar in a location with bright, indirect light.
- Wait for Roots: You should start seeing tiny white roots emerge from the nodes in a few weeks. Once the roots are about an inch long, they’re ready to be potted up into soil using the same steps as the stem cutting method.
The “Secret Sauce” (Pro Tips)
Here are a few little tricks I’ve learned over the years that really make a difference:
- Don’t Let the Leaves Touch the Water (in water propagation): If your cuttings are in water, make sure no leaves are submerged. Leaves in the water will rot and can contaminate the water, leading to the death of your cutting before it even grows roots.
- Bottom Heat is Your Friend: If you’re struggling with slow rooting, especially in cooler months, using a seedling heat mat can speed things up significantly. Place your pots on top of it. This gentle warmth encourages root development from below.
- Take Cuttings from Vigorous Growth: Don’t try to propagate from a leggy, stressed, or old plant. Look for firm, healthy, and actively growing stems. These have the most stored energy to push out new roots.
Aftercare & Troubleshooting
Once you see those tiny roots peeking out of the potting mix or reaching a good length in water, it’s time for them to become independent!
- Gradually Acclimate: If you used a plastic bag or dome, slowly start to introduce them to drier air by removing the cover for longer periods each day over a week.
- Watering: Continue to keep the soil consistently moist but not soggy. Allow the top inch of soil to dry out slightly between waterings.
- Light: Keep them in bright, indirect light. As they grow stronger, you can slowly introduce them to more direct morning sun if you like, but always be mindful of scorching.
The most common issue you might encounter is rot. This usually happens from overwatering or poor drainage. You’ll see stems turning mushy and black. If this happens, it’s best to discard the affected cutting and review your watering habits. Sometimes, cuttings just fail to root. Don’t be discouraged! Gardening is always a learning process, and sometimes a cutting just isn’t meant to be.
A Little Patience Goes a Long Way
Watching a new plant emerge from a tiny cutting is one of the most rewarding experiences in gardening. It’s a little bit of magic, really. Be patient with your new Polka Dot Plants. They might seem hesitant at first, but with a little care and attention, they’ll soon be thriving and adding that lovely splash of color to your world. Happy propagating!
Resource:
https://identify.plantnet.org/k-world-flora/species/Hypoestes%20phyllostachya%20Baker/data