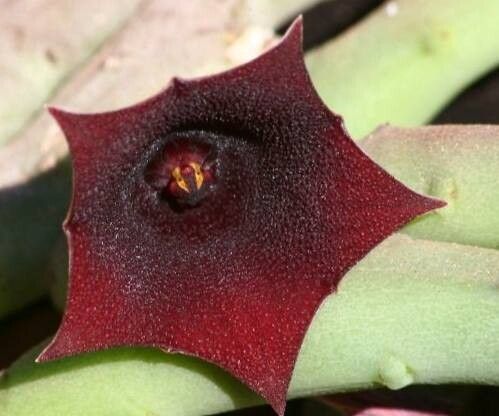
Oh, hello there! I’m so glad you’re curious about propagating Huernia pendula. It’s one of those fascinating succulents that really draws you in with its quirky, star-shaped flowers and robust, trailing stems. If you’ve ever admired yours and thought, “I’d love more of these!” then you’re in for a treat. Propagating this beauty is surprisingly straightforward, making it a wonderful project for even those of you just dipping your toes into the world of plant propagation. It’s incredibly rewarding to see those little pieces you’ve nurtured grow into their own thriving specimens.
The Best Time to Start
Generally, the most successful time to propagate Huernia pendula is during its active growing season. For most of us, that means late spring through summer. When the days are longer and the temperatures are consistently warm, your cuttings will have the best energy reserves to root and establish themselves. Trying to root them when the plant is naturally slowing down in cooler months can lead to slower progress and a higher chance of issues.
Supplies You’ll Need
Gathering your supplies beforehand makes the whole process so much smoother. Here’s what you’ll want to have on hand:
- Sharp, clean pruning shears or a craft knife: To make clean cuts.
- A well-draining potting mix: I love a succulent or cactus mix, often amended with extra perlite or coarse sand for even better drainage.
- Small pots or trays: Terracotta pots are great because they breathe and help wick away excess moisture.
- Rooting hormone (optional but recommended): This can give your cuttings a nice boost, though Huernia often roots without it.
- A spray bottle: For gentle watering.
- Labels and a marker: To keep track of your propagated plants, especially if you’re working with a few different varieties.
Propagation Methods
Huernia pendula is typically propagated through stem cuttings, which is my absolute favorite method. It’s quick and effective!
Stem Cuttings:
- Select a healthy stem: Look for a mature, healthy stem that is at least 3-4 inches long. Avoid stems that look dried out or are showing any signs of rot.
- Make the cut: Using your sharp, clean shears or knife, make a clean cut just above a node (the little bump where a leaf emerges). This is important for encouraging rooting.
- Let it callus: This is a crucial step! Place the cuttings in a dry, well-ventilated spot away from direct sunlight for 2-7 days. You want the cut end to dry out and form a callus, which prevents rot when planted. It will look a bit dried and sealed over.
- Prepare the potting mix: Fill your chosen pots with your well-draining potting mix.
- Apply rooting hormone (optional): If you’re using rooting hormone, dip the callused end of the cutting into the powder.
- Plant the cuttings: Gently insert the callused end of the cutting about 1-2 inches deep into the potting mix. Make a small hole with your finger or a pencil first so you don’t disturb the callus. Firm the soil gently around the base of the cutting.
- Initial watering: Water very sparingly. You just want the soil to be slightly moist, not wet. A light misting with your spray bottle is often enough to start.
The “Secret Sauce” (Pro Tips)
Here are a few things I’ve learned over the years that really make a difference:
- Don’t overcrowd: Give your cuttings a bit of space in their pots. This promotes good air circulation, which is a real friend to succulent cuttings and helps prevent fungal issues.
- Bottom heat is a game-changer: If you have a heated propagation mat, using it under your pots can significantly speed up the rooting process. A little warmth from below encourages root development. Just ensure the heat isn’t too intense.
- Patience with watering: It’s so tempting to water frequently, but overwatering is the number one killer of succulent cuttings. Let the soil dry out almost completely between waterings. Better too dry than too wet!
Aftercare & Troubleshooting
Once your cuttings are planted, place them in a bright spot with indirect light. Avoid harsh, direct sun, which can scorch them.
After a few weeks, you can gently tug on a cutting. If you feel resistance, it means roots have begun to form! You can then start watering a little more regularly, allowing the soil to dry out between waterings. Once the new growth appears robust and the plant feels firmly rooted, you can treat it like a mature Huernia.
The most common issue you might encounter is rot. If you see a cutting becoming mushy, black, or wilting without any sign of rooting, it’s likely due to too much moisture. Unfortunately, if rot sets in, it’s usually difficult to save, but you can try to cut away the rotted part, let the healthy section callus, and try again. Keep an eye out for any pests too, though this is less common with cuttings.
A Encouraging Closing
Propagating Huernia pendula is such a satisfying journey. Don’t be discouraged if your first attempt isn’t perfect; that’s how we all learn! Be patient, trust the process, and soon you’ll have a whole wonderful collection of these fantastic plants. Happy propagating!
Resource:
https://identify.plantnet.org/k-world-flora/species/Huernia%20pendula%20E.A.Bruce/data