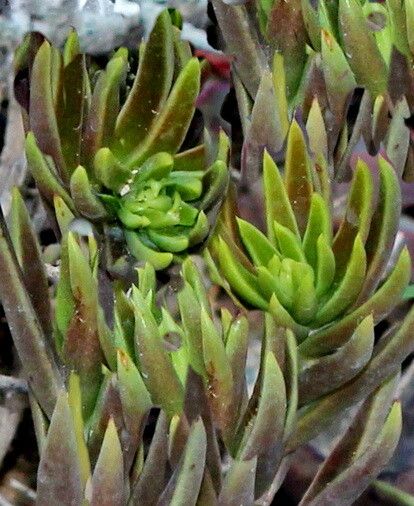
Hello, fellow plant lovers! So, you’ve fallen head over heels for the charms of Echeveria angustifolia? I completely get it. Those slender, silvery-green leaves are just so elegant, aren’t they? They add a touch of sophistication to any succulent collection. And the best part? Bringing more of these beauties into your life through propagation is incredibly rewarding. It’s a fantastic way to fill up pots, share with friends, or just marvel at nature’s magic. For beginners, Echeveria angustifolia is generally quite forgiving, which makes it a wonderful plant to start your propagation journey with.
The Best Time to Start
When it comes to giving your Echeveria angustifolia cuttings the best chance to thrive, spring and early summer are your golden windows of opportunity. This is when the plant is actively growing, meaning it has plenty of energy to put into developing new roots. You can also have success with healthy cuttings taken in late summer, but you’ll want to ensure they have ample time to establish before cooler temperatures arrive. Avoid taking cuttings during the plant’s dormancy in winter or when it’s stressed from extreme heat.
Supplies You’ll Need
Gathering your tools beforehand makes the whole process much smoother. Here’s what I always have on hand:
- Well-draining succulent or cactus potting mix: This is non-negotiable! A gritty mix is essential to prevent waterlogged roots. You can buy pre-made or mix your own with potting soil, perlite, and coarse sand.
- Clean, sharp pruning shears or a sharp knife: A clean cut minimizes the risk of infection and promotes faster healing.
- Rooting hormone (optional but helpful): A little dip in rooting hormone can give your cuttings a boost, especially if you’re a bit worried.
- Small pots or trays: Terracotta pots are great because they breathe.
- A spray bottle for misting: Gentle hydration is key.
- A shallow tray or saucer: If you opt for water propagation.
Propagation Methods
Echeveria angustifolia is a master of regeneration, and thankfully, it’s pretty straightforward to propagate. My favorite methods involve cuttings and leaves.
Stem Cuttings:
This is my go-to for a quick and reliable start.
- Select a healthy stem: Look for a mature stem that has at least a few sets of leaves.
- Make the cut: Using your clean shears or knife, cut the stem just below a set of leaves. Get a piece that’s at least a couple of inches long.
- Remove lower leaves: Gently pluck off the bottom 2-3 sets of leaves. These will also be potential propagules, and removing them exposes the node where roots will form.
- Let it callus: This is crucial! Place the cutting in a dry, well-ventilated spot away from direct sunlight for 2-7 days, or until the cut end has dried and formed a callus. This prevents rot.
- Pot it up: Fill a small pot with your succulent mix. Then, insert the callused end of the stem into the soil, just deep enough to stand upright.
- Water sparingly: Wait a few days after potting before giving it its first light watering. The soil should be barely moist.
Leaf Cuttings:
These are a bit more patient, but seeing those tiny new plants emerge from a single leaf is pure joy!
- Gently detach leaves: Carefully twist a healthy leaf from the main stem. You want to get a clean break, ideally with a tiny bit of the stem attached. If you just pull the leaf off without the white base, it’s less likely to grow.
- Let them callus: Similar to stem cuttings, allow the leaves to dry and callus over in a dry, indirect light spot for a few days.
- Lay them on soil: Once callused, lay the leaves on top of your succulent potting mix. You don’t need to bury them.
- Mist regularly: Mist the soil lightly every few days, just enough to keep it slightly humid. The leaves will absorb moisture from the air and the soil. Avoid soaking the leaves themselves.
- Be patient: It can take several weeks, or even months, for tiny roots and baby plants to appear from the base of the leaf. Don’t give up!
The “Secret Sauce” (Pro Tips)
You’ll find that a few little tricks can really make a difference.
- The “Air Sandwich” for Cuttings: When your stem cuttings are callusing, I like to lay them on a paper towel or a clean baking sheet in a spot with bright, indirect light. This allows for maximum air circulation around the cut end, speeding up the callusing process and reducing rot risk even further. Think of it as giving them a nice, dry spa treatment!
- Bottom Heat is Your Friend: If you’re propagating in a cooler environment or want to speed things up, consider using a seedling heat mat placed under your pots. This gentle warmth encourages root development from below, giving your cuttings a wonderful advantage. Just make sure the mat doesn’t dry out the soil too quickly!
Aftercare & Troubleshooting
Once you see those first signs of life – little pink roots peeking out or a tiny rosette forming – it’s time to adjust your care.
- New Roots: When your stem cuttings have developed a good network of roots (you can gently tug them to feel resistance), start watering more thoroughly, allowing the soil to dry out completely between waterings. For leaf cuttings that have grown into small plants, treat them like mature Echeverias – water when the soil is dry.
- Sunlight: Gradually introduce your new plants to brighter light. Direct, intense sun can scorch young leaves, so start with bright, indirect light and slowly acclimate them.
- Signs of Trouble: The most common issue is rot, which usually happens when the soil stays too wet or the are not callused properly. If you see mushy, black stems or leaves, immediately remove the affected parts and give the healthy parts a chance to dry out and potentially re-root. If a leaf cutting turns black and slimy, it’s usually a lost cause but don’t get discouraged. Try again with a fresh leaf!
A Little Encouragement to Close
Propagation is a journey, and like all good journeys, it requires a sprinkle of patience. Don’t be disheartened if a cutting or leaf doesn’t make it – every gardener has had their share of casualties! Just view it as a learning experience, adjust your approach, and try again. The thrill of nurturing a new plant from a tiny bit of its parent is an unparalleled joy. So go ahead, get your hands dirty, and enjoy the beautiful process of growing more of these exquisite Echeveria angustifolia plants! Happy propagating!
Resource:
https://identify.plantnet.org/k-world-flora/species/Echeveria%20angustifolia%20E.Walther/data