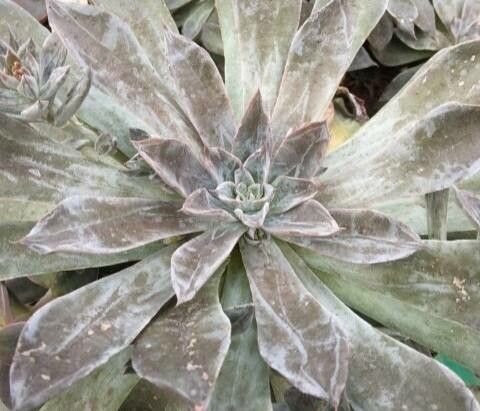
Hello fellow plant lovers! I’m so thrilled to dive into the wonderful world of Thompsonella platyphylla with you today. This little gem, with its charming rosettes of fleshy leaves, is a real joy to have in any collection. And the best part? It’s surprisingly easy to share its beauty! Propagating it is incredibly rewarding. You’ll be amazed at how quickly you can create new plants to gift to friends, fill out your own space, or just for the sheer satisfaction of it. I find it’s a pretty beginner-friendly plant to propagate, which is always a plus!
The Best Time to Start
For Thompsonella platyphylla, the sweet spot for propagation is during its active growing season. This usually means spring and early summer. During this time, the plant is full of energy and has the best chance of developing strong roots. You can also have success in late summer, but avoid propagating when it’s very hot or during the plant’s dormancy in winter.
Supplies You’ll Need
Gathering your supplies beforehand makes the whole process smoother. Here’s what I usually have on hand:
- Sharp, clean pruning shears or a good knife: For clean cuts.
- Well-draining potting mix: A cactus or succulent mix works perfectly. You can also make your own by combining potting soil with perlite or pumice (about a 50/50 ratio).
- Small pots or seed trays: Whatever you have handy for your new babies. Make sure they have drainage holes!
- Rooting hormone (optional but helpful): A powder or gel can speed up the rooting process.
- A spray bottle: For gentle watering.
- Gloves (optional): If you prefer them.
Propagation Methods
Thompsonella platyphylla is wonderfully versatile. I usually rely on a couple of methods that give me fantastic results.
Stem Cuttings
This is my go-to method. It’s straightforward and yields excellent success.
- Take Your Cuttings: Using your clean shears or knife, cut a healthy stem that is at least 2-3 inches long. Aim for stems with a few leaves on them. You can also take cuttings from the rosettes themselves if they’ve grown a bit leggy.
- Prepare the Cutting: Gently remove a few of the lower leaves from the cutting. This exposes a bit of the stem, which is where the roots will form. If you’re using rooting hormone, dip the cut end into the hormone now.
- Let It Callus: This is a crucial step! Place the cuttings in a dry, well-ventilated spot for 2-3 days. You want the cut end to dry out and form a callus. This prevents rot when you plant it.
- Plant Your Cuttings: Fill your small pots with your well-draining mix. Make a little hole in the center and insert the callused end of the cutting into the soil, burying the part where you removed the leaves. Gently firm the soil around it.
- Initial Watering: Water very lightly after planting, just enough to settle the soil. You don’t want to drench it.
Water Propagation
This method is incredibly satisfying because you can watch the roots grow!
- Take Your Cuttings: Follow step 1 from the stem cuttings method.
- Prepare the Cutting: Remove a few bottom leaves.
- Place in Water: Find a clean glass or jar and fill it with water. Place the cuttings in the water, making sure the leaves are not submerged. If a leaf touches the water, it’s likely to rot.
- Find a Bright Spot: Place the jar in a bright location, but out of direct, harsh sunlight.
- Change Water Regularly: Change the water every few days to keep it fresh and prevent bacteria from growing.
- Plant When Ready: Once you see encouraging root growth (about an inch or so), you can plant your cuttings in soil following step 4 from the stem cuttings method.
The “Secret Sauce” (Pro Tips)
Here are a few things I’ve learned over the years that make a difference:
- Bottom Heat is Your Friend: If you have a heat mat, place your pots on it. This gentle bottom heat really encourages roots to form faster and increases your success rate, especially if your home is a bit on the cooler side.
- Don’t Overwater, Ever! This cannot be stressed enough for succulents. Too much moisture is the quickest way to invite rot. Allow the soil to dry out significantly between waterings. When you do water after planting, be gentle.
- Patience with Leaves: Sometimes, a leaf will detach from the stem. Don’t throw it away! You can lay these leaves on top of the soil, and some varieties will actually root and produce tiny plantlets from the base. It’s a bonus baby!
Aftercare & Troubleshooting
Once your cuttings have rooted (you can test this by very gently tugging on the plant – if there’s resistance, it has roots!), it’s time for a little tender loving care.
- Regular Watering: Continue to water sparingly. Let the soil almost dry out completely between waterings. Reduce watering in the cooler months.
- Light Needs: Your new plants will thrive in bright, indirect light. Too much direct sun can scorch their leaves, especially when they’re young.
- Signs of Trouble: The most common issue is rot, which looks like mushy, brown stems or leaves. This is almost always due to overwatering. If you see this, remove the affected parts immediately and let the remaining plant dry out. If the entire cutting rots, sadly, it’s time to start again. Another sign of stress can be wilting or yellowing leaves, which might indicate under or overwatering, or insufficient light.
A Little Encouragement
See? Not too daunting, is it? Propagating Thompsonella platyphylla is a delightful way to engage with your plants and expand your green family. Be patient with your new cuttings, trust the process, and most importantly, enjoy the journey of watching them grow! Happy propagating!
Resource:
https://identify.plantnet.org/k-world-flora/species/Thompsonella%20platyphylla%20Rose/data