Oh, hello there! Come on in and grab a mug. Today, we’re diving into the delightful world of replicating one of my garden favorites: Centaurea fragilis.
Your New Garden Friends Bloom Easily
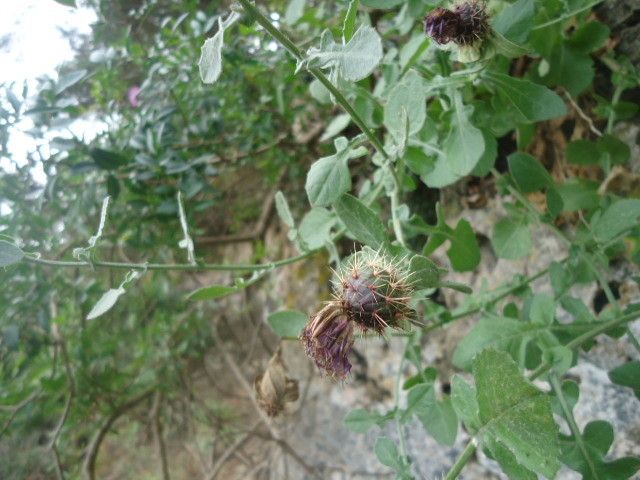
I just adore Centaurea fragilis. Its delicate, almost ethereal blue flowers have this charm that just brightens up any border. Plus, there’s a truly special satisfaction that comes from watching a tiny cutting or division transform into a thriving plant. It’s like magic, but rooted in good old gardening know-how. Now, is it a walk in the park for absolute beginners? Honestly, I’d say it’s moderately easy. With a little attention and these tips, you’ll be well on your way to success.
When to Get Your Hands Dirty
The very best time to be thinking about propagating Centaurea fragilis is in late spring to early summer. This is when the plant is actively growing and has plenty of fresh, healthy stems to work with. You want to capture that vibrant energy!
Your Propagating Toolkit
Here’s what you’ll want to gather before we begin:
- Sharp, clean pruning shears or secateurs: Makes for clean cuts, which are super important for preventing disease.
- Potting mix: A good quality, well-draining potting mix is key. I often use a blend of peat moss or coco coir, perlite, and a bit of compost.
- Small pots or seed trays: Clean ones, of course!
- Rooting hormone (optional but recommended): This really gives your cuttings a boost. Look for a powdered or liquid form.
- Watering can with a fine rose attachment: To water gently without disturbing your precious cuttings.
- Small labels and a marker: To keep track of what you’ve planted and when!
Bringing New Centaurea to Life
Let’s get propagating! We’ll focus on the most reliable methods.
Stem Cuttings: This is my go-to for Centaurea fragilis.
- Select your stems: Look for healthy, non-flowering stems from your mature plant. Aim for stems that are about 4-6 inches long.
- Make the cut: Using your sharp shears, make a clean cut just below a leaf node. A leaf node is where a leaf attaches to the stem – that’s where the magic happens for root development.
- Prepare the cutting: Gently remove the lower leaves from the stem, leaving just a few at the top. If the leaves are large, you can even cut them in half to reduce water loss.
- Dip in rooting hormone: If you’re using it, dip the cut end of the stem into the rooting hormone, tapping off any excess.
- Plant your cuttings: Fill your small pots with your prepared potting mix. Make a small hole in the center with your finger or a pencil and gently insert the cutting, ensuring the leaf node is just below the surface of the soil. Firm the soil around it.
- Water gently: Water thoroughly but gently until the soil is moist.
Division: If your Centaurea fragilis has grown into a nice clump, division is a fantastic way to get multiple plants.
- Prepare the plant: Water your mature plant a day or two before you plan to divide it. This helps it recover from the shock.
- Lift the plant: Carefully dig up the entire plant.
- Gently tease apart: Using your hands or a trowel, gently separate the root ball into smaller sections. Each division should have a good amount of roots and a few healthy shoots.
- Replant immediately: Plant your divisions into pots filled with fresh potting mix or directly into prepared garden beds. Water them in well.
The “Secret Sauce” from My Garden
- Don’t let the leaves touch the water (if you’re water propagating, which I occasionally do here): While not using water propagation as the primary method above, if you decide to try it for a quick root strike, make sure those lower leaves are out of the water. Any submerged foliage will just rot and can take your cutting down with it.
- Bottom heat makes a big difference: If you have the space, popping your pots on a heat mat designed for seedlings can dramatically speed up root formation. It mimics the warmth of spring soil perfectly.
- Humidity is your friend: Cuttings need a humid environment to encourage root growth without drying out. You can achieve this by placing a clear plastic bag loosely over the pot (making sure it doesn’t touch the leaves!) or by misting them regularly, especially if you aren’t using the plastic bag trick.
Nurturing Your New Sprouts
Once you see new growth emerging – that’s our sign that roots are developing!
- Gradually acclimatize: If you used a plastic bag, start by removing it for a few hours each day, then leave it off entirely.
- Watering: Keep the soil consistently moist but not waterlogged. Let the top inch of soil dry out slightly between waterings.
- Light: Place your newly rooted cuttings in bright, indirect light. Once they’ve established themselves, you can gradually introduce them to more direct sun.
- Transplanting: When your new plants have a good root system and are growing well, you can transplant them into larger pots or their final garden spot.
Now, what if things don’t go as planned? The most common issue I see is rot. This usually happens from overwatering or poor drainage. If you see a cutting turning mushy and black, unfortunately, it’s best to discard it and try again. Don’t get discouraged; it happens to the best of us!
Happy Growing!
Propagating Centaurea fragilis is such a rewarding journey. Be patient with your new plants, and remember that sometimes, gardening is all about experimentation and learning from each attempt. Enjoy the process, and soon you’ll have an abundance of these lovely blue blooms to share!
Resource:
https://identify.plantnet.org/k-world-flora/species/Centaurea%20fragilis%20Durieu/data