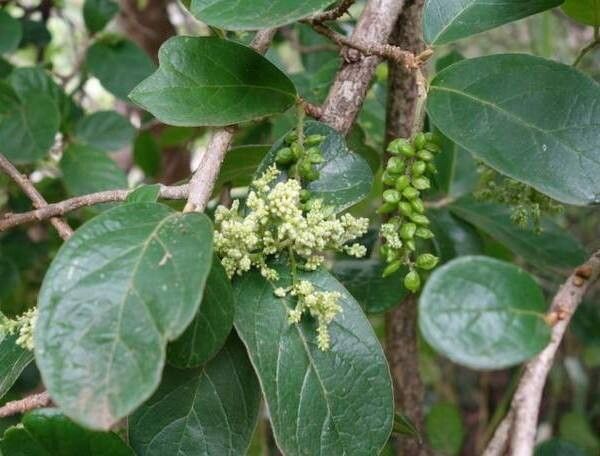
Ah, Antidesma venosum! I have such a soft spot for this lovely plant. Its lush foliage and delicate charm make it a real standout in any garden or indoor space. And the best part? Seeing those tiny new plants unfurl, knowing you coaxed them to life yourself – it’s a truly magical feeling. If you’re just starting out with propagation, don’t worry, this one is quite forgiving, especially with a few helpful pointers.
The Best Time to Start
For Antidesma venosum, spring and early summer are your absolute golden ticket. This is when the plant is actively growing, full of vigor, and ready to put its energy into developing new roots. You’re looking for stems that are semi-hardwood – not brand new and floppy, but not old and woody either. Think of it as a firm yet flexible pencil in terms of texture.
Supplies You’ll Need
Gathering your supplies beforehand makes the whole process so much smoother. Here’s what I always have on hand:
- Sharp Pruning Shears or Knife: Clean cuts are crucial to prevent disease.
- Rooting Hormone: A good quality rooting powder or gel will give your cuttings a significant advantage.
- Well-Draining Potting Mix: I like a blend of equal parts perlite, coco coir, and a good quality potting soil. For cuttings, a lighter mix is best.
- Small Pots or Trays: Clean, with drainage holes, of course!
- Plastic Bags or a propagator lid: To create a humid microclimate.
- Watering Can or Spray Bottle: For gentle watering.
- Labels and a Pen: To keep track of what you’ve propagated and when.
Propagation Methods
Antidesma venosum is wonderfully amenable to stem cuttings, which is my favorite and usually the most successful method.
- Taking the Cuttings: Under ideal conditions (spring/early summer!), select a healthy stem. Using your sharp shears, make a clean cut just below a leaf node. A leaf node is that little bump on the stem where a leaf grows from. Aim for cuttings that are about 4-6 inches long. Remove the lower leaves, leaving just two or three at the very top. This reduces water loss and prevents leaves from rotting in the soil.
- Applying Rooting Hormone: Dip the cut end of the stem into your rooting hormone, ensuring it’s coated well. Tap off any excess.
- Planting the Cuttings: Fill your small pots with the well-draining potting mix. Make a hole in the center with your finger or a pencil. Gently insert the dipped end of the cutting into the hole, firming the soil gently around it.
- Creating Humidity: Water the soil just enough to moisten it. Then, cover the pot with a plastic bag (make sure the leaves don’t touch the sides!) or place it under a propagator lid. This traps moisture and creates a humid environment that encourages root development.
The “Secret Sauce” (Pro Tips)
Here are a few little tricks I’ve learned over the years that can really boost your success:
- Bottom Heat is Your Friend: If you have a heated propagator mat, using it will make a world of difference. Warm soil temperatures really encourage root formation and speed up the process. Just a gentle warmth is all they need.
- Don’t Drench, Mist: While you want humidity, overwatering is the killer of most cuttings. It’s far better to let the surface of the soil dry out slightly between waterings. A gentle misting with your spray bottle can help keep the leaves hydrated without waterlogging the roots.
- Cleanliness is King: I can’t stress this enough – always use clean tools and pots. Fungus and bacteria can attack vulnerable cuttings in a heartbeat. A quick rinse with soapy water and a good air dry is usually enough for pots.
Aftercare & Troubleshooting
Once your Antidesma venosum cuttings have successfully rooted (you’ll see new leaf growth, and if you gently tug, there will be resistance), it’s time to gradually acclimate them.
- Acclimation: Over a week or two, slowly reduce the humidity. You can start by opening the top of the plastic bag for a few hours each day, or by lifting the propagator lid more frequently.
- Watering: Once they are fully acclimated, water when the top inch of soil feels dry. They still appreciate consistent moisture but hate soggy feet.
- Light: Place them in a bright spot with indirect sunlight. Direct sun can scorch young, tender leaves.
- Troubleshooting: The most common problem you’ll face is rot. If you see your cutting turning mushy or black, it’s usually a sign of too much moisture and not enough air circulation. If this happens, you might need to discard it and start fresh with drier soil and better ventilation. Another sign of failure is just… nothing happening. If after several weeks you see no signs of growth, it’s likely the cutting never took. Don’t get discouraged, just try again!
A Final Word of Encouragement
Growing new plants from cuttings is a journey, and like all good journeys, it takes a bit of patience. Don’t be disheartened if not every single one takes. Celebrate the successes, learn from the challenges, and most importantly, enjoy the quiet satisfaction of nurturing life. Happy propagating!
Resource:
https://identify.plantnet.org/k-world-flora/species/Antidesma%20venosum%20E.Mey.%20ex%20Tul./data