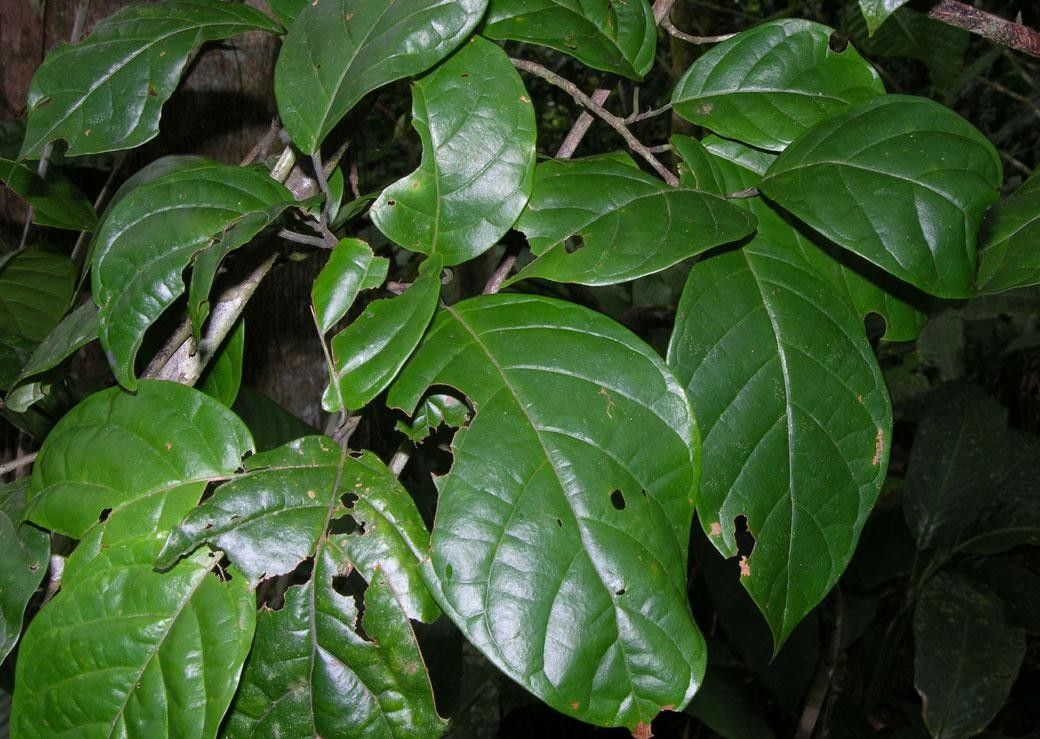
Oh, hello there! Come on in, pull up a chair. Let’s have a chat about one of my favorite treasures in the garden – Coccoloba excelsa. If you’ve ever seen one of these beauties, you know why they capture our hearts. They have this magnificent presence, with their large, leathery leaves and often a graceful, tree-like form. Plus, some varieties produce delightful edible fruits, which is always a bonus in my book!
Now, I’ll be honest, propagating Coccoloba excelsa isn’t exactly like rooting a common pothos. It’s a bit more of a special project, so it might be a tad challenging for absolute beginners. But don’t let that deter you – with a little patience and the right approach, you absolutely can succeed! And the reward of seeing your own little Coccoloba take off? Pure gardening joy.
The Best Time to Start
To give your Coccoloba excelsa the best chance at success, I always recommend starting in late spring or early summer. This is when the plant is in its active growth phase. New growth is generally more pliable and responsive to rooting. Think of it as the plant being full of energy and ready to put down some roots!
Supplies You’ll Need
Here’s what I usually keep handy when I’m getting ready to propagate:
- Sharp pruning shears or a clean knife: For making clean cuts on your cuttings. Sterilize them between uses!
- Rooting hormone: A powder or gel is fine. This really gives your cuttings a boost.
- Well-draining potting mix: I like a blend of peat moss, perlite, and a bit of coarse sand. You want air to get to those developing roots.
- Small pots or propagation trays: Clean ones, please!
- Clear plastic bags or a propagation dome: To create a humid environment.
- Watering can with a fine rose: For gentle watering.
- Optional: Bottom heat mat: This can significantly speed up the rooting process.
Propagation Methods: Let’s Get Our Hands Dirty!
For Coccoloba excelsa, I find stem cuttings to be the most reliable method. Let’s walk through it:
- Select Your Cuttings: Look for healthy, semi-hardwood stems on your mature plant. These are stems that are not brand new and soft, but also not old and woody. You want pieces that are about 4-6 inches long.
- Make the Cut: Using your sterilized pruners or knife, make a clean cut just below a leaf node (where a leaf attaches to the stem). This is where roots are most likely to form.
- Prepare the Cutting: Gently remove the lower leaves, leaving just a few at the top. This prevents them from rotting once the cutting is in the soil. If the remaining leaves are particularly large, you can even cut them in half crosswise to reduce water loss.
- Apply Rooting Hormone: Dip the cut end of the stem into your rooting hormone powder or gel. Tap off any excess.
- Potting Up: Fill your clean pots with your well-draining potting mix. Make a hole in the center large enough for the cutting. Insert the treated stem into the hole, ensuring the leaf nodes that were pruned off are below the soil surface. Gently firm the soil around the cutting.
- Create Humidity: Water the soil lightly. Then, cover the pot with a clear plastic bag (you can use skewers to prop it up so it doesn’t touch the leaves) or place it under a propagation dome.
The “Secret Sauce” (Pro Tips)
Here are a few tricks I’ve learned over the years that can really make a difference:
- Don’t let the leaves touch the water (if you were tempted to try water propagation): While some plants are happy in water, Coccoloba leaves are quite prone to rot if they sit in stagnant water. Stick to soil!
- Bottom Heat is Your Friend: If you have a bottom heat mat, place your pots on it. This gentle warmth mimicking spring soil temperatures will encourage root development much faster than just ambient room temperature. I find it a game-changer for slower rooters.
- Patience is Key – Seriously: Coccoloba excelsa can be a bit of a slowpoke when it comes to rooting. Don’t be tempted to pull them up too soon to check for roots! Give them at least 6-8 weeks, and sometimes longer, before you gently tug to feel for resistance.
Aftercare & Troubleshooting
Once you feel that resistance, or even see new leaf growth, it’s a good sign! Gradually acclimatize your new plant to your home environment. If it was covered, slowly open the plastic bag a bit more each day over a week. Continue to keep the soil consistently moist but not soggy.
The most common problem you might encounter is rot. If your cuttings look mushy or black at the base, that’s rot. This usually happens due to:
- Overwatering: The soil stays too wet for too long.
- Poor drainage: The potting mix isn’t airy enough.
- Lack of air circulation: That humid microclimate is great, but sometimes too much of a good thing can lead to fungal issues.
If you see rot, it’s usually best to discard the cutting and try again. You can often prevent it by ensuring your soil is well-draining and not watering unless the top inch of soil feels dry.
A Little Encouraging Closing
So there you have it! Propagating Coccoloba excelsa is a journey, not a race. It takes a bit of dedication, but trust me, watching those first tiny roots emerge and a new leaf unfurl is incredibly satisfying. Don’t be discouraged if your first attempt isn’t a roaring success. Each try teaches you something new. Just remember to be patient, keep things clean, and enjoy the process of growing your own little piece of paradise. Happy propagating!
Resource:
https://identify.plantnet.org/k-world-flora/species/Coccoloba%20excelsa%20Benth./data