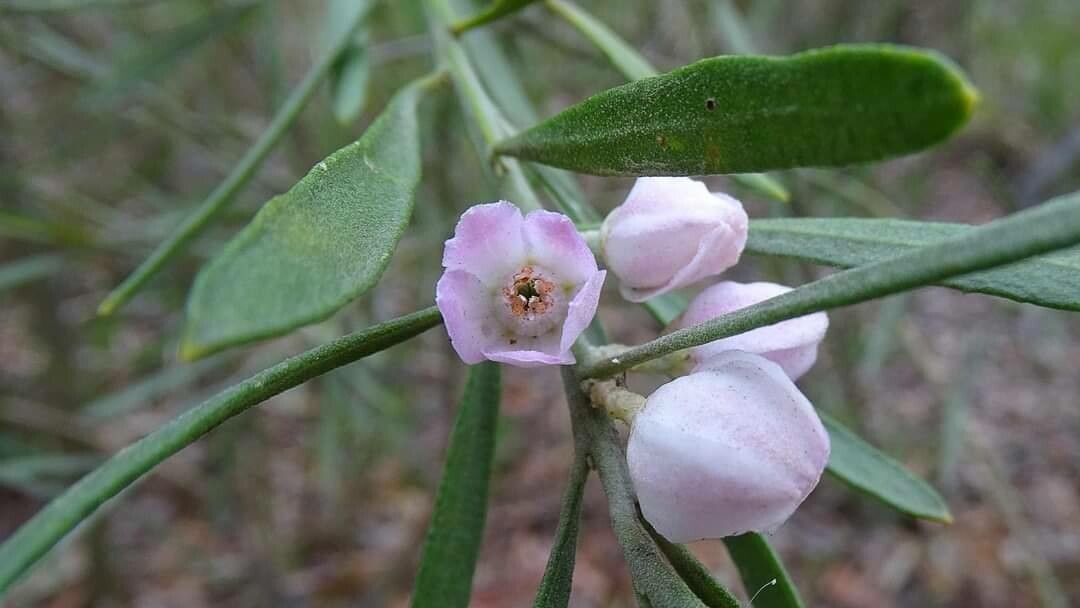
Well hello there, fellow plant lover! It’s so lovely to have you join me today. We’re diving into the wonderful world of Crowea angustifolia, and let me tell you, it’s a plant that just brings a smile to my face. Those delicate, star-shaped pink flowers? Absolutely charming. They bloom for such a long period, too, offering a burst of color when so many other things are resting.
Now, you might be wondering if adding more of these beauties to your garden is a daunting task. I’d say that propagating Croweas is wonderfully rewarding, and while it takes a little care, it’s certainly not one of those finicky plants that will have you tearing your hair out. With a bit of patience and these tips, you’ll be well on your way to a whole constellation of Croweas!
The Best Time to Start
For the best success with our Crowea cuttings, I find that late spring through to early summer is simply ideal. This is when the plant is actively growing and has plenty of energy to put into developing new roots. You’re looking for stems that are semi-hardwood – meaning they’ve lost some of their youthful softness but aren’t yet completely woody and mature. Give a stem a gentle bend; if it snaps cleanly, it’s likely too old. If it’s still very flexible, it’s probably too soft. That sweet spot in the middle is what we’re after.
Supplies You’ll Need
Gathering your supplies beforehand makes the whole process so much smoother. Here’s what I always have on hand:
- Sharp, clean pruning shears or secateurs
- A quality potting mix – I like a blend that’s light and well-draining. A mix of potting soil, perlite, and a little bit of coarse sand works beautifully.
- Small pots or seedling trays with drainage holes.
- Rooting hormone (optional, but it can give you a bit of a boost).
- A mister or spray bottle filled with clean water.
- A clear plastic bag or propagation dome to create a humid environment.
- A small trowel or dibber for making holes in the soil.
Propagation Methods: Stem Cuttings
This is by far the most common and effective way to multiply your Croweas. It’s straightforward and yields great results.
- Take Your Cuttings: Head out to your Crowea plant in your chosen timeframe. Select healthy, vigorous stems that are about 10-15 cm (4-6 inches) long. Using your sharp secateurs, make a clean cut just below a leaf node. A leaf node is where a leaf emerges from the stem. This is where the magic of root development often begins. You can take several cuttings from a single plant, just be sure to do it without over-pruning your mother plant.
- Prepare the Cuttings: Gently remove the lower leaves from the cutting, leaving just two or three sets of leaves at the very top. This prevents them from rotting in the soil and reduces water loss. If your cuttings are quite long, you can even cut the remaining leaves in half horizontally. This trick is fantastic for reducing transpiration.
- Apply Rooting Hormone (Optional): If you’re using rooting hormone, dip the cut end of each stem into the powder or gel, tapping off any excess.
- Plant Your Cuttings: Fill your small pots or trays with your prepared, moistened potting mix. Use your trowel or dibber to make a hole in the center of each pot. Carefully insert the cut end of your Crowea cutting into the hole, ensuring the leaf nodes are buried. Gently firm the soil around the stem to ensure good contact.
- Create a Humid Environment: This is crucial! Water the soil lightly to settle it in. Then, cover the pots with a clear plastic bag or place them under a propagation dome. Make sure the plastic doesn’t touch the leaves if possible – that can encourage rot. Pop the whole setup in a bright spot, but out of direct, harsh sunlight.
The “Secret Sauce” (Pro Tips)
Here are a couple of my tried-and-true tricks that make a real difference:
- Think “Bottom Heat”: Croweas absolutely love a bit of warmth from below to encourage root formation. If you have a heated propagator mat, pop your pots on that! If not, don’t despair – placing them in a warm spot, like on top of a refrigerator or in a sunny (but not scorching) windowsill, can also provide enough ambient heat.
- Don’t Drown Your Dreams: While humidity is key, overwatering is the quickest way to lose your cuttings. The soil should feel consistently moist, not soggy. If you poke your finger in and it feels squishy, you’ve gone too far. Let it dry out just a fraction before watering again.
Aftercare & Troubleshooting
Once your cuttings have started to show signs of new growth – tiny leaves unfurling or a bit of vigor returning – that’s a good sign roots are forming! Keep them in that humid environment for a few more weeks.
You’ll know they’re ready to be potted on individually when you gently tug on a cutting and feel resistance. It means roots have anchored it in the soil. Carefully transplant them into larger individual pots, continuing to water them as you did before. As they establish further, you can gradually acclimatize them to less humid conditions by slowly opening up the plastic bag or removing the dome for longer periods.
The most common issue you’ll encounter is rot. If you see cuttings turning black and mushy, or if the leaves look limp and yellowed before any signs of roots, it’s usually a sign of too much moisture or lack of air circulation. Don’t be too hard on yourself if a few don’t make it – it happens to the best of us! Just discard them and try again with fresh cuttings.
A Encouraging Closing
And there you have it! Propagating your own Crowea angustifolia is a truly satisfying process. Be patient, observe your cuttings, and trust your instincts. The joy of nurturing a new plant from a tiny piece of stem is immense. Happy propagating, and may your gardens be ever more abundant!
Resource:
https://identify.plantnet.org/k-world-flora/species/Crowea%20angustifolia%20Sm./data