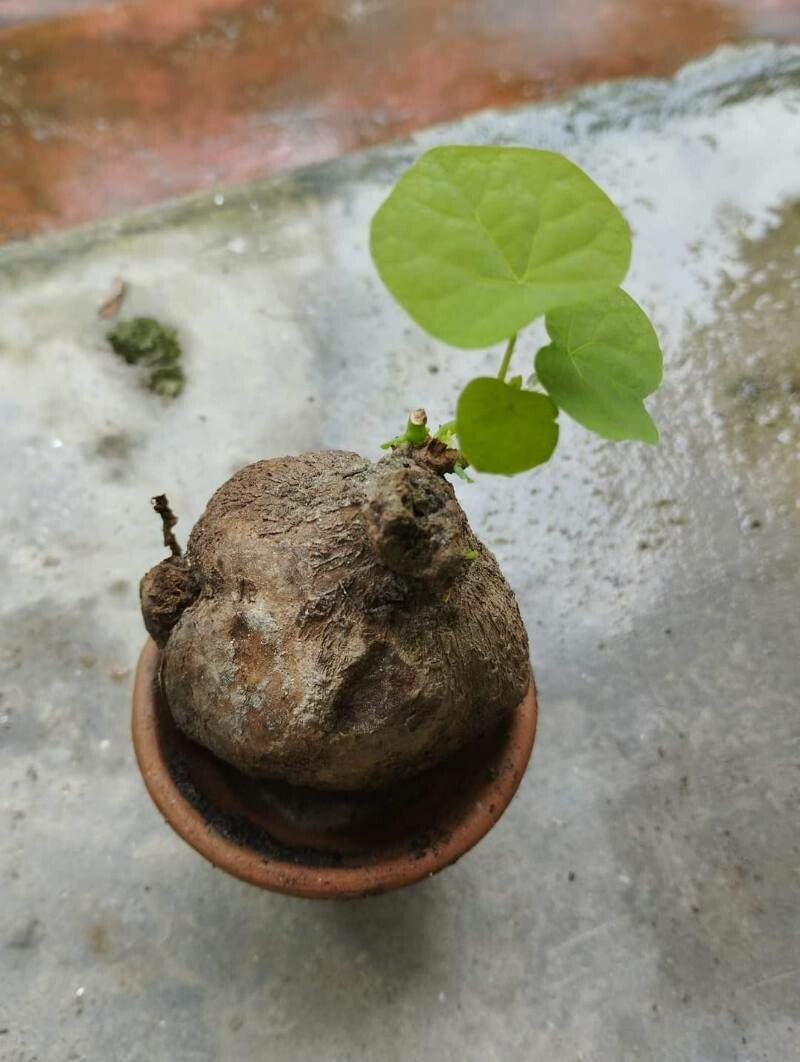
Hey there, fellow plant lovers! I’m so excited to chat with you today about a truly enchanting plant: Stephania rotunda. If you’ve ever seen one of these beauties, with its fascinating caudex (that swollen, bulb-like base) and delicate, heart-shaped leaves trailing elegantly, you know what I’m talking about. It’s like a little botanical sculpture, and propagating them is incredibly rewarding. Now, I won’t lie, Stephania rotunda can be a little bit of a diva sometimes, so it’s not the absolute easiest plant for a brand-new beginner, but with a little patience and a few insider tricks, you’ll be well on your way!
The Best Time to Start
Generally, the spring and early summer months are your golden ticket for propagating Stephania rotunda. This is when the plant is actively growing and has the most energy to put into developing new roots. Look for new, healthy shoots that are firm and not yet woody. Starting when the plant is in its vigorous growth phase significantly increases your chances of success.
Supplies You’ll Need
Here’s what you’ll want to have on hand before you dive in:
- Sharp, clean pruning shears or a sharp knife: For making clean cuts.
- Potting mix: A well-draining mix is crucial. I like to use a blend of equal parts perlite, coco coir, and some orchid bark. A cactus and succulent mix with added perlite works well too.
- Small pots or seed trays: With drainage holes, of course!
- Optional: Rooting hormone: A powder or gel can give your cuttings a little boost.
- Optional: Plastic bag or propagator: To create a humid environment.
- Optional: Heat mat: Especially helpful if your propagation area is on the cooler side.
Propagation Methods
While Stephania rotunda can be a bit finicky, the most reliable method for me has always been stem cuttings.
- Take Your Cuttings: Gently select a healthy stem that’s at least 4-6 inches long and has a few sets of leaves. Using your sharp pruning shears or knife, make a clean cut just below a leaf node (that’s where a leaf attaches to the stem). Try to get a cutting with at least two or three leaf nodes.
- Prepare the Cutting: Gently remove the lower leaves from the cutting, leaving only the top two or three leaves intact. If the leaves are very large, you can even cut them in half horizontally to reduce water loss.
- Apply Rooting Hormone (Optional but Recommended): Dip the cut end of the stem into your rooting hormone, tapping off any excess.
- Plant Your Cuttings: Fill your chosen pots with your well-draining potting mix. Make a small hole in the center of the soil with your finger or a pencil. Insert the cut end of the Stephania rotunda cutting into the hole, ensuring at least one leaf node is buried under the soil. Gently firm the soil around the stem.
- Water Gently: Water the soil lightly, just enough to moisten it. Avoid waterlogging.
- Create a Humid Environment: This is key! You can cover the pot with a clear plastic bag (making sure the leaves don’t touch the plastic) or place it inside a propagator. If you’re using a plastic bag, poke a few small holes in it for ventilation.
The “Secret Sauce” (Pro Tips)
Here are a few things I’ve learned over the years that can really make a difference:
- Don’t let those leaves touch the water (if you’re using a humidity dome or bag)! This is a prime spot for rot to set in. If they droop down, prop them up gently.
- Bottom heat is your friend. Stephania rotunda appreciates a little warmth from below. Placing your pots on a gentle heat mat can significantly speed up root development. It mimics the warmth of the soil during its active growing season.
- Patience is a virtue, and so is observation. Don’t be tempted to pull your cuttings out immediately to check for roots. Give it at least 4-6 weeks. You’ll know roots are forming when you see new growth appearing, or feel a gentle resistance when you tug very lightly on the cutting.
Aftercare & Troubleshooting
Once you see signs of new growth, congratulations! This means roots are developing. You can slowly start to acclimate your new plant to less humid conditions by gradually opening your propagator or removing the plastic bag over a few days. Continue to water sparingly, allowing the soil to dry out slightly between waterings.
The most common pitfall you’ll encounter is rot. If your cutting turns mushy, blackens, or just looks completely sad and wilts without any signs of new growth, it’s likely succumbed to rot. This is usually due to overwatering or poor drainage. If you see this happening, don’t despair! Sometimes, a stem cutting can still be salvaged if you catch it early. You can try making a fresh, clean cut to remove the rotten portion and try propagating again, ensuring your moisture levels are more controlled.
Keep Growing!
Propagating Stephania rotunda can be a delightful journey. Remember to be gentle, keep things clean, and provide that crucial humidity. Don’t be discouraged if your first attempt isn’t a runaway success. Every gardener has their “failures,” and they’re just learning opportunities in disguise. Enjoy the process, celebrate every bit of new growth, and you’ll soon have a small army of these gorgeous plants to admire! Happy propagating!
Resource:
https://identify.plantnet.org/k-world-flora/species/Stephania%20rotunda%20Lour./data