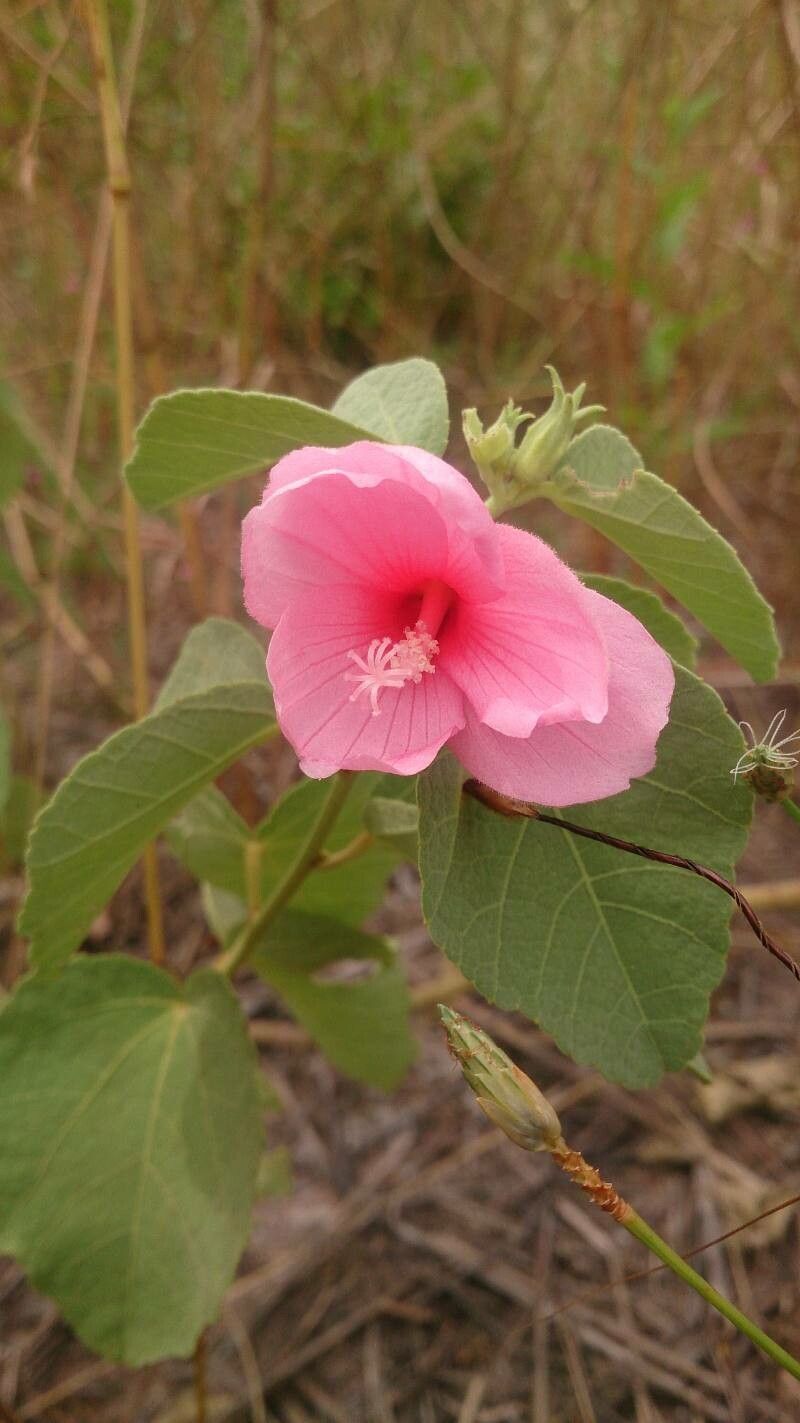
Hey there, fellow plant enthusiasts! I’m so excited to chat with you today about a truly charming little plant: Urena australiensis, often called the “Ciliate-leaf Urena” or sometimes just “Australian Burr.” If you’ve ever admired its delicate, pink star-shaped flowers and its uniquely textured leaves, you’re not alone. It’s a plant that brings a touch of the tropics without being too demanding.
And the best part? It’s surprisingly rewarding to propagate! For those of you just dipping your toes into the wonderful world of plant propagation, I’ve got good news. Urena australiensis is generally quite forgiving, making it a fantastic candidate for beginners. You can easily fill your garden or your home with these beauties without too much fuss.
The Best Time to Start
My go-to time for starting new Urena australiensis plants is definitely late spring or early summer. This is when the plant is in its most vigorous growth phase. You know, when it’s really putting on a show? That’s your cue! You’ll find the stems are pliable and full of energy, which translates to excellent rooting success. Waiting until the weather is consistently warm is key.
Supplies You’ll Need
Before we get our hands dirty, let’s gather our materials. Here’s what I usually have on hand:
- Sharp Pruning Shears or a Clean Knife: For taking clean cuttings.
- Rooting Hormone Powder or Gel: This is optional, but it definitely gives your cuttings a helpful boost.
- Well-Draining Potting Mix: I like a mix of equal parts peat moss or coco coir and perlite or coarse sand. This prevents soggy roots!
- Small Pots or Seedling Trays: With drainage holes, of course.
- Water: For watering your cuttings.
- Plastic Bag or Clear Dome: To create a mini-greenhouse effect.
- Optional: Bottom Heat Mat: If your home tends to be cooler.
Propagation Methods
There are a couple of ways to go about this, but my favorite for Urena australiensis is through stem cuttings. It’s straightforward and yields great results.
Stem Cuttings:
- Select a healthy stem: Look for a stem that’s grown this season, so it’s not too woody. Aim for a stem that’s about 4-6 inches long.
- Make the cut: Using your sharp pruning shears or knife, make a clean cut just below a leaf node (that’s where a leaf meets the stem).
- Prepare the cutting: Gently remove the lower leaves, leaving just a couple of leaves at the top. If the remaining leaves are large, you can even snip them in half to reduce water loss.
- Apply rooting hormone (optional but recommended): Dip the cut end of the stem into your rooting hormone powder or gel. Tap off any excess.
- Plant your cutting: Fill your small pots with your well-draining potting mix. Make a hole in the center with your finger or a pencil and insert the cutting, ensuring that at least one leaf node is buried under the soil. Firm the soil gently around the base.
- Water gently: Water the potting mix thoroughly until you see water drain from the bottom of the pot.
- Create a humid environment: Cover the pot with a plastic bag (making sure it doesn’t touch the leaves) or place it under a clear dome. This traps humidity, which is crucial for successful rooting.
- Find a good spot: Place the pots in a bright location, but out of direct, harsh sunlight. A sunny windowsill is usually perfect.
The “Secret Sauce” (Pro Tips)
Now, for a couple of little tricks I’ve picked up over the years that really make a difference:
- Don’t let those pretty leaves touch the soil! Seriously. If the leaves are sitting right on the damp soil surface, they’re much more prone to rot. Trim them back or trim the stem a bit longer to prevent this.
- Bottom heat is your friend. If your home’s ambient temperature is hovering below 70°F (21°C), pop your pots onto a gentle bottom heat mat. This warmth from below encourages root development without drying out the top of the soil too quickly. It’s like a cozy little heating pad for your cuttings.
Aftercare & Troubleshooting
Be patient! It can take anywhere from 2 to 6 weeks for your cuttings to develop a good root system. You’ll know they’ve rooted when you gently tug on the cutting and feel resistance, or you might even see new leaf growth appearing.
Once you see those roots, it’s time to gradually acclimatize your new plant to normal conditions. Remove the plastic bag or dome for progressively longer periods over a few days. Keep the soil consistently moist but not waterlogged.
The most common issue you’ll encounter is rot. If your cutting starts to look mushy, turns black, or wilts dramatically and fails to perk up (even with water), it’s likely succumbed to rot. This usually happens if the soil is too wet or there isn’t enough air circulation. Don’t get discouraged; just try again with fresh cuttings and slightly drier soil.
A Encouraging Closing
Watching a new plant sprout from a simple cutting is one of gardening’s greatest joys, don’t you think? It’s a little bit of magic happening right before your eyes. So, go ahead, give it a try! Be patient with your new baby plants, provide them with a little warmth and humidity, and I have no doubt you’ll be celebrating your own success with Urena australiensis in no time. Happy propagating!
Resource: