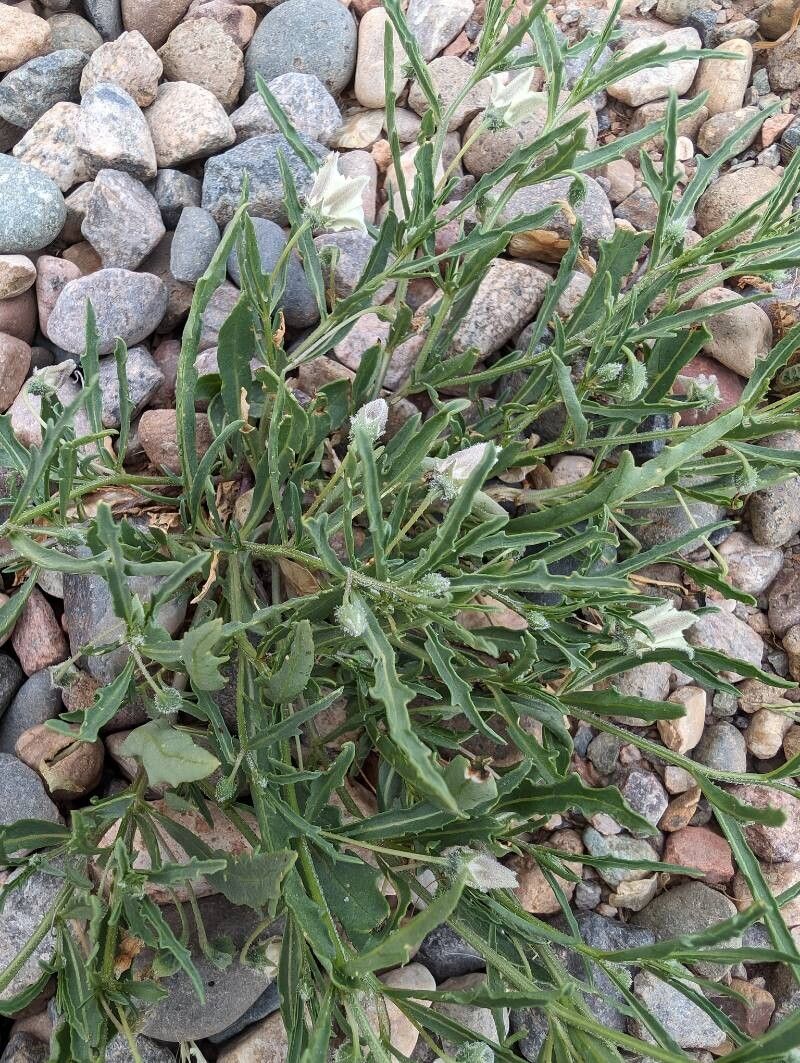
Oh, hello there! Pull up a chair and let’s chat about one of my absolute favorites: Chamaesaracha villosa. You know, the one with those lovely, velvety leaves and charming little star-shaped blooms? It truly is a gem for adding a touch of elegance to any corner of your garden.
And the best part? You can easily share that beauty! Propagating Chamaesaracha villosa is incredibly rewarding. Seeing those tiny roots emerge and knowing you’ve helped create a whole new plant from a parent stock is just… well, it’s pure gardening joy. Now, I wouldn’t say it’s the easiest plant for a complete novice to propagate, but with a little care and attention, you’ll find it quite manageable. Think of it as a fun learning curve!
The Best Time to Start
For the highest chance of success with Chamaesaracha villosa, I always aim for late spring or early summer. This is when the plant is actively growing, producing plenty of new, pliable stems perfect for taking cuttings. The days are getting longer and warmer, which really helps those cuttings get established.
Supplies You’ll Need
Gathering your tools beforehand makes the whole process so much smoother. Here’s what I usually have on hand:
- Sharp pruning shears or a clean, sharp knife: For making precise cuts.
- Well-draining potting mix: I love a blend of perlite and peat moss, or a dedicated seed-starting mix.
- Small pots or trays: Clean ones are a must to prevent disease.
- Rooting hormone (optional but helpful): Dip the cut ends into this, and you’ll often see faster root development.
- Plastic bag or humidity dome: To create a mini greenhouse effect.
- Spray bottle: For gentle misting.
- Labels: Don’t forget to label your creations!
Propagation Methods
I’ve had the most success with Chamaesaracha villosa using stem cuttings. It’s straightforward and yields great results.
- Select Your Cuttings: Look for healthy stems that are not flowering. You want new, but somewhat firm, growth. About 4-6 inches long is ideal.
- Make the Cut: Using your clean shears or knife, make a clean cut just below a leaf node. This is the point where a leaf attaches to the stem, and it’s where roots are most likely to form.
- Prepare the Cutting: Gently remove the lower leaves, leaving only a few at the top. This prevents leaves from rotting in the soil or water. If the leaves are large, you can even cut them in half to reduce water loss.
- Apply Rooting Hormone (Optional): If you’re using it, dip the cut end into the rooting hormone powder, tapping off any excess.
Now, you have two paths you can take:
Method 1: Soil Propagation
- Potting: Fill your small pots with your prepared potting mix. Make a small hole in the center with your finger or a pencil.
- Planting: Insert the prepared cutting into the hole, ensuring the leaf nodes are below the soil surface. Gently firm the soil around the stem.
- Watering: Water gently to settle the soil. You want the soil to be moist, but not waterlogged.
- Creating Humidity: Cover the pot with a clear plastic bag or place it under a humidity dome. Poke a few holes in the bag for ventilation.
- Placement: Place the pot in a bright spot that gets indirect sunlight. Avoid direct sun, which can scorch young cuttings.
Method 2: Water Propagation (Less common for this plant, but possible)
- Container: Use a clean jar or glass filled with fresh water.
- Placement: Place the prepared cuttings in the water, making sure no leaves are submerged.
- Water Changes: Change the water every few days to keep it fresh and prevent bacterial growth.
- Location: Keep in a bright spot with indirect light.
The “Secret Sauce” (Pro Tips)
Over the years, I’ve learned a few tricks that really boost propagation success.
- The “Heel” Technique: Sometimes, when taking cuttings, I’ll gently pull a stem downwards instead of cutting it cleanly. This can tear a small piece of the older bark, called a “heel,” which contains dormant buds that can sprout roots. Just clean it up a little, and it’s a fantastic bonus!
- Bottom Heat is Your Friend: If you can, pop your pots onto a seedling heat mat. This gentle bottom warmth encourages root development much faster. It’s like a cozy heated bed for your cuttings!
- Don’t Be Afraid to Experiment (Slightly): While I recommend the soil method, if you are trying water propagation, I’ve found that just barely touching the leaf node to the water surface can sometimes be more effective than submerging it. It’s a subtle difference but can help prevent rot.
Aftercare & Troubleshooting
Once you start seeing tiny roots poking out from the drainage holes or new growth appearing on the stem, congratulations! You’re on your way.
- Gradual Acclimation: If you used a plastic bag or humidity dome, gradually introduce your new plant to normal room humidity by opening the covering a little more each day for about a week.
- Light and Water: Continue to keep them in bright, indirect light. Water thoroughly when the top inch of soil feels dry.
- Transplanting: Once the roots are well-established and filling the pot, you can transplant them into slightly larger pots.
Now, what if things don’t go as planned? The most common issue is rot. If your cutting turns mushy, black, or smells unpleasant, it’s usually a sign of too much moisture and not enough air circulation. Discard it and try again! Another sign of struggle can be wilting that doesn’t perk up after watering. This might mean the cutting simply didn’t take, or it could be a sign of not enough humidity initially.
A Encouraging Closing
Propagating any plant is an act of faith and patience. Don’t get discouraged if your first few attempts aren’t perfect. Treat each one as a learning experience, and enjoy the process of nurturing these new little lives. Before you know it, you’ll have a whole collection of Chamaesaracha villosa to admire and share! Happy gardening!
Resource:
https://identify.plantnet.org/k-world-flora/species/Chamaesaracha%20villosa%20Rydb./data