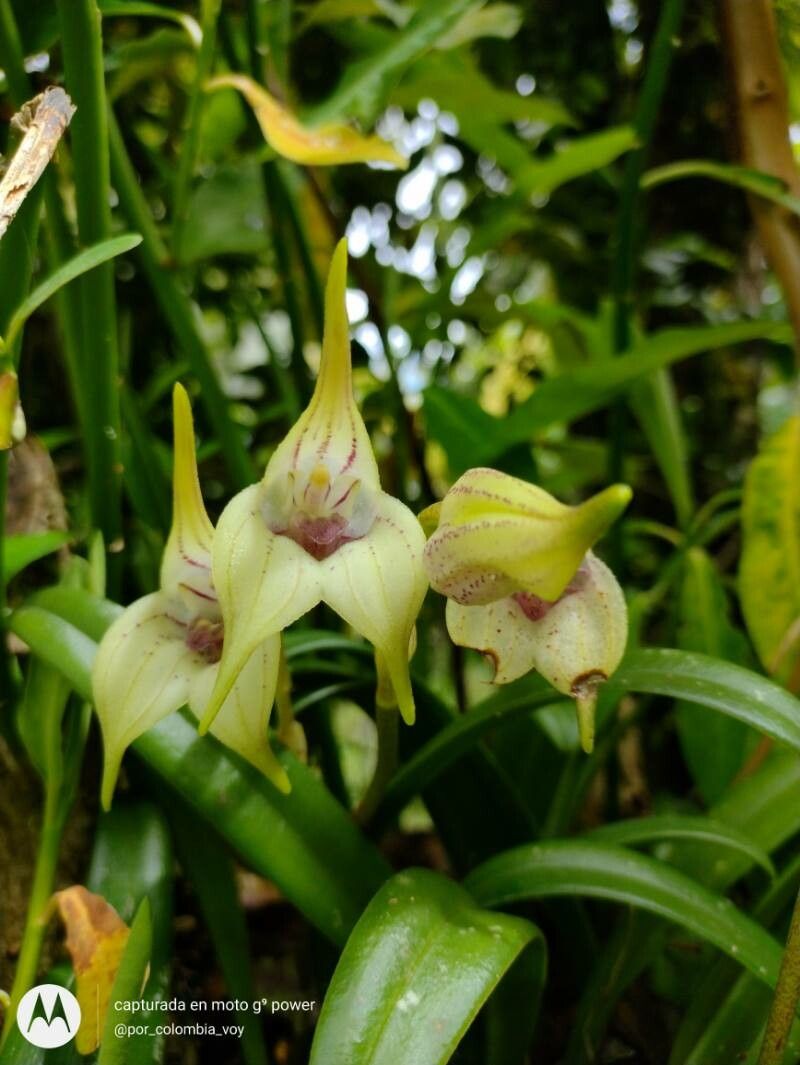
Hello fellow plant lovers! Today, we’re going to dive into the wonderful world of propagating Masdevallia coriacea. If you’ve ever admired its unique, leathery leaves and striking blooms, you’ll know how special this orchid truly is. There’s a unique satisfaction in coaxing new life from an existing plant, especially one as charming as Masdevallia coriacea. Now, to be upfront, this isn’t the absolute easiest orchid to propagate. It takes a bit of finesse and patience, but I promise, the reward is well worth the effort. Think of it as a delightful challenge!
The Best Time to Start
For Masdevallia coriacea, the sweet spot for propagation is usually in the spring or early summer. This is when the plant is actively growing and has plenty of energy to spare. I find it’s best to work with a healthy, well-established plant that’s showing vigorous new growth. Avoid propagating when the plant is stressed, perhaps from extreme heat or cold, or during its flowering period.
Supplies You’ll Need
Gathering your supplies beforehand makes the whole process smoother. Here’s what I recommend:
- Sharp, sterile pruning shears or a clean knife: You want to make clean cuts to prevent disease.
- DIP ‘n GROW or Clonex rooting hormone (optional but recommended): This can give your cuttings a great head start.
- High-quality orchid potting mix: A mix designed for orchids, often containing bark, perlite, and charcoal, is ideal to ensure good drainage and aeration.
- Small pots or seedling trays: New divisions or cuttings will need small homes to start their journey.
- Sphagnum moss: This is fantastic for keeping humidity levels up, especially for young plants.
- Watering can with a fine spray nozzle: Gentle watering is key.
- Labels and a permanent marker: Don’t forget to label your babies!
- A small, clear plastic bag or a small propagator: To create a humid environment.
Propagation Methods
Masdevallia coriacea is most successfully propagated through division. This is when you split a mature plant into smaller sections, each with its own roots and at least one healthy pseudobulb (the swollen base of the stem).
Division Step-by-Step:
- Gently remove the plant from its pot. If it’s tightly wedged, you might need to carefully slide a knife around the edges.
- Inspect the root system. You’re looking for natural divisions where the plant has grown into separate clumps.
- Using your sterile shears or knife, carefully cut through the rhizome (the creeping stem) to separate the divisions. Aim for divisions that have at least 2-3 healthy growths and a decent root system. Don’t be afraid to gently tease apart roots if necessary, but try to minimize damage.
- Remove any dead or damaged leaves or roots.
- (Optional) Dip the cut ends of the rhizome and roots into your rooting hormone.
- Pot each division into its own small pot using your orchid mix. Ensure the new plant is at the same depth it was previously growing.
- Water lightly after potting.
The “Secret Sauce” (Pro Tips)
Here are a few tricks I’ve learned over the years that can really make a difference:
- Don’t overwater after division. While they need some moisture, soggy roots are the fastest way to rot. Let the potting medium dry out slightly between waterings. Think “moist, not wet.”
- Provide consistent, high humidity. Young divisions are especially susceptible to drying out. A small plastic bag tented over the pot (with a few air holes) or placing the pots in a propagator can create that vital humid microclimate. This is where that sphagnum moss comes in handy too – you can tuck some around the base of the division in the pot.
- Avoid direct sunlight. New divisions are tender and can scorch easily. Bright, indirect light is perfect.
Aftercare & Troubleshooting
Once your divisions are potted, keep them in that humid environment for a few weeks. As they start to establish, you can gradually acclimate them to slightly less humidity. Water when the potting mix is approaching dryness, and always use room temperature water.
The most common issue you’ll encounter is rot. If you notice mushy, brown or black leaves or pseudobulbs, it’s likely due to overwatering. If you catch it early, sometimes you can trim away the rotted parts with sterile tools and let the plant dry out thoroughly. If a division just refuses to grow or looks perpetually wilted and unhappy, it might not have had enough viable root mass to begin with. Don’t be discouraged; learn from it, and try again with a stronger division next time.
A Little Patience Goes a Long Way
Propagating Masdevallia coriacea is a rewarding process that connects you more deeply with your plants. It takes a bit of care and attention, but seeing those tiny new growths emerge is incredibly satisfying. Be patient with your new little orchids, give them the environment they need, and you’ll be rewarded with beautiful new plants to cherish. Happy growing!
Resource:
https://identify.plantnet.org/k-world-flora/species/Masdevallia%20coriacea%20Lindl./data