Oh, hello there! Come on in and pull up a chair. I’ve got my favorite mug of chamomile ready, and I’m so excited to chat with you about one of my absolute favorite wildflowers: Moraea polystachya. You know, the one with those lovely, delicate blooms that look like butterflies flitting through the garden?
Introduction: Welcoming More Moraea into Your Life
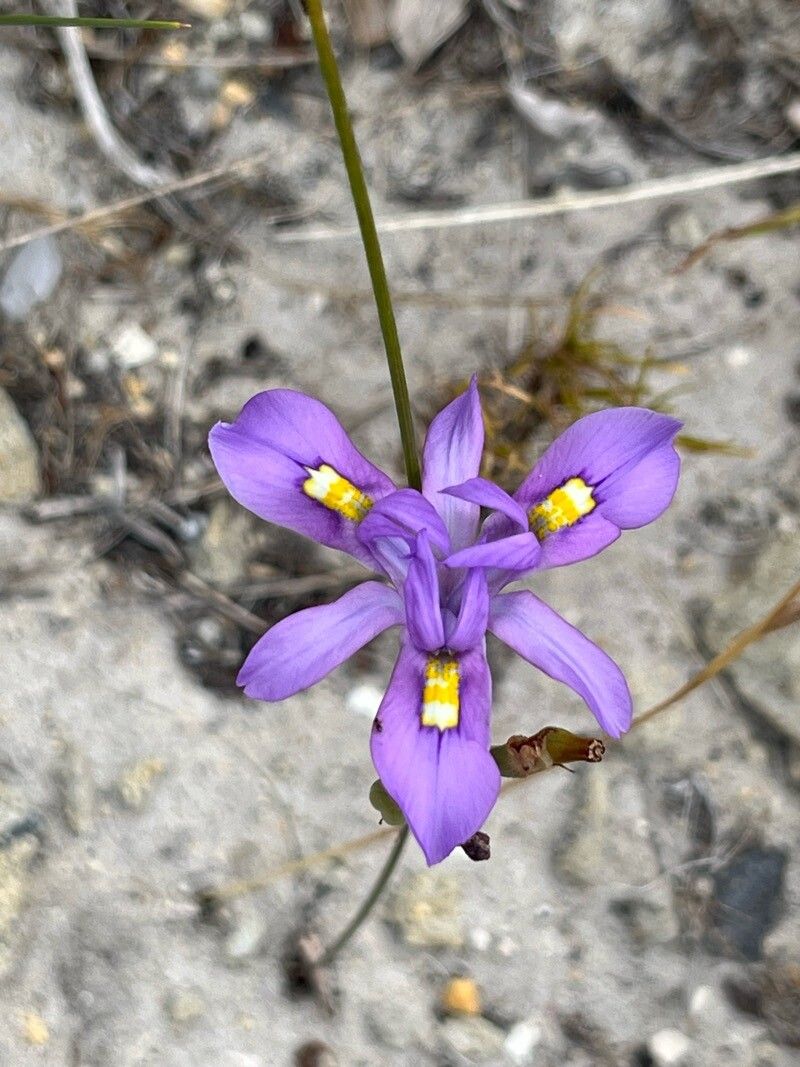
Moraea polystachya, often called African Iris or, more poetically, the “butterfly iris,” is a real charmer. Its elegant flowers, usually in shades of blue, purple, or white with intricate markings, bring a touch of wild, unfussy beauty to any landscape. And the best part? You can easily share this beauty by propagating it! For those of you just dipping your toes into the plant propagation pool, I’d say Moraea polystachya is quite beginner-friendly. It’s forgiving and generally eager to grow, which makes the whole process incredibly rewarding. Seeing a tiny new plant emerge from something you started yourself is a special kind of magic.
The Best Time to Start: Spring’s Gentle Awakening
My experience tells me that the absolute sweet spot for propagating Moraea polystachya is in early spring. This is when the plant is just waking up from its winter rest and is full of vigor, ready to put on a growth spurt. Starting then gives your new divisions or cuttings plenty of time to establish themselves before the heat of summer or the chill of autumn.
Supplies You’ll Need: Your Propagation Toolkit
Don’t worry, you don’t need anything too fancy. Here’s what I usually gather:
- Sharp pruning shears or a clean knife: For making clean cuts.
- Well-draining potting mix: A good blend of peat moss, perlite, and some compost works wonderfully. You can also add a bit of coarse sand.
- Small pots or trays: Whatever suits the size of your divisions or cuttings.
- Watering can with a fine rose attachment: To water gently without disturbing delicate roots.
- Rooting hormone (optional but helpful): Especially for cuttings, this gives them an extra boost.
- Labels and a pen: To keep track of what you’ve planted and when.
Propagation Methods: Sharing the Joy
The most common and successful way I propagate Moraea polystachya is through division. These plants naturally form clumps, and over time, they get bigger and can even start to bloom less prolifically in the center.
Dividing Your Moraea:
- Gently unearth the parent plant. Carefully dig around the base of the Moraea, trying not to damage the root system. Lift the entire clump from the soil.
- Separate the clumps. Gently tease apart the root ball with your hands. You’re looking for natural divisions, where sections of the plant have their own roots and shoots. If it’s a bit stubborn, use your clean pruning shears or knife to make a cut through the root mass, ensuring each new division has roots and at least one growth shoot.
- Replant your divisions. Fill your new pots or a prepared spot in the garden with your well-draining potting mix. Plant each division so the crown (where the leaves emerge from the roots) is just at the soil surface.
- Water thoroughly. Give them a good soak to settle the soil around the roots.
You can also try seed propagation, but honestly, division is so much faster and more reliable for getting established plants.
The “Secret Sauce”: My Insider Tips
Now, for a couple of little tricks I’ve picked up over the years that can make your propagation efforts even more successful:
- Don’t overwater newly divided plants. While they need moisture, soggy soil is the enemy! Let the top inch of soil dry out slightly between waterings. This encourages the roots to seek out moisture and grow stronger.
- Think about camouflage. When you’re replanting divisions, tuck them into your existing garden beds among other plants. This can offer a touch of shade and protection while they get established, preventing them from looking too stark and vulnerable. They’ll appreciate the ambient moisture from their neighbors, too!
Aftercare & Troubleshooting: Nurturing New Growth
Once your divisions are planted, keep them consistently moist but not waterlogged. New growth is the best indicator that they’ve taken. You’ll start to see fresh leaves emerging from the crown.
The main thing to watch out for is rot. If you see leaves turning yellow and mushy, or if the soil stays perpetually soggy, you might have a rot issue. This is usually a sign of too much water or poor drainage. If you suspect rot, gently unpot the division, trim away any mushy or black roots with your clean shears, and replant in fresh, well-draining soil.
A Little Patience Goes a Long Way
Starting new plants is such a rewarding journey, isn’t it? It requires a touch of patience, a dash of observation, and a whole lot of love. Don’t be discouraged if not every single one takes off immediately. Keep trying, keep learning from your plants, and soon you’ll have more of those delightful Moraea polystachya to admire and even share with friends. Happy planting!
Resource: