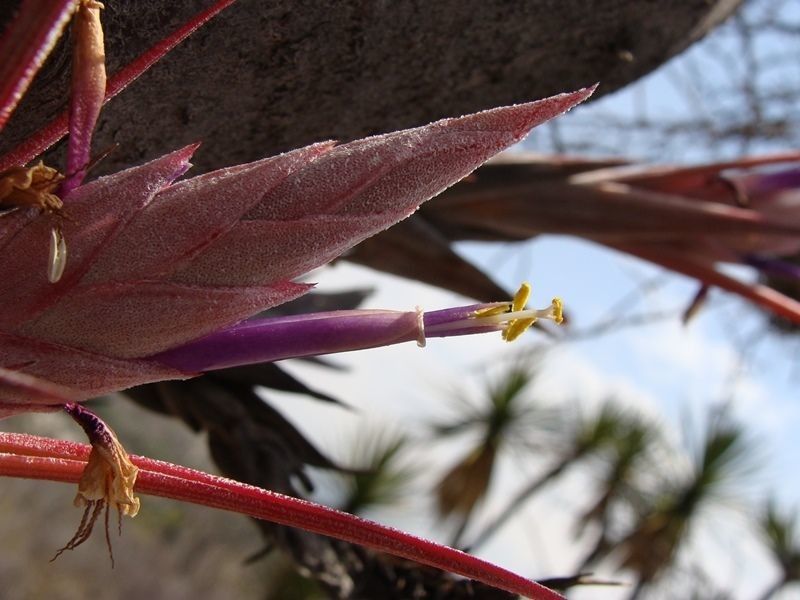
Hello fellow plant enthusiasts! It’s me, your resident green-thumb guru, back with another exciting propagation adventure. Today, we’re diving into the wonderful world of Tillandsia circinnatioides, often called the Cardboard Bromeliad.
Now, I know what you might be thinking – Tillandsias? Aren’t those the “air plants” that just sort of… float? Well, you’re not wrong! But Tillandsia circinnatioides has this wonderfully architectural look, with stiff, arching leaves that create such a dramatic presence. And the best part? Propagating them isn’t nearly as intimidating as you might imagine. While it takes a little finesse and a good eye, I’d say it’s a moderately challenging but incredibly rewarding project for the aspiring propagator. Seeing a tiny pup unfurl and grow into its own plant is pure magic!
The Best Time to Start
The absolute best time to think about propagating Tillandsia circinnatioides is when the mother plant is actively growing. For most of us, that means late spring through early autumn. You’ll usually see the most vigorous growth and the appearance of new pups during these warmer, brighter months. Trying to propagate when the plant is stressed or dormant is just asking for disappointment.
Supplies You’ll Need
You don’t need a whole arsenal of fancy gear for this. Here’s what I’ve found most helpful:
- A sharp, sterilized knife or pruning shears. For these often fleshy plants, a clean cut is crucial to prevent disease.
- A spray bottle filled with clean, filtered water.
- A well-draining medium. While not strictly necessary for all methods, if you’re using division, something like a bark-based orchid mix or even coarse perlite can be helpful.
- A shallow tray or container for displaying your cuttings or newly divided plants.
- Optional: Rooting hormone powder (though often not strictly necessary for Tillandsias, it can give a little boost).
- Optional: A clear plastic bag or dome to create a humid microclimate.
Propagation Methods
There are a couple of ways we can coax new Tillandsias into existence. Let’s explore the most common and successful ones:
1. Division: The Most Common Route
This is how you’ll typically find new Tillandsia circinnatioides plantlets. When your main plant starts producing offsets, or “pups,” around its base, that’s your golden ticket.
- Inspection Time: Gently examine the base of your established T. circinnatioides. Look for baby plants that have started to form their own tiny leaves and appear to have a small base attachment point. The pup should be at least a quarter to a third the size of the mother plant before you consider separating it.
- The Gentle Detach: Using your sterilized knife or shears, carefully cut just above the point where the pup is attached to the mother plant. Take your time and aim for a clean separation. Sometimes, you might be able to gently twist and pull the pup away if it’s very loosely attached.
- Healing Break: Once separated, set the pup aside in a bright, airy spot, away from direct sun, for a day or two. This allows the cut end to callus over, which is super important to prevent rot.
- New Beginnings: Now, you can place your pup in one of a few ways:
- Dry Mounting: Simply rest it on a surface where it has good air circulation. This is often all that’s needed.
- Light Potting: If you prefer, you can nestle it into a shallow dish with some bark mix or perlite. Ensure it’s not buried too deeply.
- Misting: Lightly mist the pup once or twice a day, especially if your home is on the drier side. Make sure it has ample time to dry out between mistings.
2. Stem Cuttings (Less Common for this Specific Species, but Possible)
While division is the go-to, you can sometimes propagate T. circinnatioides from larger stem sections, especially if you have a very old, branching specimen.
- The Strategic Cut: Select a healthy, mature stem or branch. Using your sterilized tools, cut a section that is at least 4-6 inches long, ensuring it has some healthy leaves.
- Remove Lower Leaves: Gently peel away the lowest few leaves from the cut end. This exposes the stem tissue so it can potentially root.
- Callus is Key: Just like with division, allow the cut end to dry and callus over for several days, perhaps even up to a week, in a bright, airy location.
- Setting the Stage: You can then place this cutting upright in a shallow dish with a bit of moist bark or perlite. The goal is for the cut end to be in contact with a slightly humid, airy medium.
- The Humid Chamber: For cuttings, creating a mini-greenhouse effect can be highly beneficial. Place the dish with your cutting inside a clear plastic bag or under a clear dome, but ensure there’s still plenty of air circulation to prevent fungal issues. Open it daily for a few minutes to refresh the air.
The “Secret Sauce” (Pro Tips)
Over the years, I’ve learned a few tricks that can make all the difference.
- Don’t Let the Base Dwell in Water: This is paramount, especially with division. While Tillandsias love humidity, the base of the plant – where roots would form – hates being constantly wet. Always provide ample air circulation, and never let the plant sit in standing water.
- Bottom Heat is Your Friend: If you’re struggling with cuttings that seem reluctant to root, consider a gentle warmth from below. A seedling heat mat set to a low temperature can be surprisingly effective in encouraging root development. Just make sure it doesn’t dry out your medium too quickly.
- Patience is More Than a Virtue, It’s a Strategy: Tillandsia circinnatioides isn’t the fastest grower, so don’t expect overnight miracles. Give your propagated pups time to establish. They’ll tell you when they’re ready by showing new growth.
Aftercare & Troubleshooting
Once your little Tillandsia starts showing signs of life – a new leaf unfurling is the best indicator! – you’re golden.
Continue with its regular watering routine, which for Tillandsia circinnatioides usually means a thorough soak or misting every week to ten days, allowing it to dry completely between waterings. Ensure it has bright, indirect light.
Now, the not-so-fun part: troubleshooting. The most common culprit for propagation failure is rot. If you see the base turning mushy, black, or slimy, it’s a bad sign. This usually means there’s too much moisture and not enough air. If you catch it early, you might be able to cut away the rotted section, let the healthy part callus, and try again. Overwatering or poor air circulation are usually the culprits, so re-evaluate your watering and placement. Another sign of stress can be curling or drying leaves, which might mean it’s too dry, or perhaps too much direct sun. Adjust your environment accordingly.
A Little Encouragement to End
Propagating Tillandsia circinnatioides is a journey, not a race. It’s a fantastic way to expand your collection and share the joy of plants with others. Don’t be discouraged if your first attempt doesn’t go perfectly. Learn from it, adjust your approach, and most importantly, enjoy the process! Happy propagating, and may your Cardboard Bromeliads thrive!
Resource:
https://identify.plantnet.org/k-world-flora/species/Tillandsia%20circinnatioides%20Matuda/data