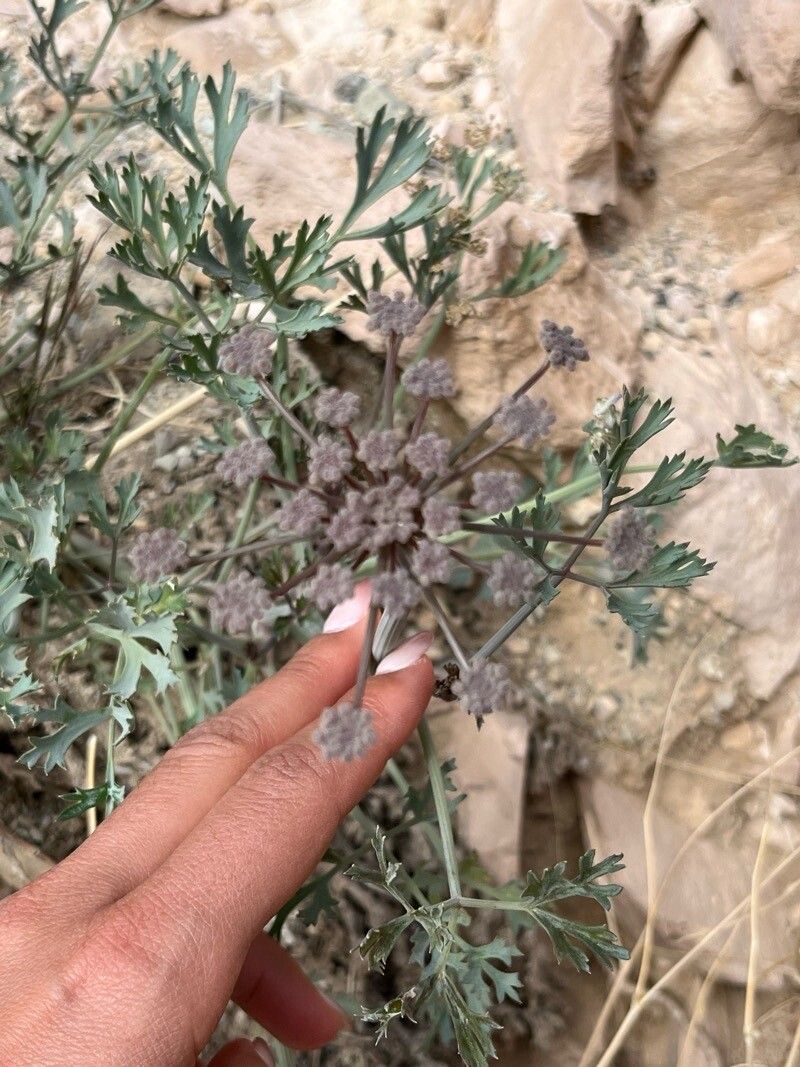
Oh, hello there! It’s so lovely to see you in my little corner of the garden. Today, we’re going to chat about a plant that always brings a smile to my face: Ducrosia flabellifolia. Sometimes called the “Fanned Sage” because of its beautiful, fan-shaped leaves, it offers a delightful fragrance and a lovely, often woody, structure to the garden. Sharing this beauty with others, or simply adding more of it to your own space, is incredibly satisfying. Now, is it a beginner-friendly plant to propagate? I’d say it’s moderately so. It requires a little attention to detail, but the rewards are absolutely worth it.
The Best Time to Start
For Ducrosia flabellifolia, my go-to time to begin propagating is when the plant is actively growing, usually late spring to early summer. This is when the stems have enough vigor to put out roots, and the days are long and warm enough to encourage growth. You want to be working with healthy, non-flowering shoots if you’re taking cuttings.
Supplies You’ll Need
Gathering your supplies before you start makes the whole process smoother. Here’s what I usually have on hand:
- Sharp pruning shears or a clean knife: For making clean cuts.
- Rooting hormone powder or gel: This is a big help, especially for woody stems.
- Well-draining potting mix: A good mix of perlite, sand, and peat moss works wonders. You can also buy a specialist seed-starting or succulent mix.
- Small pots or trays: Clean containers are essential to prevent disease.
- Labels and a marker: Never underestimate the importance of knowing what you’ve planted!
- Watering can with a fine rose or a spray bottle: For gentle watering.
- A plastic bag or propagation dome: To maintain humidity.
Propagation Methods
Ducrosia flabellifolia is quite amenable to propagation from stem cuttings. It’s generally the most straightforward method for this particular plant.
Here’s how I do it:
-
Take Your Cuttings:
- Look for healthy, non-flowering stems from your mature plant.
- Using your clean shears, make a cut just below a leaf node (where a leaf attaches to the stem).
- Aim for cuttings that are about 4-6 inches long.
- Gently remove the lower leaves, leaving just a few at the top. This prevents them from rotting in the soil.
-
Prepare the Cuttings:
- Dip the cut end of each stem into your rooting hormone. Tap off any excess. This step is crucial for encouraging faster and more robust root development.
- Make a small hole in your potting mix with your finger or a pencil. This prevents you from rubbing off the rooting hormone when you insert the cutting.
-
Plant Your Cuttings:
- Gently insert the treated end of the cutting into the prepared hole.
- Firm the soil around the base of the cutting to ensure good contact.
- If you’re planting multiple cuttings in one pot, give them a little space – about 2-3 inches apart.
-
Create a Humid Environment:
- Water the soil gently but thoroughly.
- Cover the pot or tray with a plastic bag or a propagation dome. Make sure the leaves aren’t touching the plastic if possible; this can invite rot. You can use stakes to hold the bag up.
- Place your potted cuttings in a bright location that receives indirect sunlight. Avoid direct sun, as it can scorch the young cuttings.
The “Secret Sauce” (Pro Tips)
Over the years, I’ve learned a few little tricks that seem to boost the success rate.
- Bottom Heat is Your Friend: For woody cuttings like those of Ducrosia flabellifolia, a little warmth from below can make a world of difference. Using a heat mat specifically designed for seedlings can significantly speed up root formation. It mimics the warm soil of summer.
- Don’t Be Afraid of a Slight Wilt: Sometimes, I let my cuttings sit out of water for just a few minutes after taking them before dipping them in rooting hormone. This allows the cut end to form a slight callus, which can actually help prevent rot and encourage roots to emerge. Don’t let them get bone dry, though – just a slight “airing out.”
- The “Mother Knows Best” Principle: Always take cuttings from the most vigorous, healthiest plants you have. The stronger the parent plant, the stronger the potential new plants will be.
Aftercare & Troubleshooting
Once you’ve got your cuttings planted, the waiting game begins.
- Check for Roots: After about 4-6 weeks, gently tug on a cutting. If you feel resistance, you likely have roots! You can also look for new leaf growth as a sign of success.
- Acclimatize Gradually: Once roots have formed, slowly remove the plastic bag or dome over a few days to help the young plants adjust to lower humidity.
- Transplant Carefully: When the new plants have a good root system and are actively growing, you can pot them up into individual, slightly larger pots with fresh, well-draining soil.
Now, let’s talk about what to do if things don’t go as planned:
- Rot: This is probably the most common issue. Mushy, dark stems or leaves are a sure sign of rot. It’s usually caused by too much moisture and not enough air circulation. If you catch it early, you might be able to cut away the rotten parts and try again. Make sure your soil is airy and don’t overwater.
- No Growth: Sometimes, cuttings just don’t take. This can be due to a variety of factors – the time of year, the vitality of the cutting, or insufficient humidity. Don’t get discouraged! Just try again with fresh cuttings.
A Encouraging Closing
Propagating plants is such a wonderfully rewarding process. It connects you to the cycles of nature and gives you a deeper appreciation for the resilience and beauty of our green friends. Be patient with your Ducrosia flabellifolia cuttings. Sometimes it takes a little time, a little warmth, and a whole lot of hopeful observation. Enjoy the journey, and soon you’ll be surrounded by even more of these lovely fanned beauties! Happy gardening!
Resource:
https://identify.plantnet.org/k-world-flora/species/Ducrosia%20flabellifolia%20Boiss./data