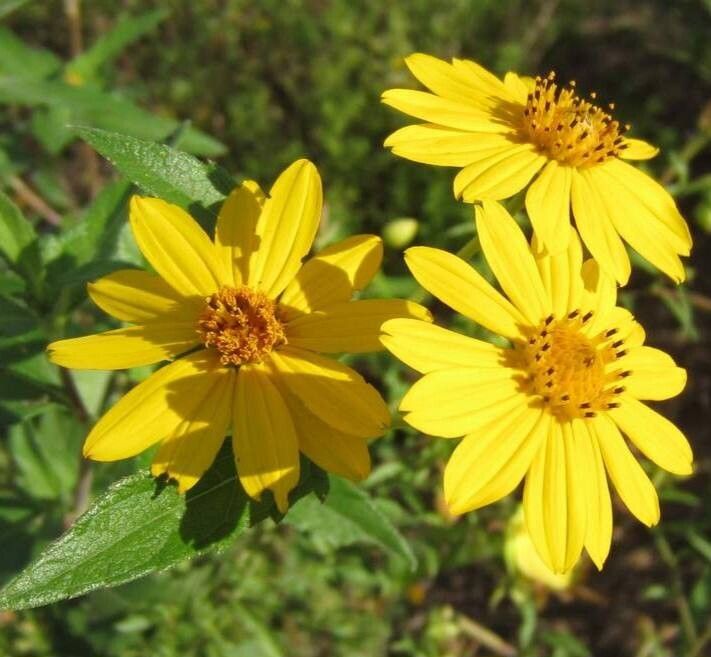
Oh, Wedelia silphioides! If you’re looking to fill your garden with sunny, cheerful blooms, this is a plant you’ll want to get to know. Its bright yellow flowers are like little bursts of sunshine, and the way it drapes and trails makes it perfect for spilling over containers or softening the edges of garden beds. The best part? Propagating this beauty is incredibly rewarding, and I’m happy to say, it’s quite beginner-friendly! You’ll have a whole garden of these cheerful plants in no time.
The Best Time to Start
Generally, the best time to take cuttings from Wedelia silphioides is when the plant is actively growing. This usually means late spring through summer. You’re looking for healthy, non-flowering stems that are relatively mature, not the brand-new, floppy growth. Think of stems that are firm but still a bit bendy – not woody, but not wimpy either.
Supplies You’ll Need
Here’s a little checklist to get you prepped:
- Sharp Pruning Shears or a Clean Knife: For taking clean cuts.
- Small Pots or Seed Trays: For your new baby plants.
- Well-Draining Potting Mix: A good quality seed-starting mix or a blend of peat moss and perlite works wonderfully.
- Rooting Hormone (Optional but Recommended): This can give your cuttings a helpful boost.
- Watering Can or Spray Bottle: For keeping things moist.
- Plastic Bags or a Propagation Dome: To create a humid environment.
Propagation Methods
Let’s get our hands dirty with the easiest methods!
Stem Cuttings
This is my go-to for Wedelia.
- Select Your Stems: Find those happy, healthy stems I mentioned earlier.
- Make Your Cuts: Using your clean shears, cut a stem that’s about 4-6 inches long. Make your cut just below a leaf node (where a leaf attaches to the stem). This is where the magic happens for root development.
- Prepare the Cuttings: Gently remove the lower leaves from the cutting, leaving just a few at the top. This prevents them from rotting in the soil.
- Apply Rooting Hormone (If Using): Dip the cut end into your rooting hormone powder or gel. Tap off any excess.
- Plant Your Cuttings: Stick the treated end about 1-2 inches deep into your prepared potting mix. You can fit several into a small pot, just give them a little space.
- Water Gently: Water the soil so it’s evenly moist, but not soggy.
- Create Humidity: Cover the pot loosely with a plastic bag or place it inside a propagation dome. This keeps the humidity high, which is crucial for cuttings to root.
Water Propagation
This method is fascinating to watch!
- Take Your Cuttings: Follow steps 1 and 2 from the stem cutting method.
- Remove Lower Leaves: Just like before, strip off the leaves from the bottom half of the cutting.
- Place in Water: Put the cuttings in a clean jar or vase filled with fresh water. Make sure the water level covers the leaf nodes where you removed the leaves.
- Keep it Bright: Place the jar in a spot with bright, indirect light.
- Change Water Regularly: Refresh the water every few days to keep it clean and oxygenated. You’ll start seeing tiny roots emerge!
The “Secret Sauce”
Here are a few tricks I’ve picked up over the years:
- Don’t Let the Leaves Touch the Water (for stem cuttings): If you’re using the soil method, make absolutely sure no leaves are buried in the moist soil. Any leaf sitting in stagnant moisture is a fast track to rot. It’s better to have fewer leaves at the top than to risk losing the whole cutting to rot.
- Bottom Heat is Your Friend: If you’re serious about propping and want faster results, a little warmth from below really speeds things up. A seedling heat mat placed under your pots can make a huge difference in how quickly your cuttings develop roots. Just a gentle warmth, not hot!
Aftercare & Troubleshooting
Once you see roots forming (you might see them poking out the bottom of the pot or peeking through the water) – hooray!
- For Soil Cuttings: Gradually acclimate your new plants to drier air by slowly opening up the plastic bag over a few days. Keep the soil consistently moist but not waterlogged. Once they look strong and are putting out new growth, you can transplant them into their own little pots.
- For Water Cuttings: When the roots are about an inch long, they’re ready to be gently transplanted into pots filled with your well-draining potting mix. Water them in well after planting.
Keep an eye out for signs of rot, which usually looks like the cutting turning black or mushy. If this happens, it’s often because of too much moisture, poor drainage, or lack of air circulation. Don’t despair if a few don’t make it; it’s all part of the learning process! Just remove the failed cutting and try again.
A Little Encouragement
Remember, gardening is a journey, and propagation is one of its most magical parts. Be patient with your little Wedelia cuttings. Watch them closely, learn from each attempt, and celebrate every success, no matter how small. Soon you’ll have a delightful abundance of these sun-loving blooms to share! Happy planting!
Resource: