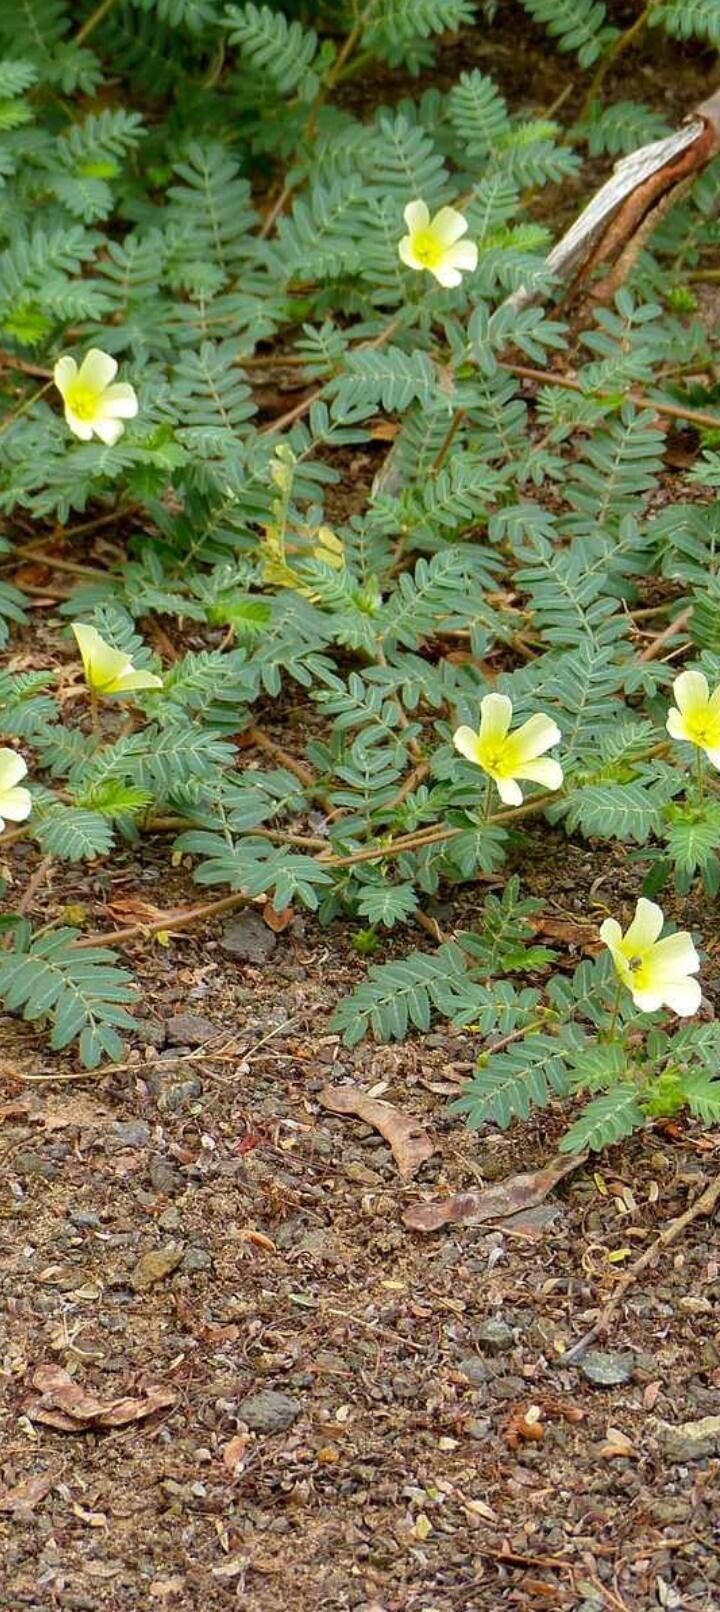
Hey there, fellow garden enthusiasts! I’m so excited to chat with you today about a plant that’s really captured my heart: Tribulus cistoides. You might know it by its common name, Gokhru, or devil’s thorns. Its vibrant yellow flowers are an absolute showstopper, bringing a burst of sunshine to any garden. Plus, it’s a fantastic groundcover that’s surprisingly tough once established. If you’re looking to expand your collection or share this beauty with friends, propagating Tribulus cistoides is incredibly rewarding, and I’m happy to tell you it’s quite approachable for beginners with a little guidance.
The Best Time to Start
For the highest success rate, I always recommend propagating Tribulus cistoides from spring through early summer. This is when the plant is actively growing and has plenty of energy to put into developing new roots. You’ll want to look for healthy, new growth – think stems that are firm but still a bit pliable, not old, woody material.
Supplies You’ll Need
Here’s what you’ll want to have on hand to get started:
- Sharp pruning shears or a clean knife: For making clean cuts.
- Rooting hormone powder or gel: This really gives your cuttings a boost.
- Well-draining potting mix: A good blend for cacti and succulents works wonders, or you can mix regular potting soil with perlite and coarse sand.
- Small pots or seed trays: With drainage holes, of course!
- Clear plastic bags or a propagation dome: To create a humid environment.
- Spray bottle filled with water: For misting.
- Labels and a marker: To keep track of your projects.
Propagation Methods
Tribulus cistoides is most easily propagated from stem cuttings. It’s straightforward and gives you a great chance of success.
Stem Cuttings:
- Select your cuttings: Look for healthy stems that are about 4-6 inches long. Make a clean cut just below a leaf node (where a leaf attaches to the stem). You want at least two or three leaf nodes on each cutting.
- Prepare the cuttings: Gently remove the lower leaves from the cutting, leaving only the top couple of leaves. This helps prevent rotting when you place them in the soil.
- Apply rooting hormone: Dip the cut end of the stem into your rooting hormone powder or gel. Tap off any excess.
- Plant the cuttings: Fill your pots or trays with your well-draining potting mix. Make a small hole with your finger or a pencil and gently insert the cutting, ensuring the cut end and at least one leaf node are buried in the soil. Firm the soil gently around the stem.
- Water gently: Moisten the soil thoroughly but avoid overwatering. A gentle misting from your spray bottle is also a good idea.
- Create humidity: Cover the pots with a clear plastic bag or a propagation dome. This creates a mini-greenhouse effect, keeping the humidity high, which is crucial for the cuttings to root. Make sure the plastic doesn’t touch the leaves.
The “Secret Sauce” (Pro Tips)
Here are a couple of things I’ve learned over the years that make a big difference:
- Don’t crowd your cuttings: Give them a little space. Overcrowding can lead to fungal issues and reduced air circulation, which isn’t ideal for happy rooting.
- Bottom heat helps! If you have a heat mat designed for seedlings, placing your pots on it can significantly speed up the rooting process. The warmth encourages root development from below.
Aftercare & Troubleshooting
Once your cuttings are planted, place them in a bright, indirect light location. Avoid direct sunlight, as this can scorch the delicate new cuttings. Mist them regularly to keep the humidity high, and always check that the soil is consistently moist but never waterlogged.
You’ll know your cuttings have rooted when you see new leaf growth or feel a bit of resistance when you gently tug on the stem. This usually takes anywhere from 3 to 6 weeks, depending on conditions.
If your cuttings start to turn yellow and mushy, or if you see blackening at the stem base, that’s usually a sign of rot. This often happens due to overwatering or poor drainage. Don’t be discouraged if a few don’t make it – it’s part of the learning process! Just pull out the failed cuttings and adjust your watering habits for the remaining ones.
A Encouraging Closing
Propagating Tribulus cistoides is a wonderful way to connect with nature and expand your love for this cheerful plant. Be patient with your new cuttings. Some will root quickly, while others might take their sweet time. Enjoy the journey, celebrate every little bit of new growth, and before you know it, you’ll have a whole garden full of these sunny beauties to share! Happy gardening!
Resource:
https://identify.plantnet.org/k-world-flora/species/Tribulus%20cistoides%20L./data