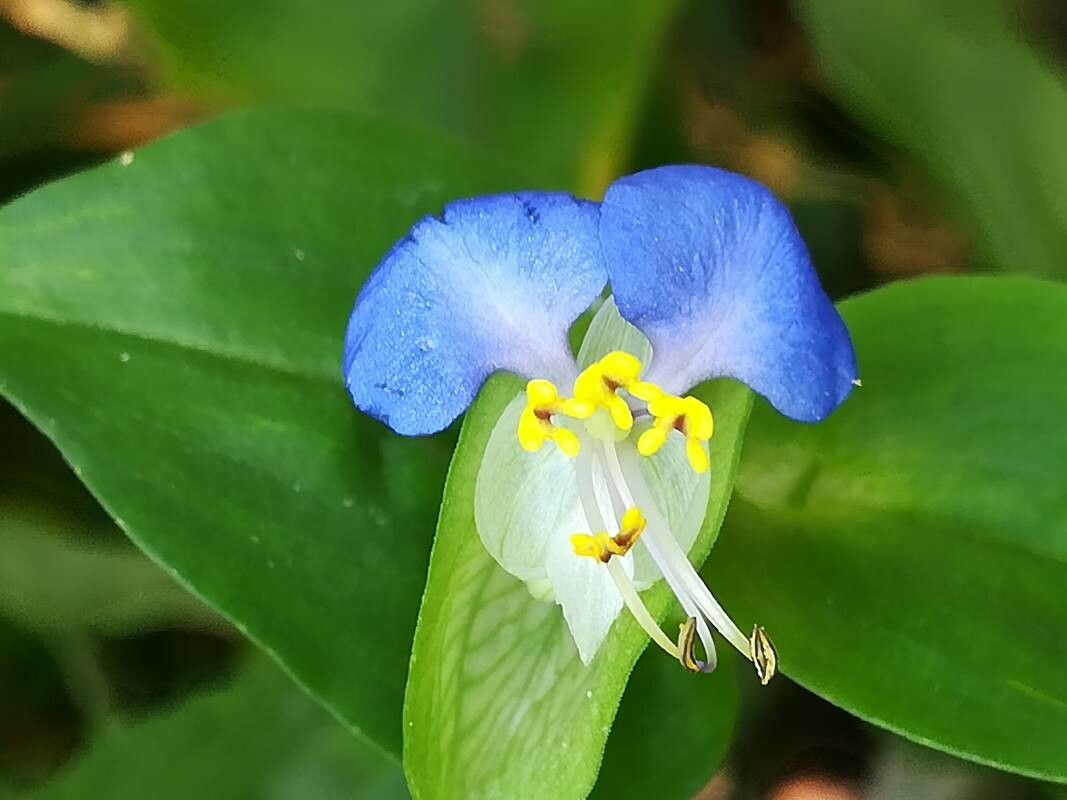
Oh, the delightful wandering dew! Commelina communis, or common dayflower, is one of those plants that just makes me smile. With its vibrant blue, comma-shaped petals that unfurl for just a day, it’s a fleeting beauty that brings so much joy. And the best part? It’s wonderfully easy to share! If you’re just starting out in the gardening world, propagating dayflowers is a fantastic way to build your confidence. You’ll have more of these cheerful blooms to fill your garden beds or share with friends in no time.
The Best Time to Start
For the absolute best success, I always recommend propagating Commelina communis during its active growing season. This typically means from late spring through early autumn. You’ll find the plants are putting on lots of new growth during this time, which means your cuttings or divisions will be full of energy and ready to root. Trying to propagate when the plant is stressed or dormant is just setting yourself up for frustration.
Supplies You’ll Need
Gathering your supplies beforehand makes the whole process so much smoother. Here’s what I usually have on hand:
- Sharp pruning shears or scissors: Clean cuts are key!
- Small pots or containers: Anything from tiny seed trays to small nursery pots will work. Make sure they have drainage holes.
- Potting mix: A fast-draining mix is best. I like a blend of potting soil and perlite or coarse sand, about a 50/50 ratio.
- Watering can or spray bottle: Gentle watering is important.
- Rooting hormone (optional, but helpful): A powder or gel can speed things up.
- Clear plastic bags or a propagation dome: For maintaining humidity.
- Labels: Don’t forget to label your new babies!
Propagation Methods
Commelina communis is quite forgiving and offers a couple of straightforward ways to multiply.
Stem Cuttings
This is my go-to method for dayflowers. It’s incredibly efficient.
- Select a healthy stem: Look for a piece of stem that’s about 4-6 inches long and has at least two or three nodes (the little bumps where leaves grow). It should be green and vigorous, not woody or old.
- Make a clean cut: Using your sharp pruning shears, cut the stem just below a node. This is where the plant is most likely to form roots.
- Prepare the cutting: Gently remove the leaves from the bottom half of the cutting. You want to expose at least one or two nodes. If any of the leaves are very large, you can even cut them in half to reduce water loss.
- Apply rooting hormone (optional): If you’re using rooting hormone, dip the cut end into the powder or gel. Just a light coating is all you need.
- Plant your cutting: Fill your small pot with your prepared potting mix. Make a small hole with your finger or a pencil. Insert the cut end of the stem into the hole, making sure at least one node is buried beneath the soil. Gently firm the soil around the stem.
- Water and cover: Water the soil gently until it’s moist but not soggy. Then, cover the pot with a clear plastic bag or place it under a propagation dome. This creates a humid environment that helps the cuttings stay hydrated while they root.
Division
If you have an established clump of dayflower, dividing it is an easy way to get multiple plants.
- Gently unearth the plant: Carefully dig up the existing dayflower clump. You can do this with a trowel.
- Separate the sections: Once the plant is out of the pot or ground, you’ll want to gently pull or tease apart the root ball. Look for sections that have healthy roots and at least a few stems. You can use your hands or a clean trowel to help with this.
- Replant the divisions: Immediately plant each division into its own pot filled with your well-draining potting mix. Treat them like you would any other potted plant, watering them in well.
The “Secret Sauce” (Pro Tips)
I’ve learned a few tricks over the years that can really boost your success rates.
- Don’t let the leaves touch the water: If you decide to try water propagation (though I find soil is more reliable for dayflowers), an important trick is to ensure none of the leaves are submerged. Roots will rot if they’re constantly in water. Only the stem should be in the water, and ideally, the cut end should be just touching it.
- Bottom heat can work wonders: Dayflowers are tropical-ish in their origins. If you have a little seedling heat mat, placing your pots on it for propagation can significantly speed up root development. It mimics the warmth of summer soil.
Aftercare & Troubleshooting
Once your cutting looks like it’s taken – you might see new little leaves starting to emerge or feel a gentle tug when you lightly pull on the stem – it’s time to transition.
- Acclimatize slowly: Gradually remove the plastic bag or dome for increasing periods over a few days. You don’t want to shock your new plant with a sudden drop in humidity.
- Watering: Keep the soil consistently moist but not waterlogged. Overwatering is one of the biggest culprits for failure. Feel the top inch of soil; if it’s dry, it’s time to water.
- Light: Place your new plants in a bright, indirect light location. Direct sun can be too intense for tender new growth.
The most common sign of trouble is rot. If your cutting turns mushy, black, or has a foul smell, it’s likely rotten. This usually happens from too much water and not enough air circulation. If a division looks wilted and refuses to perk up after a good watering, it might not have enough viable roots to support its foliage. Don’t be discouraged if a few don’t make it; it’s all part of the learning process!
A Encouraging Closing
Growing plants is a journey, and propagating is a beautiful way to deepen your connection with them. Be patient with your Commelina communis cuttings. Some will root in a couple of weeks, others might take a little longer. Just keep them happy and humid, and soon enough, you’ll have a whole new patch of these cheerful blue blooms. Enjoy the magic of creation!
Resource:
https://identify.plantnet.org/k-world-flora/species/Commelina%20communis%20L./data