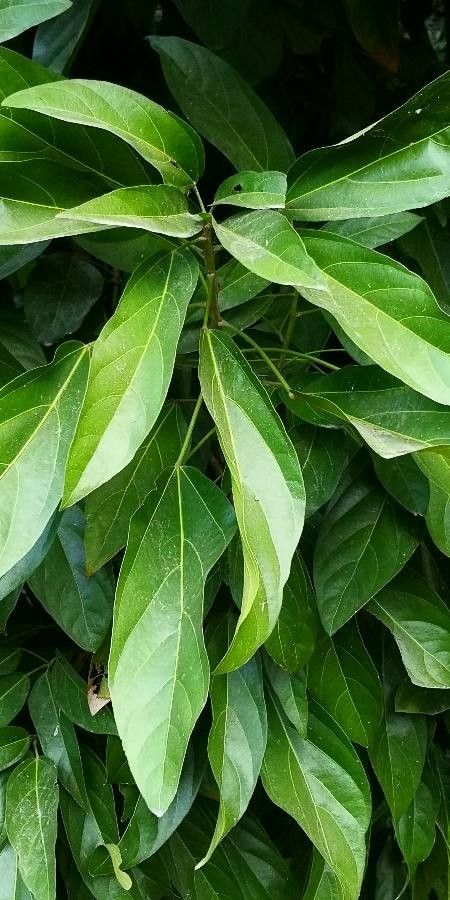
Oh, hello there! Pull up a chair and let’s chat about a truly fascinating plant: Scaphium scaphigerum, often called the “Malva nut” or “Sterculia lychnophora”. These are such unique trees, aren’t they? I’m always drawn to their interesting seed pods – they really look like little boats, hence the scientific name! Growing them from scratch is such a rewarding experience. It’s not for the absolute beginner who’s just starting out, but with a little patience and the right approach, it really is achievable. And the satisfaction of nurturing a new life from a simple seed or cutting? Priceless.
The Best Time to Start
When it comes to getting your Scaphium scaphigerum going, spring is your golden ticket. This is when the plant is waking up from its dormancy and has the most energy to put into growth. You’ll find it’s more responsive to propagation efforts during this period of active growth. If you’re working with seeds, it’s best to sow them as soon as you can get them after harvesting. For cuttings, wait until the new growth is firm but not yet woody.
Supplies You’ll Need
Here’s what you’ll want to have on hand before you dive in:
- Clean, sharp pruning shears or a knife: For making clean cuts.
- Seed-starting mix or a well-draining potting mix: A 50/50 blend of perlite and peat moss works beautifully for cuttings. For seeds, something light and airy is key.
- Rooting hormone (optional, but recommended for cuttings): A powder formulation is usually easiest.
- Small pots or trays: With good drainage holes, of course!
- Clear plastic bag or propagation dome: To create a humid environment.
- Watering can with a fine rose or spray bottle: To water gently.
- Labels and a permanent marker: To keep track of your projects!
Propagation Methods
Let’s look at the most common ways to get more Scaphium scaphigerum plants.
Seed Propagation
This is often the most straightforward method if you can get your hands on fresh seeds.
- Prepare the seeds: If the seed coat is very hard, which it often is with Malva nuts, a little pre-treatment can help. You can try soaking the seeds in warm water for 24-48 hours. Some gardeners also suggest gently nicking the seed coat with a file, being careful not to damage the embryo inside.
- Sow the seeds: Fill your pots or trays with your chosen seed-starting mix and moisten it thoroughly. Plant the seeds about ½ inch deep, spacing them a few inches apart if you’re using a tray.
- Provide warmth and moisture: Cover the pots or tray with a clear plastic bag or propagation dome. Place them in a warm spot; around 70-80°F (21-27°C) is ideal. Keep the soil consistently moist but not waterlogged. A little gentle misting is perfect.
- Be patient: Germination can take anywhere from a few weeks to a few months. Don’t give up if you don’t see anything right away!
Stem Cuttings
This method is a bit more involved but can be very successful when done at the right time.
- Take cuttings: In spring, select healthy, non-flowering stems that are about 4-6 inches long. Make a clean cut just below a leaf node (the point where a leaf attaches to the stem).
- Prepare the cuttings: Remove the lower leaves from the cutting, leaving just a few at the top. This prevents them from rotting in the soil. If you’re using rooting hormone, dip the cut end into the powder, tapping off any excess.
- Plant the cuttings: Fill small pots with your well-draining potting mix. Make a hole with a pencil or your finger and insert the cutting, firming the soil gently around its base.
- Create humidity: Water the soil gently. Then, place the pot inside a clear plastic bag or cover it with a propagation dome. This traps moisture, which is crucial for cuttings to develop roots.
- Provide light and warmth: Place the cuttings in a bright spot but out of direct, hot sun. Again, warmth is key – a heating mat can significantly boost success rates.
The “Secret Sauce” (Pro Tips)
Here are a few little tricks I’ve learned over the years that can make a big difference:
- When propagating from cuttings, ensure the remaining leaves don’t touch the sides of the plastic bag. If they do, they can encourage rot. You might need to prop up the bag slightly.
- For both seeds and cuttings, bottom heat is your best friend. A propagation mat that keeps the soil temperature consistently warm helps roots form much more effectively. It mimics the warmth of the soil in its natural environment.
- Don’t be afraid to experiment with different soil mixes. Some plants are fussier than others. If one mix isn’t working, try another with better drainage or aeration.
Aftercare & Troubleshooting
Once you see signs of roots – like new leaf growth or a gentle tug on the cutting offering resistance – it’s time to start transitioning your new plant.
- Gradually acclimate: If the cutting is in a plastic bag, start by opening the bag for a few hours each day, slowly increasing the time. This helps the plant adjust to lower humidity.
- Watering: Water your new little ones when the top inch of soil feels dry. Avoid overwatering, as this is a common cause of problems.
- Light: Provide bright, indirect light. As the plant grows stronger, it can handle a bit more sun, but always introduce it gradually.
Now, what if things go wrong? The most common issue you’ll encounter is rot. If a cutting turns mushy and black, it’s likely rotted. This is usually due to too much moisture and not enough air circulation. If your seeds don’t germinate, they might have been too old, or the conditions weren’t quite right. Don’t get discouraged! Gardening is a learning process, and failures are just stepping stones to success.
A Encouraging Closing
Propagating Scaphium scaphigerum is a journey, and like any good journey, it’s about the process as much as the destination. Be patient with your little sprouts and cuttings. Watch them patiently, provide them with the care they need, and celebrate every bit of progress. You’re cultivating life, and that’s a truly magical thing. Happy gardening!
Resource: