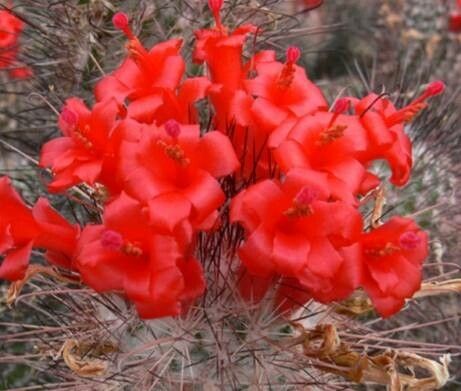
Hello, fellow plant enthusiasts! There’s something truly special about multiplying our beloved plants, isn’t there? Today, we’re diving into the wonderful world of Cochemiea halei propagation. This little stunner, with its charming, fuzzy flowers that seem to peek out from every angle, is a delight to have in any collection. And the best part? Bringing more of these beauties into your life by propagating them is incredibly rewarding.
For those of you just starting out, don’t be intimidated! While some succulents can be a bit fussy, Cochemiea halei is generally quite forgiving. With a little patience and these tips, you’ll be well on your way to success.
The Best Time to Start
When you look at your Cochemiea halei, you’ll often see new growth emerging, especially during its active growing season. This is your cue! The spring and early summer months are absolutely ideal for propagating this plant. The days are longer, the temperatures are warming up, and your plant has that burst of energy it needs to really thrive and root quickly. Avoid propagating when the plant is dormant or stressed.
Supplies You’ll Need
Before we get our hands dirty, let’s gather our essentials. Think of this as your propagation toolkit:
- Sharp, clean pruning shears or a sharp knife: Essential for making clean cuts.
- Well-draining potting mix: A cactus and succulent mix is perfect. You can also mix in perlite or pumice for extra aeration.
- Small pots or seed trays: Something with drainage holes is a must.
- Rooting hormone (optional but helpful): A powder or gel that encourages root development.
- Watering can or spray bottle: For gentle watering.
- A warm spot with bright, indirect light: Crucial for successful rooting.
Propagation Methods
Cochemiea halei is wonderfully versatile, and we can often get new plants going through a couple of common methods. My favorite is usually taking offsets, but stem cuttings are also very effective.
Taking Offsets (Pup Removal)
Your Cochemiea halei will likely produce small baby plants, called offsets or pups, around its base. This is the easiest way to propagate!
- Gently remove the parent plant from its pot.
- Examine the base of the offsets. You’re looking for pups that have started to develop their own roots.
- Using your clean pruning shears or knife, carefully cut the offset away from the mother plant, ensuring you get as many of its own roots as possible.
- Let the offset dry and callous over for a day or two. This is super important to prevent rot.
- Once calloused, replant the offset in its own pot filled with your well-draining potting mix.
- Water sparingly at first, only when the soil has dried out.
Stem Cuttings
Sometimes, you might want to propagate from the main stem or branches.
- Find a healthy stem that looks ready to grow. Make a clean cut just below a node (where a leaf attaches). Aim for a cutting that’s a few inches long.
- Remove any lower leaves from the cutting.
- Just like with offsets, allow the cutting to callous over for a few days to a week. This is non-negotiable for preventing rot. The cut end should feel dry to the touch.
- You can dip the calloused end into rooting hormone, if you’re using it.
- Insert the cutting about an inch deep into your well-draining potting mix.
- Water very lightly, just enough to moisten the soil.
The “Secret Sauce” (Pro Tips)
Now, for a couple of little tricks I’ve learned over the years that can really boost your success rate:
- Don’t be too eager to water those cuttings! It’s far better to underwater than overwater at this stage. Wait until the soil is completely dry before giving it a little drink. A gentle misting can also help keep things from drying out too much without being excessive.
- Bottom heat is your friend. If you can place your pots or trays on a seedling heat mat, it can significantly speed up the rooting process. Those warmth-loving roots will thank you! Just a gentle warmth, not hot.
Aftercare & Troubleshooting
Once your cuttings or offsets have been in their new homes for a few weeks, you might start to see signs of new growth – a tiny leaf, or perhaps your cutting feels a bit more stable. Gently tug on the cutting; if there’s resistance, you have roots!
Start watering more regularly, but always let the soil dry out between waterings. Continue to provide bright, indirect light.
The most common issue you’ll encounter is rot. If you see your cutting turning mushy, black, or translucent, it’s likely due to too much moisture. Don’t despair! If it’s a cutting, you might be able to salvage a healthy section, let it callous, and try again. For offsets, sometimes rot can be too far gone. This is why those drying and callousing steps are so critical.
A Encouraging Closing
Propagating Cochemiea halei is a journey, not a race. Be patient with your new little plants. Every gardener has had their share of propagation fails – it’s all part of the learning process! Celebrate the successes, learn from the setbacks, and most importantly, enjoy the magic of creating new life. Happy propagating!
Resource:
https://identify.plantnet.org/k-world-flora/species/Cochemiea%20halei%20(Brandegee)%20Walton/data