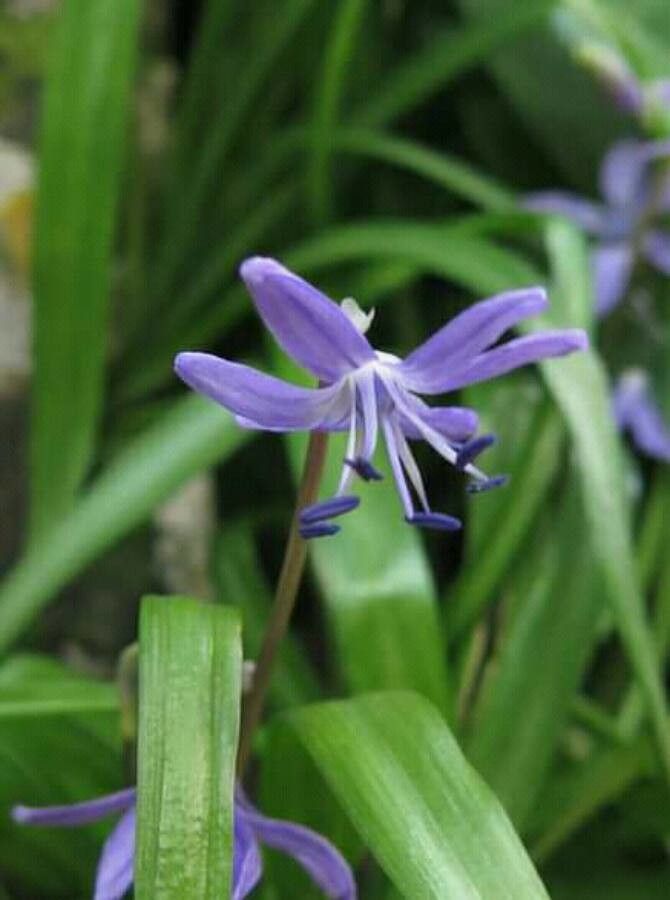
Oh, hello there! Pull up a chair, grab a cuppa, and let’s talk about a truly delightful little gem: Scilla cilicica. If you’re anything like me, you appreciate a plant that brings a whisper of spring even when the world outside is still a little bit gray. Scilla cilicica, with its delicate starry blue flowers, is just the ticket. It carpets the ground with color and brings that early cheer we gardeners crave. And the best part? Propagating it is a wonderfully rewarding experience. For beginners, I’d say it’s moderately easy, and definitely achievable with a little patience.
The Best Time to Start
The absolute sweet spot for propagating Scilla cilicica is right after it’s finished flowering, usually in late spring to early summer. This is when the plant is actively producing new growth and has plenty of energy stored up. Trying to propagate too early or too late in the season can make things a bit trickier.
Supplies You’ll Need
Here’s a little list to get you prepped. Don’t worry, it’s not too daunting!
- Sharp pruning shears or a clean knife: For making neat cuts.
- Well-draining potting mix: I like a mix of equal parts peat-free compost, perlite, and grit. This is crucial to prevent soggy roots.
- Small pots or trays: With drainage holes, of course!
- Rooting hormone (optional but helpful): A powdery or liquid form can give your cuttings a boost.
- Watering can or spray bottle: For gentle watering.
- Labels and a pen: So you don’t forget what you planted where!
Propagation Methods
Now, let’s get our hands dirty! For Scilla cilicica, we’ll focus on the most reliable methods: division and bulb offsets.
Division: Sharing the Love
This is my go-to for Scilla cilicica because they naturally multiply underground.
- Dig ’em up: Gently unearth the dormant clumps of Scilla cilicica. You’ll see the bulbs clustered together. Do this when the foliage has completely died back.
- Gently separate: Carefully tease the bulbs apart. You might find little offsets attached to the main bulb. Be as gentle as possible to avoid damaging the roots or bulbs. If they’re really stuck, a clean knife can help.
- Replant immediately: Pop the divided bulbs into your prepared well-draining soil. Plant them about 2-3 inches deep, with the pointed end facing upwards. Give them a good drink of water.
Bulb Offsets: The Little Treasure Trove
Sometimes, the bulbs you divide will already have little baby bulbs attached. Think of them as pre-made propagation starters!
- Identify the offsets: When you’re dividing, keep an eye out for smaller bulbs attached to the larger ones.
- Carefully detach: Gently twist or cut these offsets away from the parent bulb. Make sure each offset has at least a tiny bit of root attached if possible.
- Pot them up: Plant these smaller bulbs in their own pots of well-draining soil, just like you would the divided bulbs, but perhaps a little shallower. They’ll need a bit of time to mature.
The “Secret Sauce” (Pro Tips)
Here are a couple of things I’ve learned over the years that really make a difference:
- Don’t rush the dormancy: This is probably the biggest one. I’ve seen folks try to divide when the green leaves are still very much alive, and it’s a recipe for disappointment. Wait until the foliage has turned yellow and completely withered. This means the bulb has stored enough energy and is ready to rest.
- Think cool and moist: Once replanted, Scilla cilicica appreciate a moist but not waterlogged environment. I like to keep them in a spot that gets bright, indirect light and avoid letting them dry out completely, but also make sure there’s good drainage to prevent rot. A little mulch on top can help retain moisture and keep the roots cool.
Aftercare & Troubleshooting
You’ve done it! Now comes the waiting game.
- Watering: Keep the soil consistently lightly moist. If you’re unsure, stick your finger about an inch into the soil; if it feels dry, it’s time for a drink.
- Light: Place your newly potted bulbs in a spot with bright, indirect light. Avoid harsh, direct sunlight, especially when they’re just getting established.
- Feeding: For the first year, your bulbs should have enough stored food. After that, a light feeding of a balanced liquid fertilizer in early spring can encourage good growth and flowering.
Now, about those hiccups. The most common sign of trouble is rot. If you see mushy bulbs or stems, it’s usually a sign of overwatering. Make sure your soil is draining exceptionally well, and dial back the watering. Sometimes, if the conditions are too warm and dry, the bulbs might just fail to establish. Don’t despair; just try again next year with the right timing and soil.
A Encouraging Closing
Taking cuttings or dividing plants can feel a little nerve-wracking sometimes, can’t it? But honestly, with Scilla cilicica, the process is quite straightforward and incredibly satisfying. Be patient with your new little plants. They’ll take their time to settle in and show you what they’ve got. Enjoy watching them grow and soon you’ll have even more of those enchanting blue blooms to brighten your garden. Happy growing!
Resource:
https://identify.plantnet.org/k-world-flora/species/Scilla%20cilicica%20Siehe/data