Well hello there, fellow plant enthusiasts! It’s so lovely to have you join me today. I’ve been sharing my garden adventures for two decades now, and I’m always thrilled to introduce you to new treasures. Today, we’re going to talk about a plant that’s truly captured my heart: Cheirolophus crassifolius.
A Mediterranean Gem for Your Garden
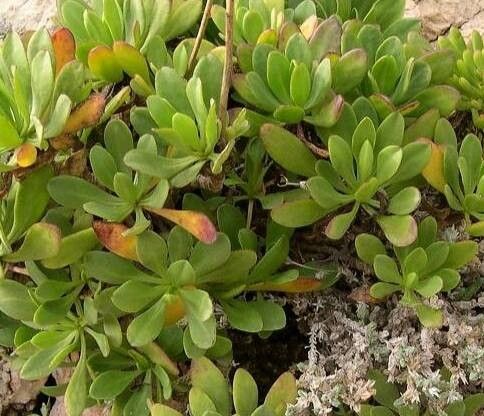
Cheirolophus crassifolius, often referred to as the “Cretan Alkanet” or simply “Cheirolophus,” is a stunning Mediterranean native. Its silvery-grey foliage is beautifully textured, and in warmer months, it’s adorned with delicate, star-shaped purple flowers that bring a touch of elegance to any space. It’s a relatively drought-tolerant plant once established, making it a fantastic choice for sunny, well-drained spots in the garden or even for containers. Propagating it is a wonderful way to expand your collection, share with friends, or simply experience the joy of creating new life from an existing plant. For those of you just starting your plant journey, I’d say Cheirolophus is moderately easy to propagate. With a little attention to detail, you’ll be successful!
When to Get Rooting
The absolute best time to take cuttings from your Cheirolophus is in late spring to early summer, right after it has finished its main blooming period. This is when the plant is actively growing, and the new shoots are semi-hardwood – not too soft and floppy, but not yet woody and stiff. This stage gives cuttings the best chance to root. Waiting until this growth spurt means you’re working with the plant’s natural energy.
What You’ll Need for Success
Gathering your supplies beforehand makes the whole process much smoother. Here’s what I always have on hand:
- Sharp Pruning Shears or a Knife: Cleanliness is key here for making clean cuts and preventing disease.
- Rooting Hormone: This isn’t strictly essential, but it can significantly speed up the rooting process and increase success rates. I prefer a powder form for ease of use.
- Well-Draining Potting Mix: A good blend is crucial. I often use a mix of equal parts perlite and peat moss, or a dedicated cactus and succulent mix.
- Small Pots or Trays: Clean containers with drainage holes are a must. Yogurt cups with holes poked in the bottom work in a pinch!
- Plastic Bags or a Propagation Dome: To create a humid environment for your cuttings.
- Watering Can or Spray Bottle: For gentle watering.
- Labels: So you don’t forget what you’ve planted!
Bringing New Cheirolophus to Life
There are a couple of reliable ways to propagate Cheirolophus. I find stem cuttings to be the most straightforward and successful method.
Propagating from Stem Cuttings:
- Select Your Cuttings: Look for healthy, non-flowering stems on your mature plant. You want stems that are about 4-6 inches long.
- Make the Cut: Using your clean pruning shears or knife, make a clean cut just below a leaf node (where a leaf attaches to the stem). This is where the plant will most readily form roots.
- Prepare the Cuttings: Gently remove the lower leaves from about half of the stem. Leave at least two or three sets of leaves at the top. If your leaves are quite large, you can even cut them in half to reduce water loss.
- Apply Rooting Hormone (Optional but Recommended): Dip the cut end of the stem into your rooting hormone powder, tapping off any excess. This creates a protective layer and encourages root development.
- Plant Your Cuttings: Fill your small pots or trays with your prepared potting mix. Make a small hole in the center of the mix with your finger or a pencil. Gently insert the cut end of the Cheirolophus cutting into the hole, making sure the leaf nodes are buried. Firm the soil gently around the stem.
- Water Gently: Water thoroughly but gently, ensuring the soil is moist but not waterlogged.
- Create Humidity: Place the potted cuttings into a plastic bag, sealing it loosely, or cover them with a propagation dome. This traps humidity around the leaves, preventing them from drying out while they develop roots. Place them in a bright spot that receives indirect sunlight. Avoid direct sun, which can scorch the young cuttings.
The “Secret Sauce” – My Insider Tips
Over the years, I’ve learned a few tricks that can make all the difference.
- “Wiggle Test” for Roots: After about 4-6 weeks, gently tug on a cutting. If you feel any resistance, it’s a good sign that roots have formed. Don’t pull it out completely, though; a gentle wiggle is enough!
- Bottom Heat is Your Friend: If you have an unheated greenhouse or a cool windowsill, consider using a seedling heat mat. Warm soil temperatures (around 70-75°F or 21-24°C) can dramatically speed up root formation, especially if the air temperature is a bit cooler.
- Don’t Overcrowd Your Cuttings: Give each cutting a bit of space in its own pot or tray. This allows for better airflow and reduces the risk of fungal diseases spreading if one cutting fails.
Aftercare and What to Watch For
Once your cuttings have rooted (you’ll notice new leaf growth and the “wiggle test” confirming roots), it’s time to treat them like small, independent plants.
- Gradual Acclimation: Slowly begin to acclimate them to drier air. This means gradually opening the plastic bag or propagation dome for increasing periods over a week or two.
- Watering: Continue to water when the top inch of soil feels dry. Avoid letting them sit in water, as this is the quickest way to invite root rot.
- Light: Gradually introduce them to more direct sunlight over time, but watch for any signs of scorching, especially in intense midday sun.
- Signs of Trouble: The most common issue is rot, which usually shows up as a mushy, blackened stem base, often with a foul odor. This is usually due to overwatering or poor drainage. If you see this, unfortunately, that cutting is likely lost. Another sign of distress is yellowing leaves, which can indicate too much or too little water, or not enough light. Learn to read the plant’s signals!
Happy Propagating!
Growing new plants from cuttings is such a rewarding experience. It connects you deeper with the natural world and the rhythms of growth. Be patient with your Cheirolophus cuttings; they appreciate a gentle touch and a little time. Don’t get discouraged if a few don’t make it – that’s part of the learning process for all of us gardeners. Enjoy the journey of watching those tiny roots emerge and your new plants flourish!
Resource: