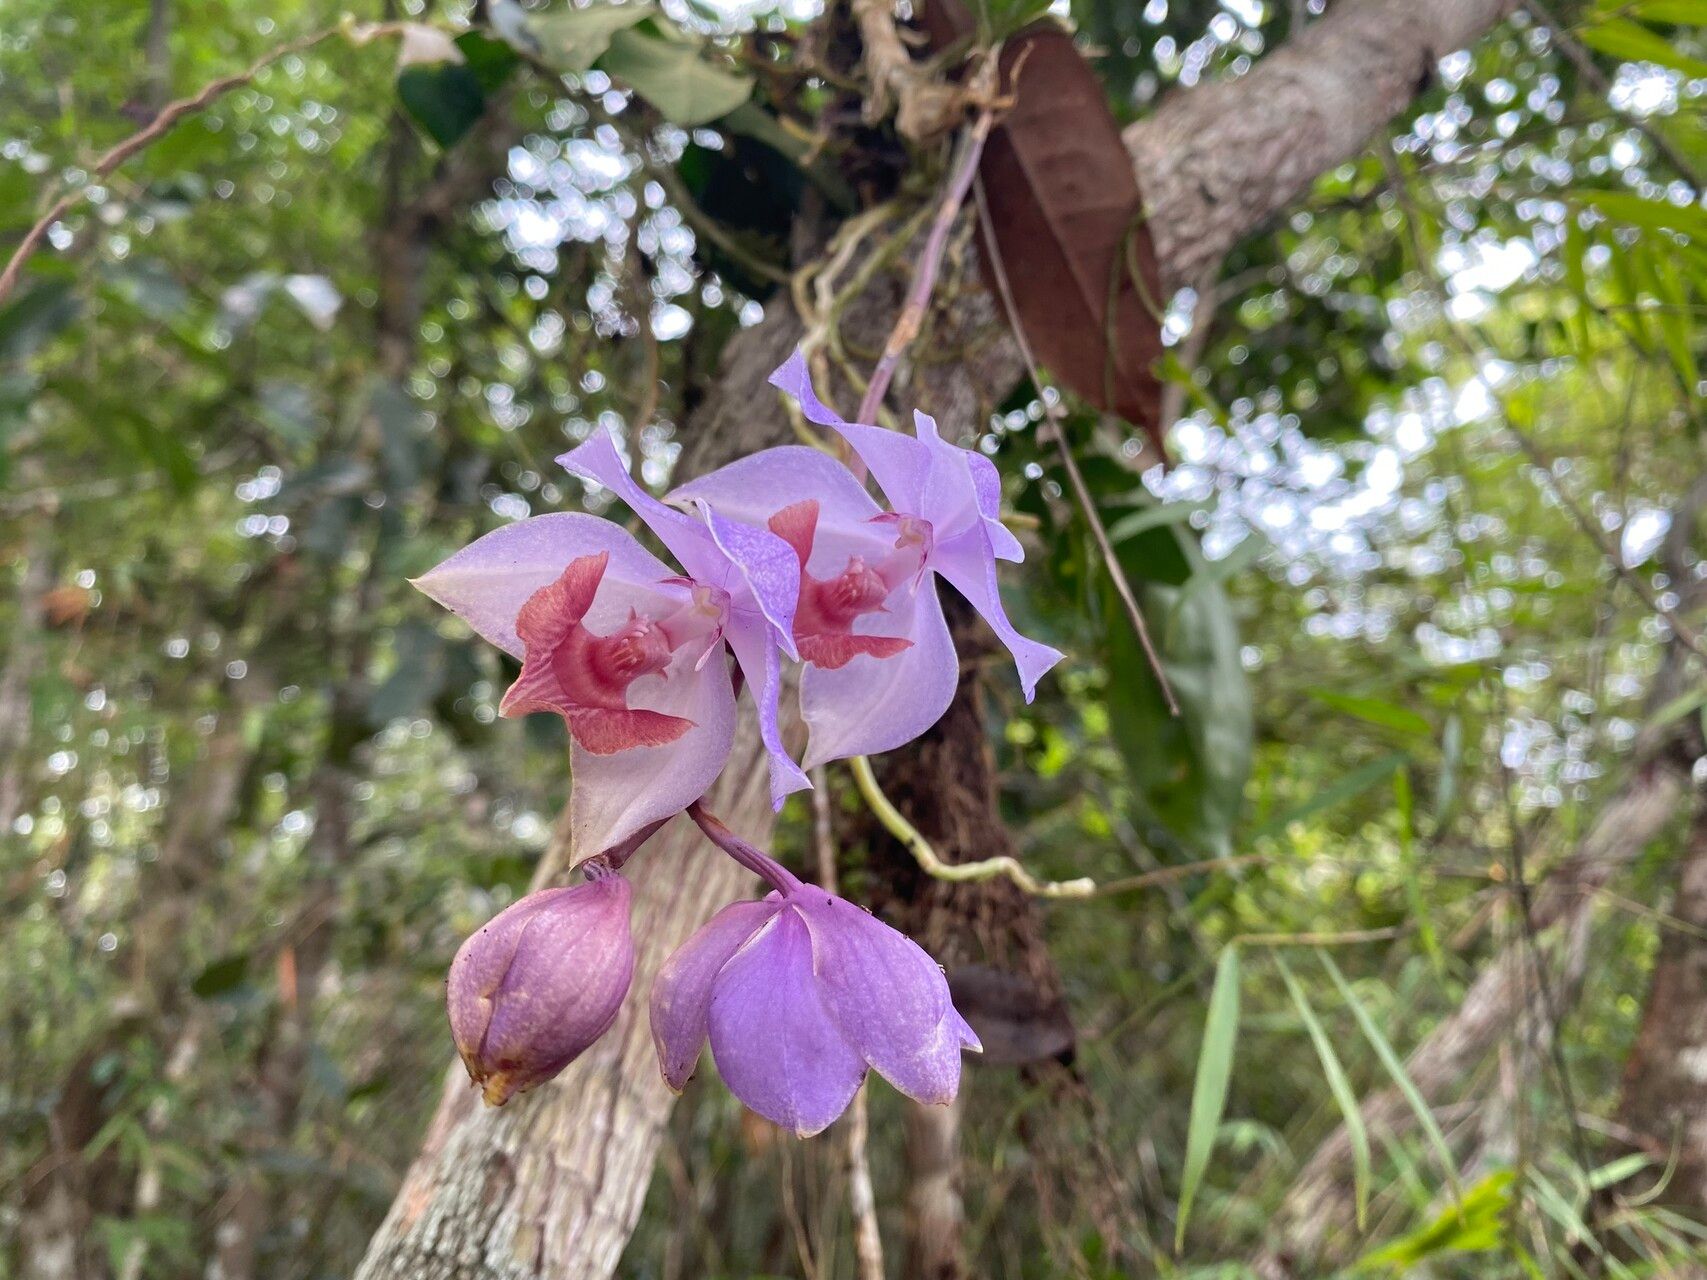
Oh, Aganisia cyanea! What a beauty. If you’re looking for a cool orchid that boasts stunning iridescent blue flowers, you’ve found a winner. They have this gorgeous, almost ethereal glow that just brightens up any space. And the wonderful thing about propagating them? It’s like giving the gift of future blooms, and honestly, it’s incredibly satisfying to watch those tiny roots emerge. Now, I’ll be upfront: Aganisia cyanea isn’t the absolute easiest orchid for a total beginner, but don’t let that scare you away! With a little patience and the right approach, you can absolutely have success.
The Best Time to Start
For Aganisia cyanea, your best bet is to propagate when the plant is actively growing. This usually means after it has finished blooming and you see new pseudobulbs or leaves starting to emerge. Think of it as giving your new babies the best possible start with plenty of energy from the mother plant. Spring and early summer are generally prime time for this in most homes.
Supplies You’ll Need
Gathering your tools beforehand makes the whole process smoother, doesn’t it? Here’s what I usually have on hand:
- Sharp, sterile pruning shears or a clean knife: For making clean cuts. Sterilize them with rubbing alcohol or by flaming them carefully.
- Orchid bark mix: A high-quality, well-draining mix is non-negotiable for orchids. I often use a blend with medium-grade bark, perlite, and a bit of charcoal.
- Small pots or containers: Terracotta pots are great as they allow for good aeration, but plastic works too if you monitor watering carefully.
- Sphagnum moss: Good for holding a bit of moisture while encouraging root growth.
- Rooting hormone (optional but helpful): A powdered or gel type specifically for orchids can give cuttings an extra boost.
- Clear plastic bags or a humidity dome: To create a humid microclimate for your cuttings.
- Watering can with a fine spray: For gentle watering.
- Labels and a marker: To keep track of what you’ve propagated and when!
Propagation Methods
Aganisia cyanea is best propagated through division. These orchids don’t typically produce readily available stem cuttings like some other plants. Division involves separating mature plants into smaller sections, each with its own roots and at least a couple of healthy pseudobulbs and leaves.
Here’s how I do it:
- Gently Remove from Pot: Carefully ease your Aganisia cyanea out of its current pot. If it’s stuck, you might need to gently run a knife around the inside edge of the pot.
- Inspect the Roots: Gently tease away some of the old potting mix to get a good look at the root system. You’re looking for natural divisions where the plant has grown into separate sections.
- Identify Usable Sections: A healthy division will have at least two or three pseudobulbs and a good network of roots. Make sure each section also has at least one active leaf shoot.
- Make the Cut: Using your sterile pruners or knife, carefully cut through the rhizome (the thick, woody stem that connects the pseudobulbs) between the sections you want to separate. Try to make a clean cut and disturb the roots as little as possible.
- Prepare the Divisions: If you used a knife, you might see a bit of sap. It’s a good idea to let the cut end air dry for a few hours or even overnight to callous over. This helps prevent rot. If you plan to use a fungicide, now might be the time, but I usually find simple callousing does the trick.
- Pot Them Up: Place each new division into its own pot filled with your prepared orchid bark mix. Position the division so the top of the pseudobulbs are just at or slightly above the surface of the mix. You want the roots to be nestled into the medium.
The “Secret Sauce” (Pro Tips)
- Don’t Over-Pot: It’s so tempting to put a small division into a big pot, but this can lead to waterlogged conditions, which orchids absolutely loathe. Choose a pot that’s snug for the roots.
- Bottom Heat is Your Friend: If you can, place your newly potted divisions on a warm propagation mat. A gentle bottom heat (around 70-75°F or 21-24°C) can significantly speed up root development and discourage fungal issues.
- Patience with Watering: After potting, I usually wait a day or two before the very first watering. When you do water, be thorough but then let the mix start to approach dryness before watering again. Orchids hate sitting in soggy conditions.
Aftercare & Troubleshooting
Once your divisions are potted up, it’s important to mimic their natural humid environment.
- Humidity is Key: Place your newly potted orchids in a bright location with good air circulation (but no drafts!). Mist them lightly daily or use a humidity tray or a clear plastic bag tented over the pot (making sure leaves don’t touch the sides). Remove the bag for a few hours each day to allow for air exchange.
- Light and Temperature: Provide bright, indirect light. Think of where you’d put a healthy, blooming orchid. Stable temperatures, ideally in the mid-70s°F (around 24°C) during the day and a slight dip at night, are beneficial.
- Rooting: It can take several weeks to a few months for new root growth to become apparent. Don’t panic if you don’t see immediate results! You’ll often see new leaf growth before significant root development.
- Troubleshooting Rot: The biggest enemy of new orchid divisions is rot. If you see pseudobulbs looking mushy or black, it’s a sign of too much moisture or a fungal infection. If this happens, you might need to un-pot the division, cut away any rotten parts with your sterile tool, let it callous again, and repot into fresh, drier mix.
A Little Patience, A Lot of Reward
Propagating orchids, especially the beautiful Aganisia cyanea, is a journey. There might be a bit of a learning curve, but the joy of seeing those first tiny roots and watching a new plant thrive is truly unmatched. So, be patient with yourself and your new green babies, and enjoy the process of creating more beauty for your home! Happy growing!
Resource:
https://identify.plantnet.org/k-world-flora/species/Aganisia%20cyanea%20(Lindl.)%20Rchb.f./data