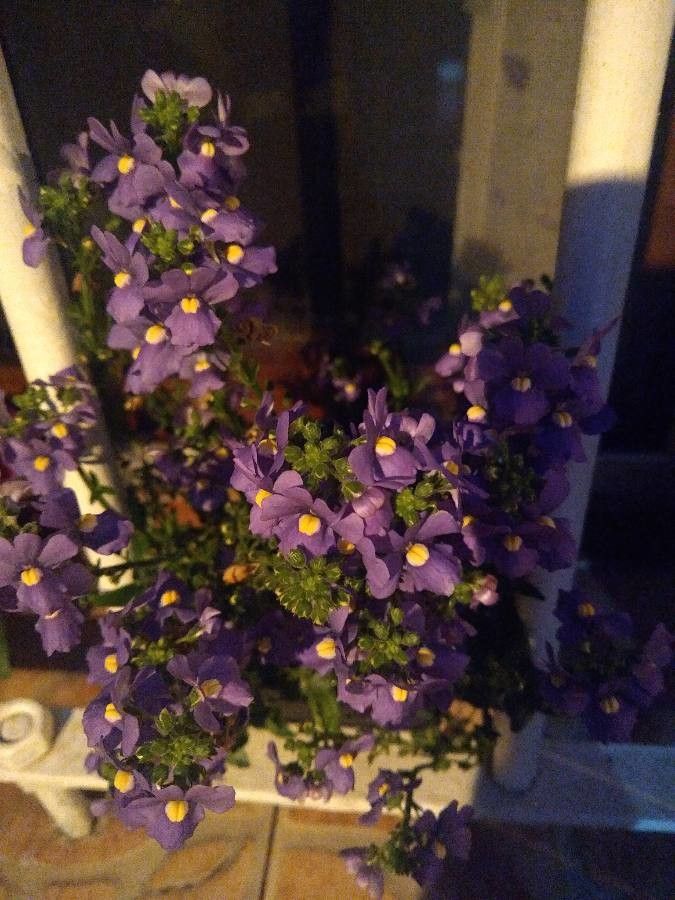
Ah, Nemesia caerulea! If you’re looking for a real charmer to brighten your garden, you’ve found it. Those delicate, sky-blue flowers have a way of just lifting your spirits, don’t they? And the scent? A lovely, subtle sweetness that’s perfect for a gentle breeze.
One of the most rewarding things in gardening, for me, is coaxing a brand new plant into existence from a tiny piece of an existing one. It feels a bit like magic, and with Nemesia caerulea, it’s a magic that’s surprisingly accessible. I’d say this is a fairly easy plant to propagate, even if you’re just starting out on your propagation journey. You’ll be rewarded with more of those delightful blooms in no time.
The Best Time to Start
Timing is everything in the garden, isn’t it? For Nemesia caerulea, I find the late spring to early summer is your sweet spot. This is when the plant is actively growing after flowering, meaning it has plenty of energy to dedicate to forming new roots. You’ll also want to take cuttings from young, healthy, non-flowering shoots. Think of it as taking a snippet of vigorous, youthful growth.
Supplies You’ll Need
Let’s get our toolkits ready! Having the right equipment just makes the whole process smoother. Here’s what I typically gather:
- Sharp Pruning Shears or a Craft Knife: Clean cuts are crucial for quick healing and preventing disease. Make sure they’re nice and sharp!
- A Well-Draining Potting Mix: I like a blend of seedling mix with a good amount of perlite or vermiculite to ensure air circulation and prevent waterlogging. Some people even use a 50/50 mix of peat moss and perlite.
- Small Pots or Trays: Clean pots are a must. Small ones, about 3-4 inch diameter, are perfect for starting cuttings.
- Rooting Hormone (Optional but Recommended): While Nemesia can root without it, a little dip in rooting hormone often speeds things up and improves success rates. Look for one with IBA.
- Plastic Bags or a Propagator Lid: To create a humid microclimate around your cuttings.
- Watering Can with a Fine Rose or Spray Bottle: Gentle watering is key.
- Labels and a Pen: So you don’t forget what you’ve planted and when!
Propagation Methods
There are a couple of tried-and-true ways to get more Nemesia caerulea. I usually lean towards stem cuttings, as they’re quite reliable.
Stem Cuttings
This is my go-to method. It’s clean, efficient, and gives you a good number of new plants.
- Prepare Your Parent Plant: Gently inspect your healthy Nemesia caerulea. Look for those non-flowering, supple, green shoots. Avoid anything woody or that already has flower buds developing.
- Take the Cuttings: Using your clean, sharp pruners or knife, take cuttings that are approximately 4-6 inches long. Make your cut just below a leaf node (where a leaf joins the stem). This is where the magic of root formation often happens.
- Prepare the Cuttings: Gently strip off the lower leaves from the bottom half of the cutting. You want to expose a few nodes for rooting. Leave a few sets of leaves at the top to help with photosynthesis. If you’re using rooting hormone, dip the cut end into the powder now, tapping off any excess.
- Plant Your Cuttings: Fill your small pots with your prepared potting mix. Make a hole with a pencil or your finger in the center of each pot. Gently insert the base of each cutting into the hole, ensuring the nodes where you removed leaves are buried. Firm the soil gently around the stem.
- Water Gently: Water the pots thoroughly but gently, making sure not to dislodge the cuttings.
- Create Humidity: Cover each pot with a clear plastic bag or place them under a propagator lid. This traps moisture and keeps the leaves from drying out. You can prop the bag up with a small stick or two so it doesn’t touch the leaves.
Water Propagation (Less Common, but Possible)
While I find soil cuttings more successful for Nemesia, you can try a few in water. It’s a neat way to watch the roots develop!
- Prepare the Cuttings: Follow steps 1 and 2 from the stem cutting method, ensuring you leave a good amount of stem below the leaf nodes.
- Place in Water: Place the cuttings in a small glass or jar of clean water. Make sure the leaf nodes are submerged, but prevent the leaves themselves from sitting in the water. They’ll rot quickly.
- Change Water Regularly: Change the water every couple of days to keep it fresh and prevent bacterial growth.
- Location: Place the jar in a bright spot away from direct sunlight.
- Potting Up: Once you see tiny roots appearing (usually after a couple of weeks), you can carefully transplant them into your potting mix as described in step 4 of the stem cutting method. Be very gentle with those new roots.
The “Secret Sauce” (Pro Tips)
Here are a couple of little tricks I’ve picked up over the years that can give your Nemesia cuttings a real boost:
- The Gentle Mist: Don’t drown your cuttings when you first pot them. Give them a good watering to settle the soil, but then mist the leaves and stems regularly for the first week or two, especially if you’ve removed the plastic bag for a bit. This keeps them hydrated without waterlogging the soil.
- A Little Warmth Encourages Rooting: Nemesia roots much better with a bit of gentle warmth from below. If you have a heated propagator or can place your pots on a heat mat (the kind used for seedlings), it will significantly speed up root development. Just make sure it’s not too hot – around 70-75°F (21-24°C) is ideal.
Aftercare & Troubleshooting
Once your cuttings have developed a good root system – you’ll see them growing through the drainage holes, or feel resistance when you gently tug on a leaf – it’s time to move them to their own small pots (if they aren’t already) and give them a bit more space.
Continue to keep the soil consistently moist but not soggy. As they grow stronger, you can start to introduce them to slightly less humid conditions and gradually move them to a brighter spot.
What about when things go wrong? The most common culprit is rot. If a cutting turns black and mushy, it’s usually a sign of too much moisture and not enough air circulation. Discard any rotten cuttings immediately to prevent it from spreading. Another sign of distress is wilting that doesn’t perk up after misting – this could mean the roots haven’t formed yet, or are struggling to absorb water. Sometimes, a cutting just doesn’t make it, and that’s okay! It’s part of the learning process.
A Encouraging Closing
Propagating Nemesia caerulea is a wonderful way to multiply your enjoyment of these beautiful blooms. Don’t be discouraged if your first few attempts aren’t perfect. Gardening is all about patience and observation. Enjoy the process of nurturing these tiny new lives, and soon you’ll have a whole garden bursting with those lovely sky-blue flowers! Happy propagating!
Resource:
https://identify.plantnet.org/k-world-flora/species/Nemesia%20caerulea%20Hiern/data