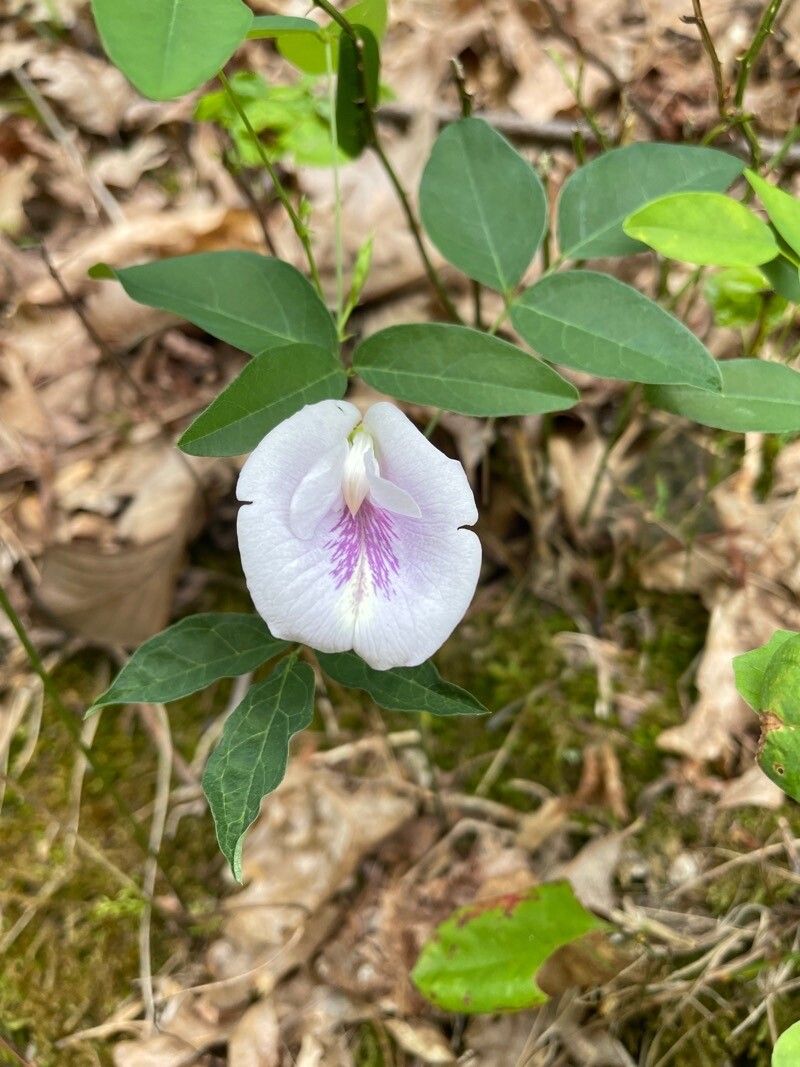
Oh, Clitoria mariana, often called the Butterfly Pea or Spreading Tickseed (though it’s not a true tickseed!), is such a charmer. Its delicate, sky-blue flowers are a absolute delight, especially in a wilder, more natural garden setting. Seeing those blooms unfurl, reminding you of tiny butterfly wings, is just pure joy. And the best part? Propagating it yourself is wonderfully rewarding. You’ll have more of these beauties to fill a forgotten corner or share with a fellow garden lover. Honestly, for a native bloom, Clitoria mariana is pretty forgiving, making it a great choice for those just dipping their toes into propagation.
The Best Time to Start
Your best bet for successfully propagating Clitoria mariana is late spring to early summer. This is when the plant is in its active growing phase, meaning it has plenty of energy to dedicate to producing new roots. You’ll want to look for stems that are healthy and vigorous, but not woody. Young, pliable growth is what we’re after.
Supplies You’ll Need
Gathering your tools beforehand makes the process so much smoother. Here’s what I usually have on hand:
- Sharp, clean pruning shears or a sharp knife: We don’t want to crush those delicate stems.
- Rooting hormone (optional but helpful): A little boost can speed things up.
- Small pots or seedling trays: Something around 3-4 inches deep is perfect.
- Well-draining potting mix: A mix of peat moss, perlite, and a bit of compost works wonders. You can also find pre-made succulent or seed-starting mixes that are excellent.
- Watering can or spray bottle: We want to keep things consistently moist, not waterlogged.
- Plastic bag or propagation dome: This creates a humid microclimate for your cuttings.
Propagation Methods
Clitoria mariana is happy with a couple of different approaches. I find stem cuttings to be the most reliable and efficient for getting multiple plants.
Stem Cuttings:
- Take your cuttings: In late spring or early summer, select healthy, non-flowering stems from your parent plant. Using your clean pruning shears, cut stems that are about 4-6 inches long. Make your cut just below a leaf node (where a leaf attaches to the stem).
- Prepare the cuttings: Gently remove the lower leaves from the bottom half of each cutting. This prevents them from rotting in the soil. If any flower buds are present, pinch them off – we want the plant’s energy to go into root development.
- Apply rooting hormone (optional): If you’re using rooting hormone, dip the cut end of each stem into it. Tap off any excess.
- Plant the cuttings: Fill your small pots or trays with your well-draining potting mix. Make a little hole with your finger or a pencil in the center of each pot.
- Insert the cuttings: Place the prepared cuttings into the holes, ensuring at least one or two leaf nodes are buried in the soil. Gently firm the soil around the base of each cutting.
- Water and cover: Water the soil lightly. Then, cover the pots with a plastic bag or a propagation dome to keep humidity high. You can use stakes to keep the bag from touching the leaves.
- Provide light and warmth: Place the pots in a bright location out of direct sunlight. A spot on a windowsill that gets filtered light is ideal. If you have a heat mat, placing your pots on it can significantly speed up root development.
The “Secret Sauce” (Pro Tips)
Here are a few tricks I’ve picked up over the years that make a real difference:
- Don’t let the leaves touch the soil (or water if water propagating): This is crucial! Submerged leaves are a recipe for rot and disease. Always trim them off below the water or soil line.
- Bottom heat is your friend: Seriously, if you can create a bit of warmth from below using a seedling heat mat, your cuttings will root much, much faster. It mimics the conditions of a warm spring, encouraging those roots to emerge with gusto.
- Don’t be afraid to check for roots subtly: After a few weeks, you can very gently tug on a cutting. If you feel any resistance, that’s a good sign roots are forming. Avoid aggressive pulling, though!
Aftercare & Troubleshooting
Once you start to see new growth emerging from your cuttings, it’s a good indication that roots have formed. You can also carefully tip the pot to see if roots are peeking out from the drainage holes.
- Transition slowly: Once roots are established, you can gradually remove the plastic bag or dome, acclimatizing your new plants to normal humidity levels over a few days.
- Water consistently: Keep the soil evenly moist but not soggy. Overwatering is the most common killer of new cuttings.
- Watch for rot: Signs of rot include a blackening or mushy stem at the soil line, or leaves turning yellow and falling off rapidly. If you see this, it’s usually a sign of too much moisture. Let the soil dry out a bit more between waterings, and ensure good air circulation. If a cutting is badly rotted, it’s best to discard it to prevent further spread.
Happy propagating! Remember, gardening is a journey, and every little success is a reason to celebrate. Be patient with your new Clitoria mariana, give them a little space to grow, and enjoy the process. You’ve got this!
Resource:
https://identify.plantnet.org/k-world-flora/species/Clitoria%20mariana%20L./data