Hello there, fellow garden enthusiasts!
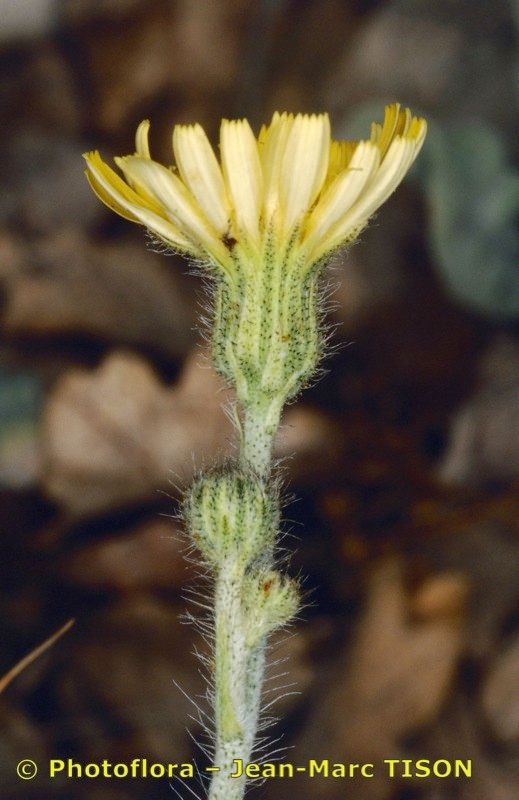
It’s so lovely to have you join me today. We’re going to talk about a plant that’s been captivating my attention for years – Pilosella hybrida. You might know it by its common names, like hawkweed or devil’s paintbrush, but I find its subtle charm truly special. It’s this delightful mix of delicate foliage and cheerful, often yellow, blooms that brings a real sparkle to any garden space.
And the best part? Getting more of this beauty for yourself is wonderfully rewarding. It’s not one of those finicky divas of the plant world, either. If you’re just starting out with propagation, Pilosella hybrida is a fantastic place to begin. You’ll find it quite forgiving, and that’s always a good sign for us home gardeners!
The Best Time to Start
When it comes to Pilosella hybrida, timing is everything for the best chance of success. I find that the late spring or early summer is just perfect. The plant is actively growing, full of vigor, and ready to put its energy into creating new roots. You’ll be taking cuttings from healthy, mature stems, and the longer, warmer days really give those new plants the boost they need to establish themselves quickly.
Supplies You’ll Need
Before we get our hands dirty, let’s gather up our tools. Having everything ready makes the process so much smoother.
- Sharp Pruning Shears or Scissors: Clean cuts are crucial for healthy healing.
- Rooting Hormone (Optional but recommended): A little boost never hurts!
- Small Pots or Seedling Trays: With drainage holes, of course.
- Well-Draining Potting Mix: I like a blend of peat moss, perlite, and a bit of sand. For Pilosella, something that mimics its natural, slightly sandy habitat is ideal.
- Watering Can or Spray Bottle: For gentle watering.
- Plastic Bags or a Propagator: To create a humid environment.
- Identificaton Tags: Trust me, you’ll thank yourself later!
Propagation Methods
Pilosella hybrida is rather obliging when it comes to making new plants. Here are a couple of methods I’ve had great success with.
Stem Cuttings
This is my go-to method for Pilosella.
- Select a Healthy Stem: Look for a non-flowering stem that is at least 4-6 inches long and appears firm and green.
- Make the Cut: Using your sharp pruning shears, make a clean cut just below a leaf node (where a leaf attaches to the stem). Remove the lower leaves, leaving only a couple at the top.
- Apply Rooting Hormone (Optional): If you’re using it, dip the cut end of the stem into the rooting hormone powder. Tap off any excess.
- Plant the Cutting: Insert the cut end into your prepared potting mix. You can gently firm the soil around it.
- Create Humidity: Water the soil lightly. Then, cover the pot with a clear plastic bag or place it in a propagator. This creates a mini-greenhouse to keep the cutting from drying out. Make sure the leaves don’t touch the sides of the plastic, as this can encourage rot.
- Provide Light and Warmth: Place the pot in a bright spot, but out of direct, harsh sunlight. A little warmth can help too; bottom heat from a heating mat is excellent if you have one.
Division
If your Pilosella hybrida plant has grown into a nice clump, division is a super-easy way to multiply your plants.
- Gently Excavate: Carefully lift the entire plant from its pot or the garden bed.
- Assess the Clump: You’ll see how the plant has naturally formed new rosettes or root clusters.
- Separate the Divisions: Using your hands or a clean trowel, gently pull or cut the plant apart into smaller sections. Each section should have a good amount of roots attached and at least a couple of healthy leaves.
- Repot: Immediately plant each division into its own pot filled with well-draining soil.
- Water and Settle: Water them in well to help the soil settle around the roots.
The “Secret Sauce” (Pro Tips)
Here are a few little tricks I’ve learned over the years that make a difference:
- Don’t Overwater! This is probably the biggest mistake beginners make. Let the top inch of soil dry out slightly between waterings, especially for cuttings. Too much moisture is the quickest way to invite fungal problems.
- Use Bottom Heat if Possible: As I mentioned, a gentle warmth from below can dramatically speed up root development, especially if your ambient room temperature is a bit cooler. It mimics the natural warmth of spring soil.
- Be Patient with Rooting Hormone: If you choose not to use rooting hormone, don’t despair. Some plant varieties will root just fine on their own, but it might take a little longer. Keep up the good care and a good environment.
Aftercare & Troubleshooting
Once you see those little roots beginning to peek out or new growth starting from the base of your cutting, you’re doing great!
- Acclimatize: If you used a plastic bag or propagator, gradually remove it over a few days. This allows the new plant to get used to your home’s humidity levels.
- Watering: Continue to water when the top inch of soil feels dry. As the plant grows larger and more established, you can gradually increase the watering frequency.
- Feeding: You don’t need to fertilize right away. Once the plant has clearly settled in and is putting on new growth, a light feeding with a balanced liquid fertilizer diluted to half strength is usually sufficient.
Now, what if things go wrong? The most common sign of trouble is rot. If your cutting turns mushy and black, or the leaves start to weaken and yellow dramatically, it’s usually a sign of too much moisture and not enough airflow. If you see this, remove the affected cutting immediately to prevent it from spreading, and reassess your watering and humidity levels for the remaining ones.
A Encouraging Closing
Creating new plants from cuttings or divisions is such a satisfying part of gardening. It’s a chance to connect with nature, learn, and fill your home and garden with more of the beauty you love. Don’t be discouraged if every single cutting doesn’t make it – that’s all part of the learning curve! Just keep observing, keep caring, and enjoy the process. Happy propagating!
Resource: